
Imagine cruising down the street on your bike, feeling the wind in your hair and the thrill of the ride. But as the sun sets, safety becomes a top priority.
That’s where flashing bike lights come in. These lights are not just accessories; they are vital tools for keeping you visible and safe on the road. You might be wondering how to set them up efficiently, so they work perfectly every time you hit the pedals.
This guide is here to make the process simple and straightforward for you. By the end of this article, you’ll have your bike lights flashing just right, ensuring you can ride confidently, even when the roads are cloaked in darkness. Ready to transform your night rides? Let’s dive in!
Choosing The Right Bike Lights
Bike lights come in different types. There are front lights and rear lights. Front lights help you see ahead. Rear lights make you visible to others. Some lights flash, others shine steadily. Flashing lights grab attention quickly. Choose the type that suits your needs.
Brightness is measured in lumens. More lumens mean brighter lights. Bright lights are good for dark areas. For city rides, medium brightness is enough. Ensure your lights can be seen from far. Visibility keeps you safe on the road.
Batteries make lights work. Some lights use rechargeable batteries. Others need regular batteries. Check how long the battery lasts. Longer battery life is good for long rides. Keep spare batteries with you always. This way, you won’t be left in the dark.

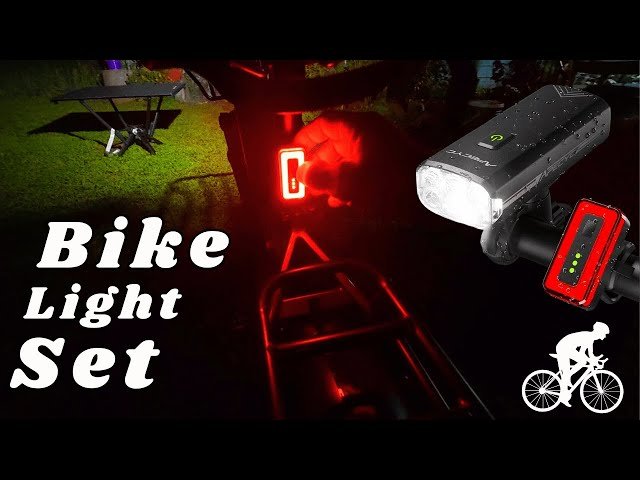
Credit: www.youtube.com
Tools Needed For Installation
Proper installation of flashing bike lights requires a few basic tools. A screwdriver, adjustable wrench, and mounting brackets ensure secure attachment. Make sure to have fresh batteries or a USB charger for power.
Essential Tools
Bicycle lights need careful setup. Screwdriversare key for attaching lights. Wrencheshelp tighten bolts. Zip ties keep wires neat. Allen keysadjust clamps securely.
Optional Accessories
- Light mountscan adjust angles.
- Reflective tapeboosts visibility.
- Extra batteriesensure longer rides.
- Smartphone holderfor GPS guidance.
Mounting The Front Light
Mount the front light securely on your bike’s handlebars for optimal visibility. Adjust the angle for maximum road coverage. Ensure the light flashes brightly to alert oncoming traffic, enhancing safety during rides.
Positioning The Light
Ensure the front light is centered. Attach it firmly to the handlebars. The light should face forward. Make sure it’s not blocked by cables. Check it’s visible from a distance.
Securing The Mount
Use the clamp to hold the light. Tighten screws for extra safety. Ensure the mount doesn’t move. Test by shaking the bike. Adjust if necessary. Feel confident the light won’t fall.
Adjusting The Angle
Aim the light slightly downwards. Avoid blinding oncoming traffic. Make sure the beam covers the road. Adjust for best visibility. Use trial and error to find the perfect angle.

Credit: www.youtube.com
Installing The Rear Light
Choose a spot on the back of your bike. Make sure it’s easy to see. The seat post is a popular choice. It’s visible and convenient. Don’t block the light with other objects. This ensures safety on the road. Check if the spot fits the light size.
Use the right tools to attach the light. Make sure it’s tight and secure. Loose lights can fall off. Check the attachment regularly. This prevents accidents and keeps the light working. Follow the instructions provided with the light.
Align the light straight and level. This helps it shine where needed. Misaligned lights can confuse drivers. Check the alignment often. Adjust if necessary. Proper alignment keeps you safe and visible.
Activating Flash Modes
Bicycle lights have different flash patternsto make you visible. Each pattern has its own use. Some lights blink fast, while others blink slow. Fast blinking grabs attention quickly. Slow blinking saves battery. Choose the right pattern for your ride. This helps others see you better.
Adjusting the flash durationis important. Short flashes use less power. Long flashes make you more visible. Set the duration according to your needs. Press the button to change it. Some lights have a timer. This feature turns them off after a set time. It helps save battery life.
Testing And Adjustments
Ensure bike lights are securely mounted and visible from all angles. Test brightness and adjust the flashing pattern for optimal safety. Regular checks and battery replacements keep them reliable during rides.
Checking Visibility In Daylight
It’s important to check the light in daylight. Make sure it’s bright enough. You should see the light from far away. Stand back and look at the bike. Ensure the lights are easy to see. Brightness is key for safety.
Nighttime Testing
Test the lights in the dark too. The lights should be bright and clear. Stand back and watch from a distance. Ask someone to ride the bike. Look if the lights are easy to spot. Make sure no part is blocking the light. Safety is important at night.
Fine-tuning Light Position
Adjust the light for the best position. Move it up and down. Check if it’s pointing straight. It should not point at the ground. Align it with the road. Secure it tightly. Loose lights can fall off. Safety comes first.
Maintaining Bike Lights
Set up flashing bike lights to enhance visibility and ensure safety. Attach lights securely to handlebars or seat posts. Test different flash settings for optimal brightness.
Regular Cleaning
Keep bike lights clean for better brightness. Use a soft cloth to wipe them. Avoid water entering the light casing. Dirt can block the light and make it dim. Clean lights help you see better at night.
Battery Replacement
Check battery life regularly. Weak batteries make lights less bright. Replace old batteries with fresh ones. Always carry spare batteries on long rides. This ensures your lights stay on when needed.
Checking For Damage
Inspect lights for cracks or breaks. Damaged lights may not work well. Fix or replace any broken parts. Securely attach lights to the bike. Loose lights can fall and break. Regular checks keep your lights in good condition.

Credit: www.youtube.com
Frequently Asked Questions
How To Connect Led Lights To A Bike?
To connect LED lights to a bike, attach them to the frame using clips or straps. Connect the lights to a power source, such as a battery pack. Ensure the wires are secure and do not interfere with bike movement.
Test the lights for functionality before riding.
When To Use Flashing Lights On A Bike?
Use flashing lights during low light, fog, or night conditions for visibility. Daytime flashing enhances safety in traffic. Ensure lights are visible from all angles. Regularly check battery life to maintain brightness. Always follow local regulations on bike lighting to avoid fines.
What Is The Flash Mode On A Bike Light?
The flash mode on a bike light creates a blinking pattern. It enhances visibility for cyclists, especially in low-light conditions. Drivers and pedestrians notice blinking lights more easily. This mode helps conserve battery life compared to steady mode. It’s essential for safety during night rides.
Can You Have Flashing Lights On A Bicycle?
Yes, you can use flashing lights on a bicycle. They improve visibility and safety, especially in low-light conditions. Ensure the lights comply with local regulations, as rules may vary. Bright, flashing lights help motorists see cyclists better, enhancing road safety for everyone.
Conclusion
Setting up flashing bike lights is simple and essential for safety. Proper installation ensures visibility in low light and bad weather. Choose lights with long battery life and water resistance. Regularly check your lights to avoid unexpected failures. Secure placement prevents accidental detachment during rides.
Practice turning them on and off quickly. These steps enhance your biking experience and safety. Ride confidently knowing you are visible. Enjoy your ride without worrying about unseen hazards. Biking is fun and safe when visibility is assured.


