

Shipping a bike across the country doesn’t have to be stressful or expensive. This guide walks you through every step—from disassembling your bike to choosing the right shipping service—so it arrives safely at your destination. Whether you’re moving, selling, or traveling, we’ve got you covered.
Key Takeaways
- Disassemble your bike properly: Remove pedals, lower the seat, and detach the handlebars to fit it in a standard bike box.
- Use a quality bike box: Buy a new or recycled box from a local bike shop or online retailer to ensure protection during transit.
- Choose the right shipping carrier: Compare options like FedEx, UPS, USPS, and specialized bike shippers based on cost, speed, and reliability.
- Protect fragile parts: Wrap the frame, fork, and drivetrain with foam, bubble wrap, or old clothing to prevent scratches and damage.
- Insure your shipment: Always add insurance, especially for high-value bikes, to cover potential loss or damage.
- Label clearly and track your package: Use a durable label and tracking number so you can monitor your bike’s journey.
- Reassemble with care: Once delivered, check for damage and reassemble using proper tools and torque settings.
How to Ship a Bike Across the Country
Shipping a bike across the country might seem daunting, but with the right preparation and knowledge, it’s completely doable—and often more affordable than you think. Whether you’re relocating, selling your bike online, or heading to a cycling event far from home, knowing how to pack and ship your bike safely is essential. In this guide, we’ll walk you through every step, from disassembly to delivery, so your two-wheeled companion arrives in one piece.
Step 1: Gather Your Supplies
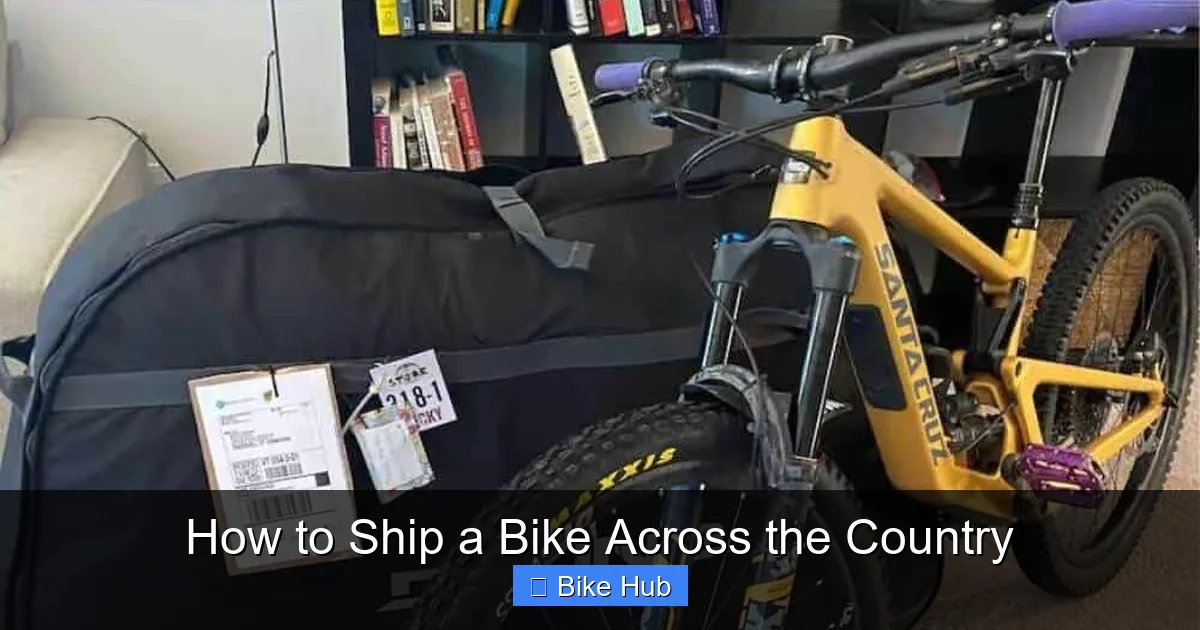
Visual guide about How to Ship a Bike Across the Country
Image source: twowheeledwanderer.com
Before you start taking your bike apart, make sure you have all the necessary tools and materials. Here’s what you’ll need:
- A bike box (new or used)
- Zip ties or Velcro straps
- Bubble wrap or foam padding
- Packing tape
- Allen wrench set (usually 4mm, 5mm, and 6mm)
- Pedal wrench (if your pedals require it)
- Plastic bags and labels (for small parts)
- Scissors or a box cutter
You can often get a free or low-cost bike box from your local bike shop—many shops receive shipments in sturdy boxes and are happy to give them away. Alternatively, you can order a bike shipping box online from retailers like REI, Amazon, or specialized bike shipping companies.
Step 2: Clean and Inspect Your Bike

Visual guide about How to Ship a Bike Across the Country
Image source: crosscountrycarshipping.com
Before packing, give your bike a thorough cleaning. This not only helps prevent dirt and grease from damaging the box or other items, but it also makes reassembly easier at your destination. Use a mild soap and water to clean the frame, wheels, and drivetrain. Let it dry completely.
While cleaning, inspect your bike for any existing damage, loose bolts, or wear. This is a great time to address minor issues before shipping. For example, if your chain is worn or your brake pads are thin, consider replacing them. A well-maintained bike is less likely to suffer during transit.
Step 3: Disassemble Your Bike
Now it’s time to take your bike apart. Don’t worry—this is simpler than it sounds, and most bikes are designed to be disassembled for transport.
Remove the Pedals
Use an Allen wrench or pedal wrench to remove both pedals. Remember: the left pedal is reverse-threaded, so turn it clockwise to loosen. Label each pedal (left and right) and store them in a small bag.
Detach the Wheels
Release the quick-release lever or loosen the thru-axle to remove both wheels. Deflate the tires slightly to prevent pressure changes during shipping. If you have disc brakes, avoid squeezing the brake levers while the wheels are off to prevent the calipers from closing.
Lower or Remove the Seat
Loosen the seat post clamp and lower the seat all the way down. If your seat post is long, you may need to remove it entirely. Wrap the seat in bubble wrap to protect it.
Remove the Handlebars
Use an Allen wrench to loosen the stem bolts and rotate the handlebars so they’re parallel to the frame. This reduces the bike’s width and makes it easier to fit in the box. Secure the handlebars in place with zip ties or tape.
Protect the Frame and Components
Wrap the frame, fork, and rear derailleur with foam or bubble wrap. Pay special attention to the chainrings, cassette, and brake rotors. Use zip ties or tape to secure the padding.
Step 4: Pack Your Bike in the Box
Now that your bike is disassembled, it’s time to pack it safely.
Line the Box
Place a layer of bubble wrap or foam at the bottom of the box for cushioning.
Position the Frame
Place the frame in the box with the fork facing down. If your box has a frame brace or foam insert, use it to keep the frame stable.
Add the Wheels
Place the wheels on either side of the frame. Use zip ties or foam to secure them and prevent movement.
Pack Small Parts
Put pedals, bolts, and other small components in labeled plastic bags. Tape these bags to the inside of the box so they don’t get lost.
Fill Empty Spaces
Use crumpled paper, foam, or clothing to fill any gaps. This prevents shifting during transit.
Seal the Box
Close the box and seal it with strong packing tape. Reinforce all seams and edges.
Step 5: Choose a Shipping Carrier
Not all carriers are created equal when it comes to shipping bikes. Here are your best options:
- FedEx: Offers reliable ground and express services. Many bike shops use FedEx for shipping. You can drop off at a FedEx location or schedule a pickup.
- UPS: Similar to FedEx, with good tracking and insurance options. UPS also offers pickup services.
- USPS: Often the most affordable, especially for smaller boxes. However, delivery times can be slower, and handling may be less careful.
- Specialized Bike Shippers: Companies like BikeFlights.com specialize in bike transport. They offer discounted rates, bike-specific packaging, and door-to-door service.
Compare prices and delivery times using online calculators. For long-distance moves, BikeFlights often provides the best value and peace of mind.
Step 6: Label and Insure Your Shipment
Create a Clear Label
Write or print a shipping label with the recipient’s full address and your return address. Use a waterproof label and cover it with clear tape.
Add Tracking and Insurance
Always opt for tracking so you can monitor your bike’s progress. Most carriers offer basic insurance (usually $100), but for expensive bikes, purchase additional coverage. Declare the full value of your bike when purchasing insurance.
Attach the Label Securely
Tape the label to the top of the box, avoiding seams or folds. Use a label protector or plastic sleeve for extra durability.
Step 7: Drop Off or Schedule Pickup
Once your bike is packed and labeled, take it to your chosen carrier’s location or schedule a pickup. If using a service like BikeFlights, they’ll coordinate pickup and delivery for you.
Keep your tracking number handy and check the status regularly. Most shipments take 3–7 business days, depending on distance and service level.
Troubleshooting Common Issues
Bike Arrives Damaged
If your bike is damaged upon arrival, document the damage with photos immediately. Contact the carrier and file a claim using your insurance. Most reputable shippers will work with you to resolve the issue.
Missing Parts
Double-check that all small parts were packed and labeled. If something is missing, contact the shipping company and provide your tracking number.
Reassembly Problems
If you’re unsure how to reassemble your bike, refer to your owner’s manual or visit a local bike shop. Many shops offer reassembly services for a small fee.
Tips for a Smooth Experience
- Ship early: Avoid last-minute stress by shipping your bike at least a week before you need it.
- Use a new box if possible: While recycled boxes work, new ones offer better protection.
- Take photos before packing: This helps with reassembly and insurance claims.
- Consider professional packing: Some bike shops offer packing and shipping services for a fee.
- Check destination rules: If shipping to an apartment or office, confirm delivery policies.
Conclusion
Shipping a bike across the country is easier than most people think—especially when you follow a clear plan. By cleaning, disassembling, and packing your bike properly, choosing the right carrier, and insuring your shipment, you can ensure it arrives safely and on time. Whether you’re moving across states or sending your bike to a friend, this guide gives you everything you need for a stress-free experience. And once your bike arrives, you’ll be ready to hit the road—or trail—with confidence.
For more tips on bike care and transport, check out our guide on how to maintain a road bike or learn how to choose a bike frame if you’re in the market for an upgrade. If you’re preparing for a long journey, don’t miss our article on how to prepare a mountain bike for long rides.



