
Adjusting your bike handle height can dramatically improve comfort, control, and riding efficiency. This guide walks you through the process step by step, covering different bike types, tools needed, and safety tips. Whether you’re a beginner or experienced rider, you’ll learn how to customize your handlebar position for the perfect fit.
Key Takeaways
- Proper handle height improves posture and reduces strain on your back, neck, and shoulders during long rides.
- Road bikes typically have lower handlebars for aerodynamics, while mountain bikes favor higher bars for control.
- You’ll need basic tools like Allen keys or a torque wrench depending on your stem and handlebar setup.
- Always check manufacturer torque specifications when reassembling components to avoid damage or injury.
- Test your new position with short rides before committing—small adjustments make a big difference.
- Hybrid and comfort bikes benefit most from higher handlebars, promoting an upright, relaxed riding position.
- If you’re unsure, consult a professional bike mechanic—especially for carbon components or complex setups.
Why Adjusting Bike Handle Height Matters
Your bike’s handlebar height isn’t just about comfort—it directly affects your riding performance, safety, and long-term health. A poorly positioned handlebar can lead to back pain, numb hands, shoulder tension, and reduced control, especially on longer rides. Whether you’re commuting, training, or hitting the trails, getting your handle height right ensures better weight distribution, improved aerodynamics (on road bikes), and a more natural riding posture.
Many riders overlook this simple adjustment, assuming their bike comes perfectly set up from the shop. But everyone’s body is different. What works for one person might cause discomfort for another. That’s why learning how to adjust bike handle height is a valuable skill that pays off in better rides and fewer injuries.
Types of Handlebar Setups and Their Adjustability
Before making any changes, it’s important to understand your bike’s handlebar and stem configuration. Not all bikes allow the same range of adjustment, and some require more involved modifications.
Visual guide about How to Adjust Bike Handle Height
Image source: c02.purpledshub.com
Threadless Stem Systems (Most Common)
Found on modern road, mountain, and hybrid bikes, threadless stems use a clamp to secure the handlebars to the steerer tube. These systems offer the most flexibility for height adjustment. You can raise or lower the handlebars by adding or removing spacers above or below the stem. Some stems also allow angle adjustments for fine-tuning.
Threaded Stem Systems (Older Bikes)
Common on vintage or entry-level bikes, threaded stems are adjusted by loosening a top bolt and raising or lowering the stem directly. These are less common today but still found on some city or cruiser bikes. Adjustment is limited by the length of the steerer tube.
Aheadset with Adjustable Stems
Some bikes feature adjustable-angle stems that let you tilt the handlebars up or down without changing spacers. This is useful for minor tweaks but doesn’t replace the need for proper spacer placement.
Integrated or Carbon Handlebars
High-end road or triathlon bikes may have integrated bars and stems. These offer minimal adjustability and often require replacing the entire unit for significant changes. Always consult your manufacturer before modifying carbon parts.
Tools You’ll Need
Most handlebar adjustments require only a few basic tools. Gather these before starting:
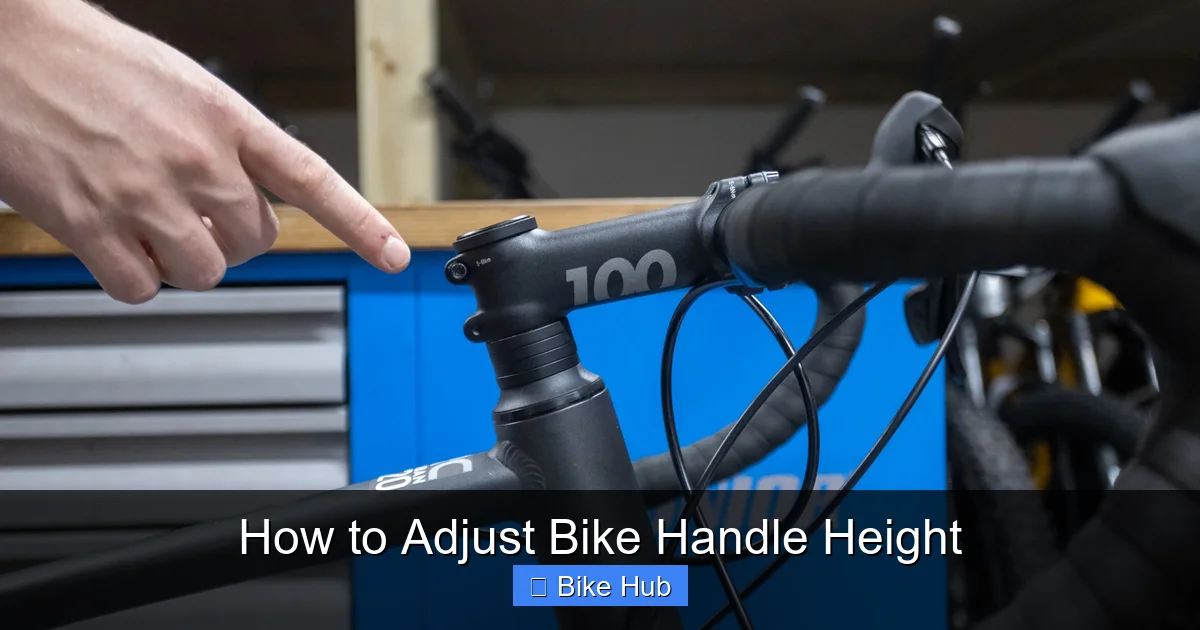
Visual guide about How to Adjust Bike Handle Height
Image source: biketips.com
- Allen key set (typically 4mm, 5mm, or 6mm)
- Torque wrench (recommended for precision and safety)
- Bike stand or stable support (optional but helpful)
- Grease or carbon paste (if working with carbon components)
- Tape measure or ruler (for consistent spacer placement)
Using the right tools prevents stripping bolts and ensures components are tightened to the correct specification. A torque wrench is especially important for carbon parts, which can crack if over-tightened.
Step-by-Step Guide to Adjusting Handlebar Height
Follow these steps to safely and effectively adjust your bike’s handlebar height. Always work in a clean, well-lit area and take your time.
Step 1: Prepare Your Bike
Place your bike in a stand or flip it upside down so it rests on the handlebars and seat. This gives you easy access to the stem and steerer tube. If using a stand, ensure the bike is stable.
Step 2: Loosen the Stem Bolts
Locate the bolts on the front of the stem (for threadless systems). These are usually two Allen bolts that clamp the stem to the steerer tube. Loosen them gradually and evenly—don’t remove them completely yet. This allows the stem to move freely.
Step 3: Remove the Top Cap Bolt
At the very top of the steerer tube, you’ll find a single bolt under the stem cap. Loosen this bolt just enough to release tension on the headset bearings. Do not remove it entirely unless you plan to fully disassemble the fork. This step is crucial—without loosening the top cap, you won’t be able to adjust the stem height.
Step 4: Adjust Spacer Position
Spacers are small rings that sit above and below the stem on the steerer tube. To raise the handlebars, move spacers from below the stem to above it. To lower them, do the opposite. Most riders keep at least one spacer below the stem for structural support.
For example, if you have three spacers below and one above, moving one from below to above will raise the bars. Make changes in small increments—10mm at a time—to avoid drastic shifts.
Step 5: Reassemble and Tighten
Once spacers are repositioned, slide the stem back onto the steerer tube. Reattach the top cap and tighten the bolt just enough to remove any play in the headset—wiggle the handlebars gently; there should be no knocking or looseness.
Then, tighten the stem bolts evenly in a cross pattern. Use a torque wrench if possible, following the manufacturer’s recommended torque (usually printed on the stem). Over-tightening can damage components; under-tightening can lead to slippage.
Step 6: Test and Fine-Tune
Take your bike for a short test ride. Pay attention to comfort, control, and any unusual noises. If the position feels too high or low, repeat the process with smaller adjustments. It’s normal to need 2–3 tries to find the ideal height.
Tips for Different Bike Types
Not all bikes should be set up the same way. Here’s how handlebar height varies by bike style:
Road Bikes
Road cyclists often prefer lower handlebars for an aerodynamic position. However, newer riders or those with back issues may benefit from a slightly higher setup. Aim for a position where your back is at a 45-degree angle when riding. Avoid going too low too soon—gradual lowering helps your body adapt.
Mountain Bikes
Higher handlebars improve control on rough terrain and steep descents. Most mountain bikers keep their bars level with or slightly above the saddle. This upright position enhances visibility and reduces strain on the lower back. If you ride technical trails, consider a riser handlebar for even more height.
Hybrid and City Bikes
These bikes are designed for comfort and practicality. Handlebars should be higher than the saddle to promote an upright posture. This reduces pressure on your hands and wrists and makes city riding more enjoyable. Many hybrids come with adjustable stems—take advantage of them.
Recumbent and Comfort Bikes
While not covered in this guide, recumbent bikes have unique setup needs. If you ride one, check out our guide on how to store a recumbent bike for maintenance tips.
Troubleshooting Common Issues
Even with careful adjustments, you might run into problems. Here’s how to fix them:
Handlebars Feel Too High
If your bars are so high they feel unstable or cause shoulder strain, lower them gradually. Also, check your stem length—a shorter stem can improve handling with higher bars.
Handlebars Feel Too Low
Low bars can cause neck and back pain. Raise them using spacers or consider a stem with a higher rise. Avoid extreme drops unless you’re an experienced racer.
Stem Won’t Move After Loosening Bolts
This usually means the top cap bolt isn’t loose enough. Double-check that it’s fully released. If the stem is stuck due to corrosion, apply a drop of penetrating oil and wait before trying again.
Creaking or Slipping
Creaks often come from under-tightened bolts or dirty contact points. Clean the steerer tube and stem interface, apply grease (or carbon paste for carbon parts), and retighten to spec. If slipping occurs, increase torque slightly—but don’t exceed recommendations.
Limited Adjustment Range
If you’ve run out of spacer room, you may need a new stem with a different angle or length. A professional bike fit can help determine the best solution. For related adjustments, see our guide on how to adjust rack height if you’re also modifying cargo setups.
When to Seek Professional Help
While most handlebar adjustments are DIY-friendly, some situations call for a mechanic:
- Working with carbon fiber components
- Installing a new stem or handlebar
- Experiencing persistent pain or numbness
- Unsure about torque specs or compatibility
A professional bike fit can also optimize your entire setup—including saddle height, reach, and pedal alignment—for peak performance and comfort. For example, if you’re preparing for a long ride, check out our guide on how to prepare a mountain bike for long rides for additional tips.
Conclusion
Learning how to adjust bike handle height is one of the simplest yet most impactful upgrades you can make to your ride. With the right tools, a bit of patience, and attention to your body’s feedback, you can dial in a position that feels natural, reduces fatigue, and enhances control. Remember: small changes lead to big improvements. Start with minor adjustments, test thoroughly, and don’t hesitate to consult a pro if needed. Your back, neck, and hands will thank you—and so will your next adventure on two wheels.


