
Strapping a dirt bike to a trailer properly is crucial for safe transport and preventing damage. This guide walks you through every step—from choosing the right straps to securing the bike correctly—so you can haul with confidence.
Key Takeaways
- Use high-quality ratchet straps: Always opt for 1-inch or wider ratchet straps rated for at least 500 lbs to ensure strength and reliability during transport.
- Secure both front and rear wheels: Lock down both ends of the bike using anchor points on the trailer to prevent forward, backward, and side-to-side movement.
- Protect your bike with soft loops or handlebar straps: Avoid direct metal-on-metal contact by using soft loops or padded straps around the handlebars or frame to prevent scratches and damage.
- Check tire pressure before loading: Properly inflated tires make it easier to roll the bike onto the trailer and reduce the risk of shifting during transit.
- Double-check all connections before driving: Always perform a final walk-around inspection to confirm straps are tight, anchors are secure, and nothing is loose or dangling.
- Use wheel chocks or a front stand if available: These tools help stabilize the bike during loading and keep it upright while strapping down.
- Never rely on just one strap: Always use at least four straps—two for the front and two for the rear—to distribute tension evenly and maximize safety.
How to Strap Dirt Bike to Trailer
Whether you’re heading to the trails, a race, or just storing your dirt bike for the season, knowing how to strap a dirt bike to a trailer is a must-have skill for any rider. Improperly secured bikes can shift, tip, or even fall off during transport—leading to expensive damage or dangerous road hazards. The good news? With the right tools and techniques, securing your dirt bike is quick, easy, and stress-free.
In this guide, we’ll walk you through a complete, step-by-step process to safely strap your dirt bike to a trailer. You’ll learn what gear you need, how to position the bike, where to attach straps, and how to double-check everything before hitting the road. Plus, we’ll share expert tips to avoid common mistakes and keep your bike in top condition.
Let’s get started!
Step 1: Gather the Right Equipment
Visual guide about How to Strap Dirt Bike to Trailer
Image source: dirtbikeplanet.com
Before you even think about loading your bike, make sure you have the proper gear. Using low-quality or mismatched equipment is one of the biggest causes of accidents during transport.
Essential Gear Checklist
- Ratchet straps (4 recommended): Look for 1-inch wide straps with a minimum working load limit (WLL) of 500 lbs. Avoid cam buckle straps for dirt bikes—they can loosen over bumps.
- Soft loops or handlebar straps: These protect your bike’s finish and provide a safe anchor point. Never wrap straps directly around the handlebars without padding.
- Trailer with secure anchor points: Your trailer should have D-rings, tie-down hooks, or rails designed for strapping down vehicles.
- Wheel chock or front stand (optional but helpful): These keep the bike upright and stable while you secure it.
- Gloves and knee pads (optional): Loading a heavy bike can be tough on your hands and knees—protect yourself.
Pro tip: If you’re transporting multiple bikes, consider a trailer with built-in wheel slots or a ramp system to make loading easier.
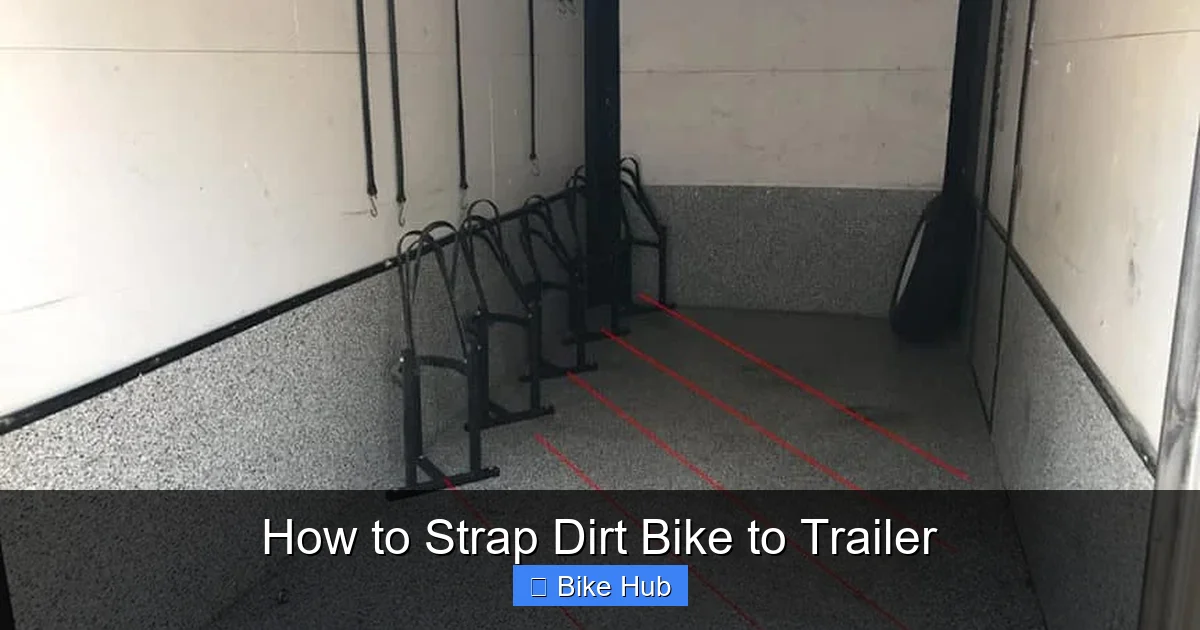
Step 2: Prepare the Trailer and Bike
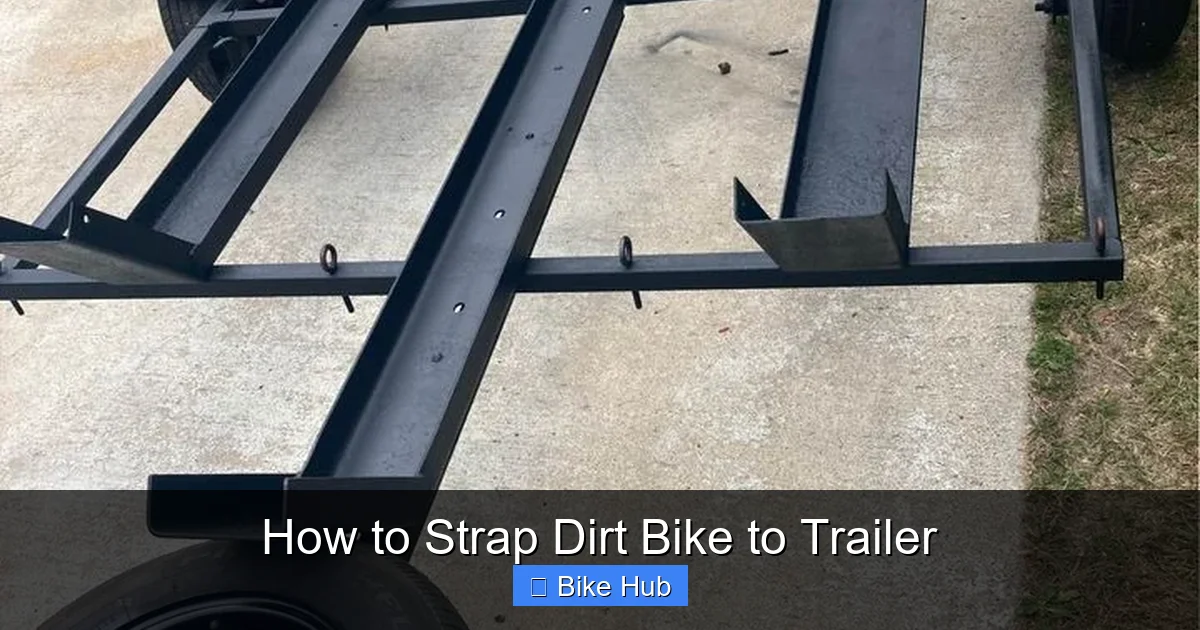
Visual guide about How to Strap Dirt Bike to Trailer
Image source: motocrosshideout.com
Preparation is key to a smooth loading process. A little prep goes a long way in preventing accidents.
Inspect the Trailer
Check that the trailer floor is clean, dry, and free of debris. Make sure all anchor points are tight and not rusted or damaged. If your trailer has a ramp, ensure it’s securely attached and rated for the weight of your bike.
Check Your Bike’s Condition
Before loading, do a quick inspection:
- Ensure the fuel tank isn’t overfilled (leave room for expansion).
- Check that the battery is secured and terminals are covered.
- Verify tire pressure is correct—underinflated tires can make rolling difficult and increase the risk of shifting.
If you’re planning a long trip, consider reviewing our guide on how to prepare a mountain bike for long rides—many of the same principles apply to dirt bikes.
Step 3: Load the Bike onto the Trailer
Now it’s time to get the bike on the trailer. Safety first—always have a spotter if possible, especially with heavier models.
Use a Ramp and Roll Slowly
Place the ramp securely against the trailer bed. Start the bike (or have someone help push if it’s electric), and roll it up slowly and steadily. Keep the front wheel aligned straight to avoid veering off the ramp.
Position the Bike Correctly
Once on the trailer, center the bike so it’s balanced left to right. If using a wheel chock, slide the front wheel into it. This keeps the bike upright and makes strapping much easier.
If you don’t have a chock, you can use a stand or even a block of wood under the front fender to keep the front wheel from rolling.
Step 4: Secure the Front of the Bike
The front end is the most critical area to secure because it controls steering and absorbs impact.
Attach Straps to the Handlebars (With Protection)
Wrap soft loops around the handlebars, just inside the grips. Then connect your ratchet straps to the soft loops and anchor them to the front corners of the trailer. Pull the straps down at a 45-degree angle toward the front of the trailer.
Never strap directly to the handlebars without soft loops—this can bend controls or scratch the finish.
Tighten Gradually and Evenly
Ratchet the straps slowly, alternating sides to keep the bike balanced. You want firm pressure—enough to prevent movement, but not so tight that you compress the suspension excessively. Over-tightening can damage forks or cause the bike to tip backward.
Step 5: Secure the Rear of the Bike
Now anchor the back to prevent the bike from shifting backward or side-to-side.
Use Rear Frame or Swingarm Anchors
Attach two more straps to the rear of the frame or swingarm (avoid the rear wheel or sprocket). Run them to the rear anchor points on the trailer, pulling diagonally outward for stability.
Some riders prefer to strap the rear wheel directly, but this can damage rims if done incorrectly. Frame or subframe attachment is safer and more reliable.
Check for Movement
Once all four straps are tight, try rocking the bike gently. It should not move forward, backward, or side-to-side. If it does, tighten the straps further or reposition them.
Step 6: Final Safety Check
Before you drive away, do a thorough inspection.
Walk Around the Trailer
Check that:
- All straps are tight and not twisted.
- Anchor points are secure and not loose.
- The bike is centered and not leaning.
- No straps are rubbing against moving parts (like wheels or chains).
- The ramp is removed and stowed.
Test the Setup
Give the bike a firm shake. If it moves more than an inch in any direction, re-tighten the straps. It’s also wise to stop after the first 5–10 minutes of driving to recheck everything—vibrations can loosen straps over time.
Troubleshooting Common Issues
Even experienced riders run into problems. Here’s how to fix the most common ones:
Bike Tips Backward During Transport
This happens when front straps are too tight or rear straps are too loose. Adjust the rear straps to pull the bike slightly forward, or reduce front tension.
Straps Keep Loosening
Switch to ratchet straps if you’re using cam buckles. Also, ensure you’re not over-tightening, which can cause straps to slip.
Bike Shifts Side to Side
Add diagonal rear straps or use side anchor points if your trailer has them. You can also use additional soft loops on the frame for extra stability.
Scratches or Damage to Handlebars
Always use soft loops or padded straps. If you don’t have them, wrap the handlebars with a towel or foam before strapping.
Bonus Tips for Safe Transport
- Cover your bike: A breathable bike cover protects against road grime and UV damage.
- Use a GPS tracker: For high-value bikes, consider a small tracker in case of theft or accidents.
- Check local laws: Some states require additional tie-downs or reflectors for trailers carrying motorcycles.
- Store tools and spare parts: Keep a basic toolkit and spare straps in your vehicle for emergencies.
For long-distance trips, also review our guide on how to protect a bike frame from rust—especially important if you’re riding in wet or salty conditions.
Conclusion
Strapping a dirt bike to a trailer doesn’t have to be complicated. With the right gear, a solid process, and a few safety checks, you can transport your bike safely and confidently every time. Remember: never cut corners when it comes to securing your ride. A few extra minutes of preparation can save you from costly repairs or dangerous situations on the road.
By following this guide, you’ll ensure your dirt bike arrives at the trailhead—or your garage—exactly as you left it. Now go enjoy the ride!


