

Resetting your electric bike controller can solve power issues, error codes, and performance glitches. This guide walks you through the process safely, whether you have a display or not, and includes troubleshooting tips for common problems.
Key Takeaways
- Understand why a reset helps: Controller resets clear temporary glitches, restore default settings, and fix communication errors between components.
- Power down completely: Always turn off the bike and disconnect the battery before starting to avoid electrical damage.
- Use the correct reset method: Some controllers reset via button combinations, others through software or physical disconnection.
- Check connections after reset: Loose or corroded wires are a common cause of recurring issues—inspect them carefully.
- Test ride after reset: Always take a short test ride to confirm the reset worked and all functions are normal.
- Know when to seek help: If problems persist after a reset, the issue may be hardware-related and require professional diagnosis.
- Keep your firmware updated: Regular updates can prevent bugs that lead to the need for resets in the first place.
How to Reset Electric Bike Controller: A Complete Step-by-Step Guide
If your electric bike feels sluggish, won’t turn on, or shows error codes like “E03” or “E05,” the problem might be with the controller—the brain of your e-bike. The good news? A simple reset often fixes these issues without needing tools or a mechanic. In this guide, you’ll learn how to reset your electric bike controller safely and effectively, whether you have a display screen or not.
Resetting the controller clears temporary software glitches, restores default settings, and re-establishes communication between the battery, motor, and throttle. It’s one of the first troubleshooting steps recommended by most e-bike manufacturers. And best of all, it takes just a few minutes.
What Is an Electric Bike Controller?
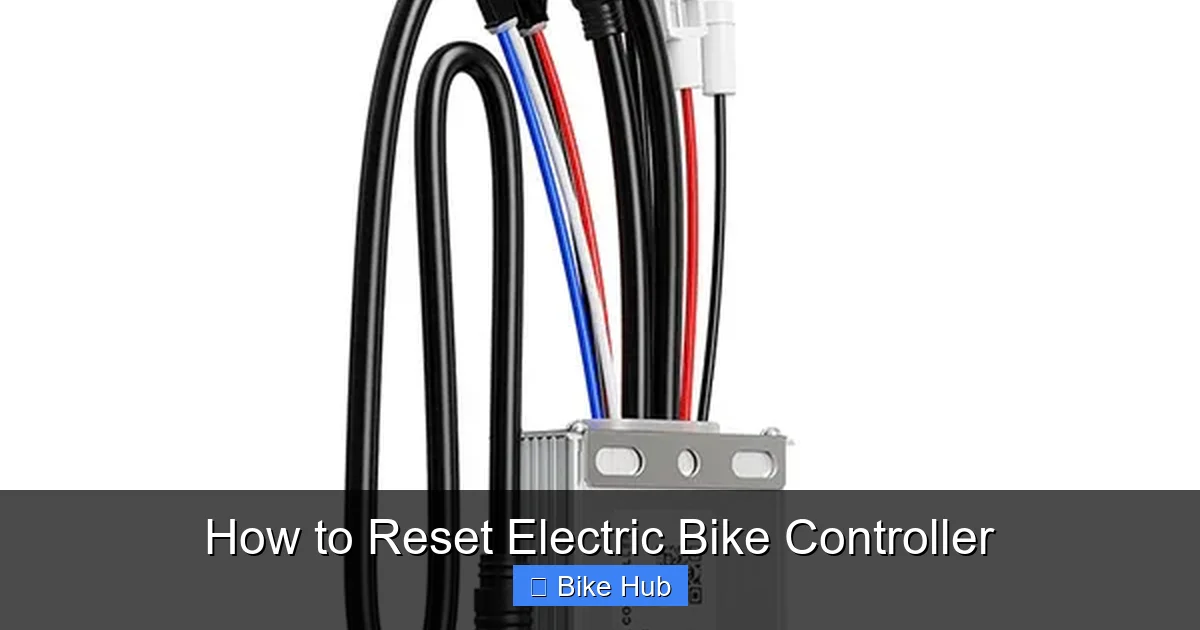
Visual guide about How to Reset Electric Bike Controller
Image source: cdn.shopify.com
Before we dive into the reset process, let’s quickly define what the controller does. The controller manages power flow from the battery to the motor based on input from the throttle, pedal assist sensor, and display. It also monitors speed, temperature, and battery levels. Think of it like the central nervous system of your e-bike.
When the controller malfunctions, you might experience:
– No power when turning on the bike
– Intermittent motor cutouts
– Error messages on the display
– Throttle not responding
– Reduced speed or power
A reset can often resolve these issues by rebooting the system.
Preparation: Safety First
Visual guide about How to Reset Electric Bike Controller
Image source: ecomotivebikes.com
Before resetting your e-bike controller, follow these safety steps:
Turn Off the Bike
Make sure the bike is completely powered off. If your bike has a display, press and hold the power button until it shuts down.
Disconnect the Battery
For safety and effectiveness, disconnect the battery. On most e-bikes, this means removing the battery pack from the frame or unplugging the main battery connector. This ensures no power reaches the controller during the reset.
Wait 30–60 Seconds
After disconnecting the battery, wait at least 30 seconds. This allows any residual charge in the controller’s capacitors to dissipate. Think of it like unplugging your router—sometimes a full power cycle is needed.
Gather Tools (If Needed)
Most resets don’t require tools, but have a small Phillips screwdriver handy in case you need to access the controller housing. Also, keep your user manual nearby—it may have model-specific instructions.
Method 1: Soft Reset (Using the Display)
Many modern e-bikes allow a soft reset directly through the display. This is the easiest method if your bike has a screen.
Step 1: Power On the Bike
Reconnect the battery and turn on the bike using the power button.
Step 2: Access the Settings Menu
Press and hold the “Mode” or “Settings” button (usually located near the display) for 3–5 seconds until the menu appears.
Step 3: Navigate to Reset Option
Use the up/down buttons to scroll to “Reset,” “Factory Reset,” or “System Reset.” The exact wording varies by brand (e.g., Bafang, Shimano, Bosch).
Step 4: Confirm the Reset
Press and hold the “Set” or “OK” button to confirm. The display may flash or show a progress bar. Wait until it restarts automatically.
Step 5: Test the Bike
Once the bike powers back on, test the throttle, pedal assist, and display functions. Take a short ride to ensure everything works.
> Tip: If your display doesn’t have a reset option, try holding the power button for 10–15 seconds. Some models perform a hard reboot this way.
Method 2: Hard Reset (Power Cycle)
If your bike doesn’t have a display or the soft reset doesn’t work, a hard reset via power cycling is your best bet.
Step 1: Turn Off and Disconnect
Turn off the bike and disconnect the battery as described earlier.
Step 2: Wait 60 Seconds
Leave the battery disconnected for at least one minute. This ensures the controller fully resets.
Step 3: Reconnect the Battery
Reattach the battery securely. Make sure all connectors are clean and fully seated.
Step 4: Power On
Turn on the bike. The controller should initialize with default settings.
Step 5: Test All Functions
Check the throttle, pedal assist levels, lights, and display (if applicable). Ride slowly at first to confirm normal operation.
> Example: A rider with a Rad Power Bike experienced sudden power loss. After a hard reset, the bike worked perfectly—no parts replaced, just a simple power cycle.
Method 3: Reset via Controller Button (Advanced)
Some e-bikes have a physical reset button on the controller itself. This is less common but useful if other methods fail.
Step 1: Locate the Controller
The controller is usually housed under the top tube or near the rear wheel. You may need to remove a cover or panel.
Step 2: Find the Reset Button
Look for a small, recessed button labeled “Reset” or “RST.” It’s often near the wiring harness.
Step 3: Press and Hold
Use a paperclip or small tool to press and hold the reset button for 5–10 seconds while the battery is connected.
Step 4: Power Cycle
After releasing the button, turn the bike off and on again to complete the reset.
> Caution: Avoid touching any exposed wires or circuits. If you’re unsure, consult your manual or a technician.
Troubleshooting Common Reset Issues
Even after a reset, some problems may persist. Here’s how to handle them:
Bike Still Won’t Turn On
– Check the battery charge. Use a multimeter or the bike’s display to confirm voltage.
– Inspect the battery connector for dirt or corrosion. Clean with a dry cloth.
– Ensure the key (if applicable) is inserted and turned.
Error Codes Keep Returning
– Note the error code (e.g., E01, E07) and refer to your manual. Common codes relate to throttle, motor, or sensor issues.
– A reset may temporarily clear the code, but if it returns, the underlying hardware may be faulty.
Throttle Not Responding
– Try re-syncing the throttle. On some bikes, you can do this by turning the throttle fully and holding it for 5 seconds.
– Check for loose throttle wires near the handlebar.
Pedal Assist Not Working
– Ensure the pedal assist sensor is clean and aligned. Dirt or misalignment can prevent detection.
– Reset the sensor by pedaling slowly for 10–15 seconds after powering on.
> Pro Tip: Keep a log of error codes and symptoms. This helps technicians diagnose issues faster if a reset doesn’t work.
When to Avoid a Reset
While resets are generally safe, avoid them if:
– The bike was recently submerged in water (risk of short circuits)
– You suspect physical damage to the controller or wiring
– The battery shows signs of swelling or leakage
In these cases, consult a professional. For example, if your bike was caught in heavy rain, refer to our guide on how to prepare for a rainy bike race for tips on drying and inspecting components.
Maintaining Your Controller After a Reset
To prevent future issues:
– Keep connectors clean and dry
– Avoid extreme temperatures (don’t leave your bike in a hot car)
– Update firmware regularly (check manufacturer’s website)
– Inspect wiring during routine maintenance
Regular care reduces the need for resets and extends your e-bike’s lifespan.
Conclusion
Resetting your electric bike controller is a simple yet powerful fix for many common problems. Whether you use the display menu, a power cycle, or a physical reset button, the process takes just minutes and can save you time and money. Always start with safety—power off and disconnect the battery—and test thoroughly after the reset.
If your e-bike still acts up, the issue may be deeper than software. But in most cases, a reset restores smooth, reliable performance. And remember, regular maintenance—like checking your bike tire pressure and cleaning your drivetrain—keeps your entire system running well.
With this guide, you’re equipped to handle controller resets with confidence. Ride safe, and enjoy the power of your e-bike at its best.


