

Are you tired of struggling with storage solutions that just don’t seem to fit your needs? Adjusting rack height might be the perfect solution to optimize your space and enhance your organization.
Imagine walking into your garage or warehouse and finding everything perfectly arranged, easy to access, and tailored to your needs. With the right rack height, you can transform chaos into order, making your daily tasks simpler and more efficient. In this guide, you’ll discover straightforward techniques to adjust rack height, empowering you to tailor your storage to fit your lifestyle or business needs.
Whether you’re looking to maximize space, improve accessibility, or simply create a more orderly environment, understanding how to properly adjust your racks is crucial. Dive in to uncover the secrets to transforming your storage spaces and enjoy the peace of mind that comes with perfect organization.
Choosing The Right Rack Height
Think about the equipment you need to store. Different devices have different sizes. Some might be tall, others short. Measure each piece. Add the heights together. This helps find the total height you need. Remember, leave some space between items. It helps with airflow and cooling.
Check the room where the rack will go. Is the ceiling high or low? Measure the height from floor to ceiling. Make sure the rack fits easily. Don’t forget about doorways. The rack should pass through them. Space might be tight. Plan carefully to avoid problems.
Think about future needs. Will you add more equipment later? Choose a taller rack if needed. Planning ahead saves time and money. It’s better than buying a new rack later. Leave some extra space for unexpected additions.
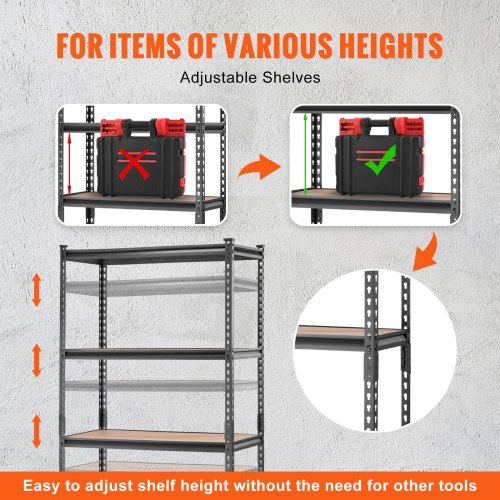
Credit: www.vevor.com
Preparation For Adjustment
Choose tools like a wrench and a measuring tape. These tools help adjust the rack height properly. Keep them close to the rack. Make sure they are easy to reach. This saves time and effort.
Wear gloves to protect your hands. Use goggles to protect your eyes. Ensure the rack is stable. Check the surroundings for hazards. Safety is very important. Keep the area clear and tidy.
Write down the current rack height. Plan how much to change it. Use a clear plan to avoid mistakes. This helps in making the adjustment smoother. Keep notes for future reference.
Step-by-step Adjustment Process
Adjusting rack height ensures efficient use of space. Begin by determining the desired height based on your needs. Use tools like a wrench to loosen bolts, then reposition the rack. Secure bolts tightly to maintain stability. Regular checks prevent misalignment over time.
Removing Existing Equipment
First, turn off all equipment to stay safe. Carefully unplug cables from devices. Place each device in a safe area. Use a screwdriver to loosen screws holding the equipment. Gently slide the equipment out of the rack. Keep all screws and tools nearby.Adjusting Rack Components
Decide on the new rack height needed. Loosen the bolts on the rack’s side. Adjust the rack to the desired height. Use a level to ensure the rack is straight. Tighten bolts securely after adjusting. Double-check to ensure stability.Reinstalling Equipment
Carefully slide each device back into the rack. Align equipment with rack holes. Secure devices with screws using a screwdriver. Reconnect all cables to the devices. Turn on the equipment to check if everything works. Ensure all equipment is safe and stable. `Techniques For Precise Adjustment
Measurement toolshelp find the right rack height. Use a tape measure to check dimensions. Compare with the desired height. Repeat measurements to ensure accuracy. Double-check measurements for precision. Accuracy is key in adjustments.
Leveling techniques keep the rack stable. Use a spirit level to check alignment. Adjust legs until the level shows balance. Make small adjustments for perfection. Balance prevents tilting and wobbling. A stable rack performs better.
Structural integrity maintains rack strength. Tighten bolts and screws securely. Check for loose parts regularly. Ensure brackets are firm and sturdy. Regular inspections prevent accidents. A strong rack is safer and lasts longer.
Common Challenges And Solutions
Adjusting rack height can be tricky due to uneven surfaces and heavy loads. Ensure stability by using a level and securing the rack. Proper tools and measurements streamline the process, ensuring efficiency and safety.
Dealing With Weight Distribution
Weight distributioncan affect rack stability. Place heavier items at the bottom. This prevents the rack from tipping over. Check that the weight is balanced. Uneven weight can cause problems. Use shelves designed for heavy loads. Ensure everything is secure and won’t move.Managing Cable Organization
Messy cables can make work harder. Use cable tiesto bundle wires. This keeps them neat and tidy. Label each wire for easy identification. It helps when you need to unplug something. Install cable management panels if possible. This keeps everything in place.Addressing Ventilation Concerns
Good ventilation keeps equipment cool. Make sure there is enough space for air. Hot air should escape easily. Blocked vents can cause overheating. Use fans to improve airflow if needed. Position equipment to allow free air movement. Keep vents clean and dust-free. `
Credit: www.ulifhome.com
Maintenance And Regular Checks
Adjusting rack height ensures proper storage and accessibility. Begin by loosening the bolts holding the rack. Slide the rack to the desired height, then retighten the bolts securely. Regular checks prevent mishaps and maintain safety.
Scheduled Inspections
Regular checks are important for rack safety. Inspect racks every month. Look for any signs of wear or damage. Broken parts can be dangerous. Check bolts and nuts. They must be tight. Ensure racks are straight and stable. Uneven racks can cause problems.
Updating Documentation
Keep all records up-to-date. Write down every inspection. Note any repairs made. This helps track rack history. Use simple language in records. Make sure everyone understands the notes. Good documentation ensures safety.
Ensuring Compliance With Standards
Follow all safety standards. Check local rules for racks. Standards keep racks safe. They prevent accidents. Ensure all parts meet these rules. Use certified parts only. Compliance protects everyone.

Credit: www.ebay.com
Frequently Asked Questions
How To Change Rack Height?
To change rack height, first empty the rack. Adjust the vertical rails to the desired level. Secure them with screws. Use a level tool to ensure even alignment. Double-check stability before loading items back onto the rack. Always follow the manufacturer’s instructions for specific adjustments and safety guidelines.
How To Adjust Squat Rack Height?
Measure your height and desired squat depth. Adjust the rack to match these measurements. Ensure safety pins are secure. Test the setup with a barbell. Adjust as needed for comfort and safety. Regularly check for equipment stability and maintenance.
How To Calculate Rack Height?
Measure the height of each rack unit (U) in inches. Multiply the number of units by 1. 75 inches. Add any additional components’ height for total rack height.
How High Should You Set The Bar On The Rack?
Set the bar on the rack at mid-chest level. This position ensures easy lifting and safe racking. Adjust based on your height and exercise type for optimal performance. Always prioritize comfort and safety when setting the bar height.
Conclusion
Adjusting rack height is simple with the right steps. Start with measuring. Use tools like a tape measure for accuracy. Next, loosen the bolts gently. Adjust the rack to the desired height. Tighten the bolts securely. Always check stability after adjustments.
A stable rack ensures safety. Follow these tips for a smooth process. Regular adjustments keep your space efficient. They also maximize storage. Keep learning. Practice makes perfect. With time, adjusting racks will be second nature. Enjoy a clutter-free environment. Happy organizing!


