
Imagine cruising down a rugged mountain trail under a starry sky, the cool night air rushing past as your tires crunch over the earth. Sounds exhilarating, right?
Yet, without proper lighting, this thrilling adventure can quickly turn into a risky endeavor. Whether you’re a seasoned mountain biking enthusiast or a newbie eager to explore the trails after dark, understanding the ins and outs of bike lighting is crucial.
Have you ever wondered how the right lighting can enhance your night rides, making them safer and more enjoyable? In this Mountain Bike Lighting Guide for Night Rides, you’ll discover the secrets to illuminating your path effectively, ensuring you ride with confidence and clarity. Stay with us to uncover how the right lights can transform your nighttime biking experience into one that’s not only safe but also utterly unforgettable.
Choosing The Right Lights
Selecting the best lights for your mountain bike is crucial for safe night rides. Focus on brightness, beam pattern, and battery life to ensure visibility and safety on dark trails.
Headlight Essentials
Good headlights are very important for night rides. They light up the trail ahead. Choose a light with a strong beam. It helps you see far and wide. A rechargeable battery is best. It saves money and is eco-friendly. Look for lights with easy mounting options. Quick setup is crucial. Waterproof lights are a smart choice. They work well in rain.
Tail Light Importance
Tail lights keep you safe. They make you visible to others. Choose lights with a bright flash mode. Flashing lights catch attention. Ensure the light is easy to mount. Quick removal is helpful. Consider lights with long battery life. You want them to last your ride. Waterproof tail lights are essential. They work in any weather.
Types Of Bike Lights
Mountain bike lights come in various types to enhance night rides. Handlebar lights offer a wide beam, illuminating trails ahead. Helmet lights provide focused light, perfect for spotting obstacles. Tail lights ensure visibility from behind, enhancing safety during night adventures.
Led Vs. Halogen
LED lights are bright and last long. They use less energy than halogen. Halogen lights are cheaper but not as bright. They get hot quickly. LED lights come in many colors. They are more durable and can handle rough rides.
Rechargeable Vs. Battery-powered
Rechargeable lights save money over time. You plug them in to charge. They are eco-friendly and easy to use. Battery-powered lights need new batteries often. They can be less reliable. Rechargeable lights are better for long trips. Battery-powered lights are easy to replace quickly.
Light Placement Tips
Proper light placement ensures safe night rides on mountain bikes. Mount lights on handlebars for wide visibility. Use a helmet light to illuminate where you look, enhancing control and awareness.
Handlebar Mounting
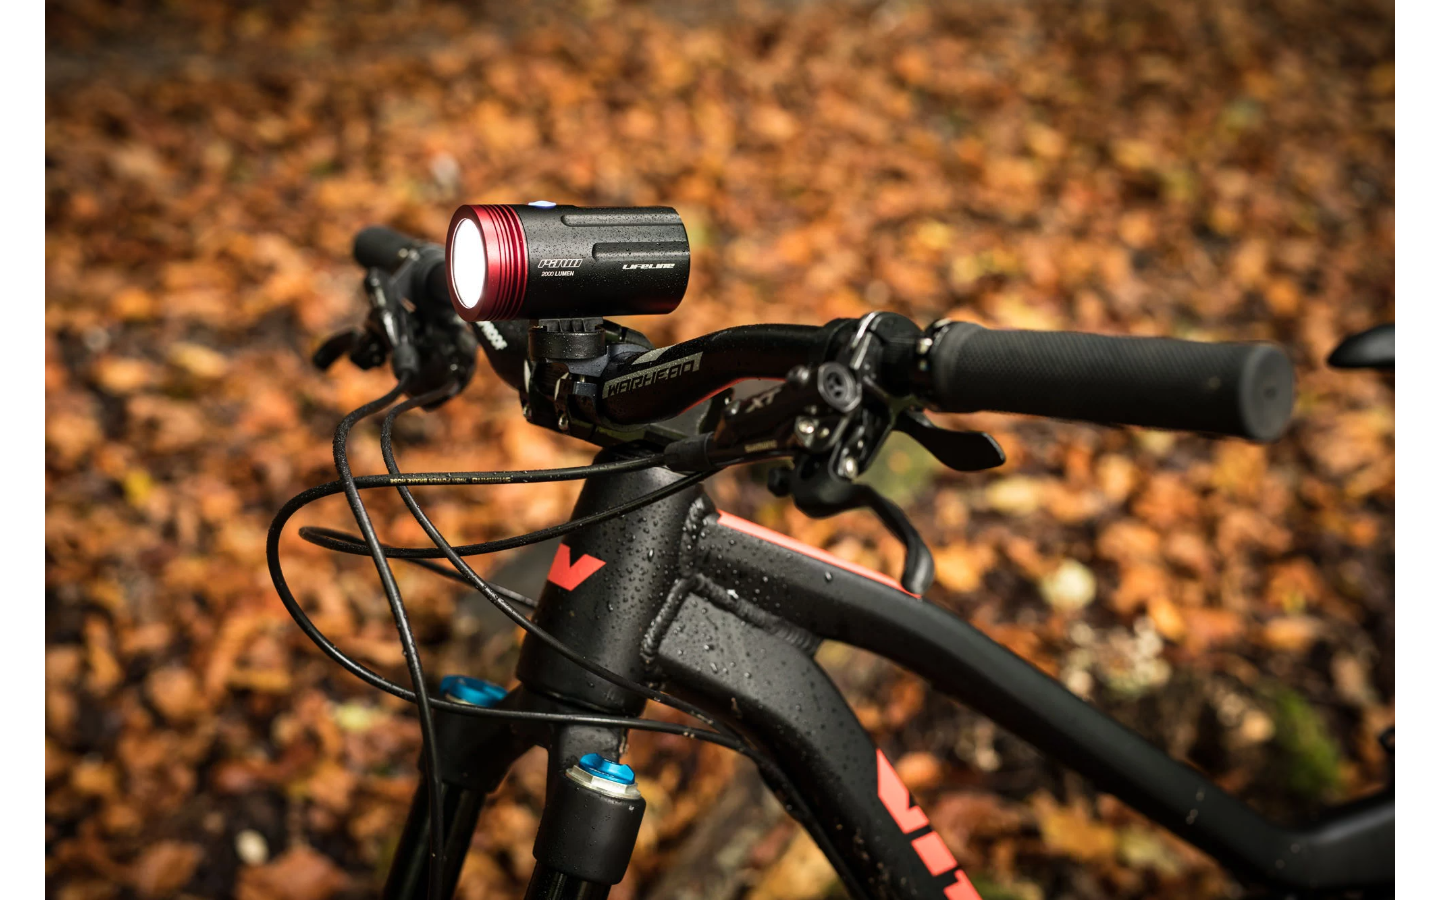
Mounting lights on the handlebar is a smart choice. It provides a wide beam. This helps in seeing the trail clearly. Make sure the light is not too high or low. Aim it about 20 feet ahead. This gives you time to react. A secure mount is crucial. It prevents the light from shaking. Use rubber straps or clamps. Check the stability before the ride. Lights should be easy to remove. This is important for charging or storage.
Helmet Mounting
Helmet lights help focus on specific areas. They follow where you look. This is useful for sharp turns. Make sure the helmet is sturdy. The light should not be heavy. Heavy lights make the helmet uncomfortable. Use a reliable mount. Velcro straps are a good option. Ensure the light is balanced. This prevents neck strain. Test the setup before long rides.

Credit: alpkit.com
Brightness And Beam Patterns
Lumens show how bright a light is. More lumens mean a brighter light. For night rides, you need at least 1000 lumens. This helps you see the trail clearly. Bright lights keep you safe from rocks and branches. Always check the lumens before buying a light.
Wide beams light up a large area. They help see what’s around you. Focused beams light up a narrow path. They help see far ahead. Choose a beam that fits your ride. Some lights offer both beam options. This gives you more flexibility. It’s important to pick the right beam for your safety.
Safety Features
Strobe and flash modes are important for night rides. They help others see you better. Quick flashes grab attention. These modes are great for busy roads and trails. A steady light is good for seeing ahead. Changing between modes keeps you safe. Ensure your light has these options. They make a big difference.
Reflective gear is essential for night biking. It helps you stand out in the dark. Jackets, vests, and helmets can have reflective parts. These reflect lights from cars and street lamps. They make you visible to drivers. Always wear reflective gear at night. It boosts your safety. Combine it with lights for best results.
Weather Considerations
Mountain biking at night demands careful weather consideration to ensure safety and visibility. Fog or rain can reduce light effectiveness, complicating trail navigation. Choose lighting gear that can withstand varied conditions for a seamless ride.
Waterproof Options
Mountain biking at night can be tricky with rain. Having waterproof lightsis a smart choice. Look for lights with an IPX rating. This tells if they can handle water. The higher the number, the better. Good waterproof lights stay safe and bright. Even in heavy rain, they work well. No need to worry about sudden showers. Waterproof lights keep shining through. They are a must-have for wet rides.
Cold Weather Performance
Cold weather affects battery lifeof your bike lights. Batteries can drain faster in the cold. Choose lights made for chilly nights. Some lights have a cold-weather mode. This helps them work longer in low temperatures. Keep batteries warm before using them. You can also carry spares in your pocket. Cold weather lights make rides safer and brighter.
Maintenance And Care
Proper maintenance and care extend the life of your mountain bike lights. Regularly clean and check connections for optimal performance. Replace batteries as needed for uninterrupted night rides.
Battery Maintenance
Keep your battery clean and dry. Moisture can cause damage. Store it in a cool place. Heat can reduce battery life. Charge it regularly to keep it healthy. Avoid letting it die completely. This helps it last longer. If not used, charge it monthly. This keeps it ready for rides.
Cleaning The Light
Use a damp cloth for cleaning. Do not use harsh chemicals. These can harm the light. Make sure to dry it well. Water can enter and damage parts. Check for dirt in crevices. A soft brush can help here. Keep the lens clear for bright light. This makes night rides safe and fun.

Credit: www.amazon.com
Budgeting For Lights
Navigating mountain bike trails at night requires careful planning for lighting. Prioritize quality lights to ensure safety and visibility. Consider battery life and brightness to suit your budget and riding needs.
High-end Vs. Affordable Options
Choosing the right lights for night rides is crucial. High-end lights offer brighter beams and longer battery life. They can be expensive. Affordable lights still provide good performance. They are a great choice for beginners.
Cost Vs. Performance
It’s important to balance cost and performance. High-end lights give more features and durability. But affordable lights can be enough for casual riders. Think about how often you ride at night. Decide if advanced features are necessary.
Credit: singletrackworld.com
Frequently Asked Questions
How Many Lumens Do I Need For Mountain Biking At Night?
For mountain biking at night, a light with 1,500 to 2,000 lumens is recommended. This ensures adequate visibility and safety on trails. Choose lights with adjustable brightness for varied terrains and conditions. Proper lighting enhances your biking experience and reduces risks during night rides.
Is 800 Lumens Enough For Night Riding?
800 lumens is generally enough for casual night riding on well-lit streets. For off-road or poorly lit areas, consider higher lumens. Ensure your bike light offers a wide beam and good battery life. Adjust brightness based on your speed and surroundings for safety.
Always prioritize visibility and road conditions.
How Many Lumens For A Night Bike Ride?
For a night bike ride, use a light with at least 200 lumens for urban areas. For trails or darker roads, aim for 600 lumens or more. A higher lumen count enhances visibility and safety. Always ensure your bike lights are fully charged before heading out.
How To Turn On Night Rider Bike Light?
Press the power button on the Night Rider bike light to turn it on. Adjust brightness settings by repeatedly pressing the button. Ensure the light is charged for optimal performance. Check user manual for specific model instructions. Enjoy a safe ride with proper illumination.
Conclusion
Night rides on mountain bikes are thrilling and fun. Good lighting is essential. It ensures safety and enhances the riding experience. Choose lights with strong brightness and long battery life. Consider your trail’s needs when selecting lights. Test your setup before heading out.
This helps avoid issues during your ride. Always carry a backup light or extra batteries. This prepares you for unexpected situations. Remember, well-chosen lights make night rides safer and more enjoyable. Equip yourself properly, and let the adventure begin.



