

Your bike helmet is your trusty companion, ensuring safety and comfort during every ride. But over time, the padding can wear out, leaving you with an uncomfortable fit that distracts from the joy of cycling.
Imagine feeling the perfect snug fit, as if your helmet was custom-made just for you, enhancing your focus and performance. Upgrading your bike helmet padding isn’t just about comfort; it’s about optimizing your ride experience and ensuring your safety. With simple steps, you can transform your helmet to feel brand new and make every ride a pleasure.
Curious to learn how you can achieve this effortless upgrade? Let’s dive into the details and get you back on the road with renewed comfort and confidence.
Choosing The Right Padding Material
Gel padding feels soft and comfortable. It molds to your head shape. This gives a snug fit. Foam padding is lightweight and firm. It absorbs impact well. Both options have their benefits. Choose based on your need.
| Feature | Gel | Foam |
|---|---|---|
| Comfort | High | Moderate |
| Weight | Heavier | Lighter |
| Impact Absorption | Good | Excellent |
Helmets need to stay cool inside. Good padding helps air flow. Foam padding often has tiny holes. These allow air to pass through. Gel padding might feel warmer. Ventilation is key for comfort.
Choose padding that lasts long. Foam padding resists wear and tear. Gel may break down over time. Check for wear signs often. This keeps your helmet safe and reliable.
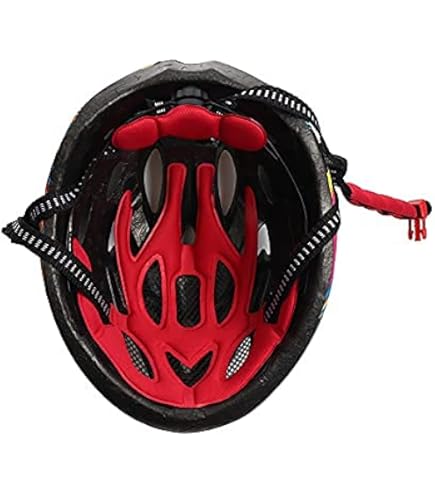
Credit: www.amazon.com
Tools Required For Padding Upgrade
Gather scissors, adhesive, and replacement pads for your bike helmet padding upgrade. Ensure proper fit and comfort by following simple steps.
Essential Tools List
- Scissorsfor cutting new padding to size.
- Measuring tapeto ensure accurate padding fit.
- Adhesive stripsfor securing new padding.
- Cleaning clothto wipe the helmet inside.
- Markerfor marking pad placement.
Optional Tools For Enhanced Comfort
- Foam sheetsfor extra cushioning.
- Velcro stripsfor adjustable padding.
- Helmet linerfor added softness.
- Anti-bacterial sprayfor cleaning.
- Extra paddingfor custom comfort.
Step-by-step Padding Replacement
Carefully take out the old padding from the helmet. Check for any glue or sticky parts. Gently peel them off without damaging the helmet. Keep the old padding to compare sizes later. Clean the helmet inside after removing the padding.
Clean the helmet interior with a soft cloth. Remove any dust or dirt inside. Ensure the surface is smooth and dry. Check for cracks or damage inside the helmet. Make sure it’s safe for new padding.
Place new padding pieces in the helmet. Ensure they fit snugly and comfortably. Use the old padding as a size guide. Attach the new padding using Velcro or glue, if needed. Press firmly to secure each piece. Check for comfort and adjust if necessary.
Enhancing Helmet Fit
Straps are important for helmet safety. Check if they are too loose. Tighten them until the helmet fits snugly. Use the buckle to keep the helmet in place. Make sure the straps form a “V” under the ears. This helps the helmet stay secure. Adjust the chin strap too. It should be tight but comfortable. You should fit only two fingers under the strap. Always check the straps before riding. A good fit protects you better.
Pads make helmets more comfortable. They help the helmet fit your head. Some helmets come with extra padding. You can add or remove pads to adjust the fit. Use thicker pads for a snug fit. Thinner pads give more room. Always make sure the padding is even. This prevents the helmet from tilting. Ensure the pads stay in place. Velcro can help with this. Check the padding often. Replace it if it wears out.
Maintenance Tips
Upgrade your bike helmet padding for better comfort and safety. First, remove the old padding carefully. Replace it with new, comfortable pads that fit well. Ensure everything is securely in place before use.
Cleaning And Care
Always keep your bike helmet clean. Use mild soap and warm water. Gently scrub the padding with a soft cloth. Avoid harsh chemicals; they can damage the material. Let the padding air dry completely. Never use a dryer or heater. This can cause the padding to shrink or become misshaped.
Regular Padding Checks
Inspect your helmet padding often for wear and tear. Look for any rips or thinning spots. Replace padding if it looks old or damaged. Fresh padding ensures comfort and safety. Always buy padding that fits your helmet model. Proper fit is key to head protection.

Credit: www.amazon.ae
Safety Considerations
Choosing the right helmet size is crucial. A helmet must fit snugly. It shouldn’t slide around when you move. Check the straps for a comfortable fit. Adjust the padding for a secure feel. Ensure the helmet sits level on your head. Avoid tilting it backward or forward.
Helmet padding helps absorb shock. Always check the padding quality. It should be thick and firm. Test your helmet for impact resistance. Drop it gently on a hard surface. Inspect for dents or cracks. Replace padding if damaged. Ensure padding covers all critical areas inside.

Credit: www.amazon.ca
Frequently Asked Questions
How Can I Make My Bike Helmet More Comfortable?
Adjust the straps and padding for a snug fit. Use moisture-wicking liners to reduce sweat. Ensure proper helmet sizing. Regularly clean and maintain the helmet. Consider purchasing gel pads for extra comfort.
Can You Add Padding To A Helmet?
Yes, you can add padding to a helmet for better fit and comfort. Use adhesive foam pads or gel inserts specifically designed for helmets. Ensure the padding doesn’t compromise helmet safety and fit snugly without pressure points. Always follow the manufacturer’s guidelines for modifications.
What Is The 5 Year Helmet Rule?
The 5-year helmet rule suggests replacing helmets every five years. This ensures maximum safety due to material degradation and evolving safety standards. Regular replacement helps maintain optimal protection during use.
What Is The 2 2 2 Rule When Fitting A Helmet On Your Head?
The 2 2 2 rule helps fit a helmet properly. Ensure two fingers’ width above eyebrows, two fingers’ width for strap tightness, and two fingers under the chin strap. This ensures safety and comfort.
Conclusion
Upgrading bike helmet padding improves comfort and safety. It’s a simple process. Choose the right materials for your needs. Remember to follow the manufacturer’s instructions carefully. A snug fit reduces risks and enhances performance. Regularly inspect your helmet for wear and tear.
Replace padding when necessary to maintain protection. Take time to find the best options available. Your head deserves the best care. Enjoy safer rides with enhanced comfort. Feel the difference every time you cycle. Prioritize safety and enjoy your biking adventures!


