
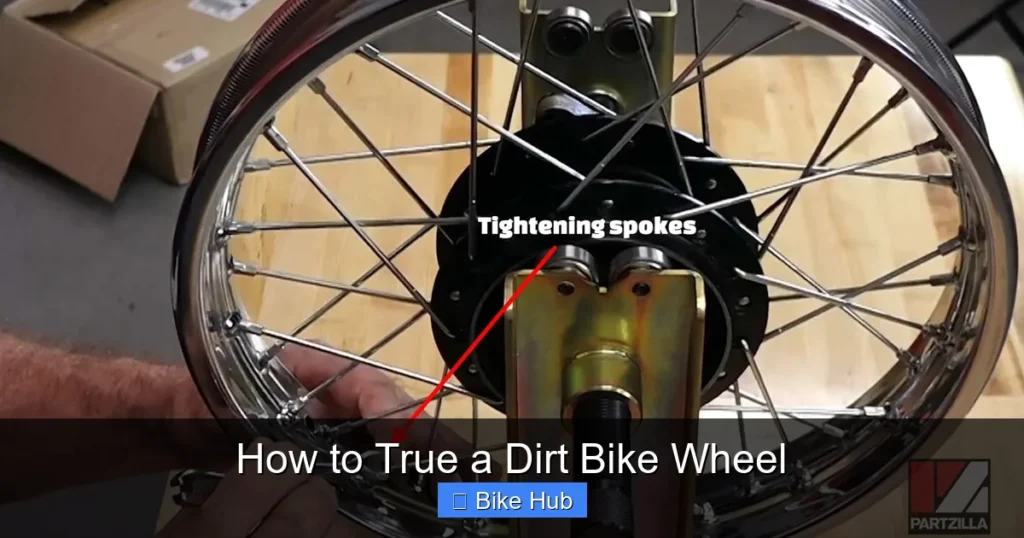
Truing a dirt bike wheel is a vital skill for maintaining control, safety, and performance on rough terrain. With the right tools and patience, you can fix lateral and radial wobbles at home, saving time and money on shop visits.
If you’ve ever ridden your dirt bike and felt a wobble in the front or rear wheel, you know how unsettling—and dangerous—that can be. That wobble isn’t just annoying; it can throw off your balance, reduce traction, and even lead to a crash on rough trails. The good news? You don’t need to rush to the mechanic every time your wheel goes out of true. With a little know-how and the right tools, you can fix it yourself—safely and effectively.
Truing a dirt bike wheel means adjusting the tension of the spokes so the wheel spins straight and round. It’s a skill every rider should have in their toolbox, especially if you ride hard or frequently. Whether you’re prepping for a race, fixing damage from a big jump, or just doing routine maintenance, knowing how to true a wheel gives you confidence and control. And the best part? It’s easier than you think.
Key Takeaways
- Truing improves ride quality: A properly trued wheel reduces vibration, enhances handling, and prevents premature tire wear.
- You only need basic tools: A spoke wrench, truing stand (or DIY alternative), and a marker are enough to get started.
- Check for damage first: Inspect spokes, nipples, and the rim for cracks or bends before adjusting.
- Work in small increments: Turn spoke nipples only a quarter to half turn at a time to avoid over-tightening.
- Lateral and radial truing are different: Lateral fixes side-to-side wobble; radial corrects up-and-down hops.
- Test ride after truing: Always take a short ride to confirm the wheel spins smoothly and safely.
- Prevention is key: Regular maintenance and avoiding hard impacts help keep wheels true longer.
Quick Answers to Common Questions
How often should I true my dirt bike wheel?
Check your wheel after every few rides, especially if you’ve hit rough terrain or taken a fall. Frequent inspections help catch issues early.
Can I true a wheel without a truing stand?
Yes! You can use your bike’s forks or create a DIY stand with zip ties and a reference point. It’s less precise but works in a pinch.
What causes a dirt bike wheel to go out of true?
Common causes include hard impacts, loose spokes, improper tire installation, or normal wear from aggressive riding.
How tight should spokes be?
Spokes should be firm but not overly tight. They should produce a similar pitch when plucked—like musical notes.
Is it safe to ride with a slightly wobbly wheel?
Not recommended. Even small wobbles can worsen quickly and affect handling, especially at high speeds or on technical trails.
📑 Table of Contents
Why Truing Your Dirt Bike Wheel Matters
A wobbly wheel isn’t just a cosmetic issue. It affects how your bike handles, especially at high speeds or on uneven terrain. When a wheel isn’t true, it can cause uneven tire wear, reduce braking efficiency, and put extra stress on your suspension and frame. Over time, this can lead to more serious problems like broken spokes, bent rims, or even hub damage.
Think of your wheel like a foundation. If the foundation is off, everything built on top of it suffers. A true wheel ensures smooth power transfer, better cornering, and a more predictable ride. Plus, it just feels better—like your bike is gliding instead of fighting you. Whether you’re a weekend warrior or a competitive rider, truing your wheel is a small step that makes a big difference.
Tools and Materials You’ll Need
Before you start, gather the right tools. You don’t need a full workshop, but having the essentials makes the job much easier.
Essential Tools
- Spoke wrench: This is the most important tool. Make sure it matches the size of your spoke nipples (usually 3.2mm, 3.3mm, or 3.5mm). Using the wrong size can strip the nipples.
- Truing stand: A dedicated stand holds the wheel steady and has indicators to measure lateral and radial runout. If you don’t have one, you can improvise using your bike’s forks or a homemade jig.
- Marker or chalk: Use this to mark problem areas on the rim so you can track your progress.
- Zip ties or tape: Helpful for creating a reference point when using your bike as a stand.
- Lubricant (optional): A drop of light oil on tight spoke nipples can make turning them easier.
Optional but Helpful
- Torque wrench: For precise spoke tension, though not required for basic truing.
- Spoke tension meter: Advanced tool for checking even tension across all spokes.
- Workstand: Keeps your bike stable while you work.
Step-by-Step Guide to Truing a Dirt Bike Wheel
Now that you’re equipped, let’s walk through the process. Remember: patience is key. Rushing can lead to over-tightening or uneven tension.
Step 1: Remove the Wheel (If Necessary)
If you’re using a truing stand, remove the wheel from the bike. For rear wheels, you’ll need to shift into neutral and possibly remove the chain or sprocket. Front wheels are easier—just loosen the axle pinch bolts and slide it out. If you’re using your bike as a stand, leave the wheel on but make sure the bike is stable and upright.
Step 2: Inspect the Wheel
Before adjusting anything, check for obvious damage. Look for:
- Broken or loose spokes
- Cracks or dents in the rim
- Stripped or rounded spoke nipples
If you find serious damage, truing might not be enough—you may need to replace parts.
Step 3: Set Up Your Truing Stand
Mount the wheel in the stand so it spins freely. If using your bike, secure it in a stand or have someone hold it. Use zip ties or tape to create reference points near the rim on both sides. These will help you see lateral (side-to-side) wobble as the wheel spins.
Step 4: Identify the Problem Areas
Spin the wheel slowly and watch the rim. Mark any spots that move toward or away from your reference points. These are your high and low spots. For radial (up-and-down) issues, look for hops in the rim as it spins.
Step 5: Adjust the Spokes
This is where the magic happens. Remember:
- To correct a lateral wobble: If the rim moves to the left at a certain point, tighten the spokes on the right side or loosen those on the left.
- To fix a radial hop: If the rim bulges outward, tighten the spokes in that area. If it dips inward, loosen them slightly.
Always make small adjustments—quarter turns are plenty. Turn the spoke wrench clockwise to tighten, counterclockwise to loosen. After each adjustment, spin the wheel to check your progress.
Step 6: Check Tension and Evenness
As you work, pluck the spokes like guitar strings. They should have a similar pitch. If some sound much tighter or looser, adjust accordingly. Even tension prevents future problems.
Step 7: Final Check and Test Ride
Once the wheel spins smoothly with minimal wobble, reinstall it on your bike. Take a short, slow ride to confirm everything feels right. Listen for unusual noises and feel for vibrations.
Common Mistakes to Avoid
Even experienced riders make mistakes when truing wheels. Here’s what to watch out for:
Over-Tightening Spokes
Cranking on spoke nipples can strip them or bend the rim. Always use gentle, consistent pressure. If a nipple won’t turn, don’t force it—apply a drop of lubricant and try again later.
Ignoring Radial Trueness
Many riders focus only on lateral wobble and forget about up-and-down hops. Both matter for a smooth ride. Check both planes as you work.
Skipping the Inspection
Jumping straight into adjustments without checking for damage can waste time and worsen problems. Always inspect first.
Using the Wrong Tools
A mismatched spoke wrench can ruin nipples. Invest in the correct size—it’s worth it.
When to Call a Professional
While most minor truing jobs can be done at home, some situations call for expert help:
- The rim is cracked or severely bent
- Multiple spokes are broken
- You’ve tried truing but the wheel still wobbles
- You’re unsure about spoke tension or wheel balance
A professional mechanic has specialized tools and experience to handle complex issues safely.
Tips for Preventing Wheel Damage
The best way to deal with a wobbly wheel is to avoid it in the first place. Here’s how:
- Avoid hard impacts: Skip big jumps or rocks if you’re not prepared.
- Check spoke tension regularly: Especially after rough rides or crashes.
- Use proper tire pressure: Too low or too high can stress the wheel.
- Store your bike properly: Don’t leave it leaning on the wheel for long periods.
Conclusion
Learning how to true a dirt bike wheel is a game-changer. It empowers you to maintain your bike, improve performance, and ride with confidence. With the right tools, a little patience, and this guide, you can tackle wobbles like a pro. Remember: small adjustments make big differences. Take your time, check your work, and always test ride before hitting the trails. Your wheels—and your ride—will thank you.
Frequently Asked Questions
Can I true a wheel with a bent rim?
Minor bends can sometimes be corrected, but severe damage usually requires rim replacement. Truing won’t fix structural issues.
Do I need to true both wheels?
Not always. Only true the wheel that shows wobble. However, checking both during maintenance is a good practice.
How long does it take to true a dirt bike wheel?
For beginners, 30–60 minutes. With experience, you can do it in 15–20 minutes. Rushing leads to mistakes.
What’s the difference between lateral and radial truing?
Lateral truing fixes side-to-side wobble; radial truing corrects up-and-down hops. Both are important for a smooth ride.
Can I use WD-40 on spoke nipples?
WD-40 can help loosen stuck nipples, but use it sparingly. A dedicated light oil is better for long-term maintenance.
Should I true my wheel before every ride?
No, but a quick visual check is wise. Full truing is only needed if you notice wobble or after a hard impact.



