
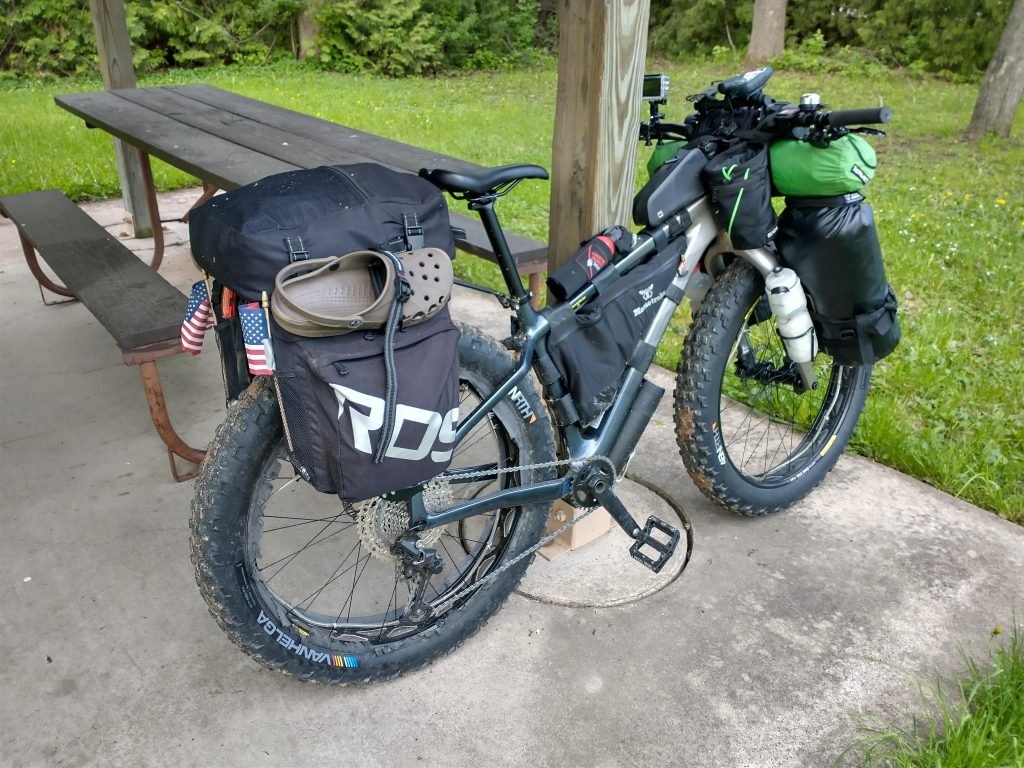
Setting up racks and panniers on your bikepacking bike can transform how you carry gear and enjoy your rides. But if you’ve never done it before, the process might seem tricky or overwhelming.
Don’t worry—you’re about to learn simple, step-by-step tips that make installation easy and effective. By the end, you’ll know exactly how to fit your racks and panniers securely, so your bike feels balanced and ready for any adventure. Keep reading, and get ready to unlock the full potential of your bikepacking setup.
Choosing The Right Racks
Racks are essential for carrying gear on a bikepacking trip. Picking the right ones helps balance weight and keeps your bike stable. This guide covers important points to consider before you buy.
Choosing racks that fit your bike and your needs makes packing easier. You want strong, light racks that work with your frame and gear.
Types Of Racks For Bikepacking
There are several rack types for bikepacking. Each type fits different styles and loads. Choose one that matches your trip and bike.
- Front racks: Hold smaller loads and keep weight low on the bike.
- Rear racks: Carry heavier gear and support larger panniers.
- Seatpost racks: Easy to install but carry limited weight.
- Lowrider racks: Attach low on the fork for better balance.
Material And Weight Considerations
Rack material affects weight and strength. Choose materials that match your riding style and load.
| Material | Weight | Durability | Cost |
| Aluminum | Light | Good | Moderate |
| Steel | Heavy | Very strong | Low |
| Carbon Fiber | Very light | Fragile | High |
| Titanium | Light | Strong | Very high |
Compatibility With Your Bike Frame
Check if racks fit your bike frame. Some frames lack mounting points or need adapters. Measure to confirm fit.
- Look for eyelets on the frame and fork.
- Check tire clearance with the rack installed.
- Verify compatibility with disc brakes or suspension.
- Consider rack size based on frame shape and size.
Selecting Suitable Panniers
Choosing the right panniers is key for a smooth bikepacking trip. They hold your gear and keep it safe on rough trails.
This guide helps you pick panniers that match your needs and riding style.
Capacity And Size Options
Panniers come in many sizes. Pick a size that fits your gear and bike rack.
- Small panniers hold up to 10 liters, good for light packing.
- Medium panniers range from 10 to 20 liters, ideal for most trips.
- Large panniers exceed 20 liters, best for longer adventures.
Waterproof Vs. Water-resistant
Waterproof panniers keep gear dry in heavy rain. Water-resistant ones protect from light moisture.
| Type | Protection Level | Weight |
| Waterproof | Full protection in rain | Heavier |
| Water-Resistant | Protects against splashes | Lighter |
Attachment Systems And Ease Of Use
Panniers attach to racks in different ways. Choose a system that fits your bike and is easy to use.
- Hook-and-loop straps are simple but may loosen on rough roads.
- Clip-on systems lock panniers firmly to racks.
- Quick-release mounts allow fast removal and attachment.
Preparing Your Bike
Setting up racks and panniers on your bikepacking bike needs some preparation. This helps make sure everything fits well and works safely.
Taking time to prepare your bike will make your trip smoother and more comfortable. Let’s look at the key steps.
Checking Mounting Points
Look at your bike frame to find where racks can attach. Most bikes have special holes or eyelets for this.
Check if the mounting points are clean and not damaged. This will help racks fit tightly and stay secure.
- Find eyelets near the rear dropouts and seat stays
- Look for front fork mounts if you want front racks
- Check that the threads in the holes are not stripped
- Clean any dirt or rust around these points
Tools Needed For Installation
Gathering the right tools before you start helps the installation go smoothly. You will need a few common bike tools.
- Allen wrenches (usually 4mm and 5mm)
- Adjustable wrench or spanner
- Torque wrench for correct tightening
- Screwdrivers for any small screws
- Grease to protect threads and bolts
Having these tools ready saves time and prevents damage to your bike or racks.
Safety Checks Before Assembly
Before you attach racks and panniers, check the bike for any safety issues. This keeps you safe on the road.
- Inspect the frame for cracks or dents
- Make sure brakes and tires work properly
- Check quick-release levers are tight
- Confirm wheel alignment is straight
- Verify all bolts on the bike are secure
Fixing any problems before assembly helps avoid accidents and gear loss during your trip.
Installing The Racks
Installing racks on a bikepacking bike lets you carry extra gear safely. Proper installation keeps your load stable on rough trails.
Follow these steps to mount your racks correctly and ensure a secure fit for your panniers.
Step-by-step Mounting Process
Start by gathering all necessary tools like Allen keys and wrenches. Identify the mounting points on your bike frame where racks attach.
- Align the rack’s mounting arms with the frame eyelets.
- Insert bolts through the rack and into the eyelets.
- Hand-tighten the bolts to hold the rack in place.
- Double-check alignment before fully tightening the bolts.
Adjusting Rack Position
Adjust the rack so it sits evenly and clears the wheels and brakes. Make sure the rack is level to keep your panniers balanced.
- Check clearance between rack and tires.
- Adjust height using spacers if needed.
- Move the rack forward or backward to avoid brake interference.
- Ensure the rack does not touch the frame or cables.
Securing Bolts And Fasteners
Use a torque wrench to tighten bolts to the recommended specifications. Loose bolts can cause damage or unsafe riding.
| Bolt Location | Tightening Torque (Nm) |
| Lower Mounting Points | 6 – 8 |
| Upper Mounting Points | 5 – 7 |
| Accessory Mounts | 4 – 6 |
Attaching Panniers To Racks
Attaching panniers correctly helps keep your bike stable and safe. It also makes your ride more comfortable. You need to focus on alignment, weight, and security for best results.
This guide covers key steps for setting up panniers on bikepacking racks. Follow each section carefully to avoid problems while riding.
Proper Alignment Techniques
Align panniers evenly on both sides of the rack. This prevents the bike from leaning. Make sure the hooks or clips fit snugly on the rack frame.
- Check that pannier hooks match the rack size.
- Attach panniers so they hang straight down.
- Avoid letting panniers touch the wheel or brakes.
- Adjust the height so panniers clear the ground well.
Balancing Weight Distribution
Keep weight balanced to improve bike control. Uneven load can make steering hard and cause accidents. Split heavy items evenly between panniers.
| Side | Suggested Load |
|---|---|
| Left | Heavier gear like tools, water |
| Right | Lighter items such as clothes, food |
Testing Stability And Security
Test panniers before riding to avoid surprises. Check if they stay in place on bumpy roads. Tighten all straps and locks firmly.
Use this checklist to test pannier stability:
- Shake the bike gently to check pannier movement.
- Ride slowly on a flat surface and listen for rattles.
- Look for any rubbing against tires or frame.
- Retighten straps if panniers shift or wobble.

Credit: www.reddit.com
Optimizing Load For Bikepacking
Setting up racks and panniers right helps balance your bike. It makes your ride smoother and safer. You can carry everything you need without trouble.
Load your bike to keep weight steady on both sides. Think about how you place gear so it stays stable on rough trails.
Packing Tips For Even Weight
Keep your bike steady by packing weight evenly on both sides. Put heavy items low and close to the frame. This helps with balance and control.
- Place heavy gear like tools and food near the bottom
- Spread weight equally on left and right panniers
- Use frame bags for medium-weight items
- Keep light gear on top or in handlebar packs
- Check your load before each ride
Avoiding Common Loading Mistakes
Many riders make loading errors that cause problems on the trail. Avoid overloading one side or packing too much weight high up. These mistakes hurt balance and safety.
| Mistake | Effect | Fix |
| Uneven weight | Bike pulls to one side | Distribute gear evenly |
| Heavy weight high up | Bike feels unstable | Place heavy items low |
| Loose straps | Gear shifts and falls | Tighten all straps |
| Overloading racks | Damage to bike or gear | Check weight limits |
Maintaining Accessibility On The Trail
Keep important gear easy to reach without unpacking everything. Place snacks, maps, and tools where you can grab them fast. This saves time and keeps you moving.
- Put snacks in handlebar or top tube bags
- Store tools in side panniers near the top
- Keep rain gear in an easy spot
- Label bags if needed for quick finds
- Test your setup before heading out
Maintenance And Troubleshooting
Setting up racks and panniers on a bikepacking bike is just the start. Regular care keeps your gear safe and working well. Small problems can become big ones if you ignore them.
Knowing how to check and fix issues helps you ride longer and safer. You can also improve your setup for better use and comfort.
Regular Rack And Pannier Checks
Inspect your racks and panniers often. Look for loose bolts, cracks, and worn straps. Make sure everything fits tightly and does not move during rides.
- Check all bolts and screws for tightness
- Look for frame or rack cracks
- Examine pannier straps and clips for wear
- Test that panniers attach securely
- Clean dirt and mud from rack and pannier parts
Fixing Common Issues On The Road
Loose racks or panniers can cause noise and danger. Tighten bolts with a multi-tool. Replace broken straps with zip ties or spare straps. Adjust rack alignment if it rubs against tires.
- Tighten loose bolts with a wrench or multi-tool
- Use zip ties to fix broken straps temporarily
- Realign racks to avoid tire contact
- Check pannier clips for damage and replace if needed
- Carry spare parts for quick fixes
Upgrading For Better Performance
Improving your rack and pannier setup makes your rides easier. Use lighter racks for less weight. Choose panniers with better waterproofing. Add extra attachment points for more gear.
- Switch to aluminum or carbon racks for weight savings
- Pick panniers with strong waterproof fabric
- Get racks with more mounting options
- Use padded straps to protect your bike frame
- Add reflective elements for night safety

Credit: www.reddit.com

Credit: www.reddit.com
Frequently Asked Questions
How Do I Install Racks On A Bikepacking Bike?
First, align the rack with mounting points on your bike frame. Use appropriate bolts and tighten securely. Check rack stability before loading gear to ensure safety during rides.
What Types Of Panniers Work Best For Bikepacking?
Waterproof, durable panniers with multiple compartments work best. Choose lightweight options to avoid extra bike strain. Look for easy attachment systems for quick setup and removal.
Can I Use Front And Rear Racks Together?
Yes, using both front and rear racks balances weight distribution. This improves bike stability and control. Ensure your bike frame supports dual racks safely before installation.
How Much Weight Can Bikepacking Racks Carry?
Most racks carry between 20 to 55 pounds safely. Always check manufacturer weight limits. Distribute weight evenly to maintain bike handling and avoid damage.
Conclusion
Setting up racks and panniers on a bikepacking bike makes your rides easier. It helps carry gear safely and keeps your bike balanced. Choose racks that fit your bike and panniers that hold what you need. Attach everything tightly and check for any movement.
Test your setup on a short ride before a long trip. A well-packed bike lets you enjoy the journey more. Simple steps lead to better rides and less worry. Now, you are ready to hit the road with confidence.



