
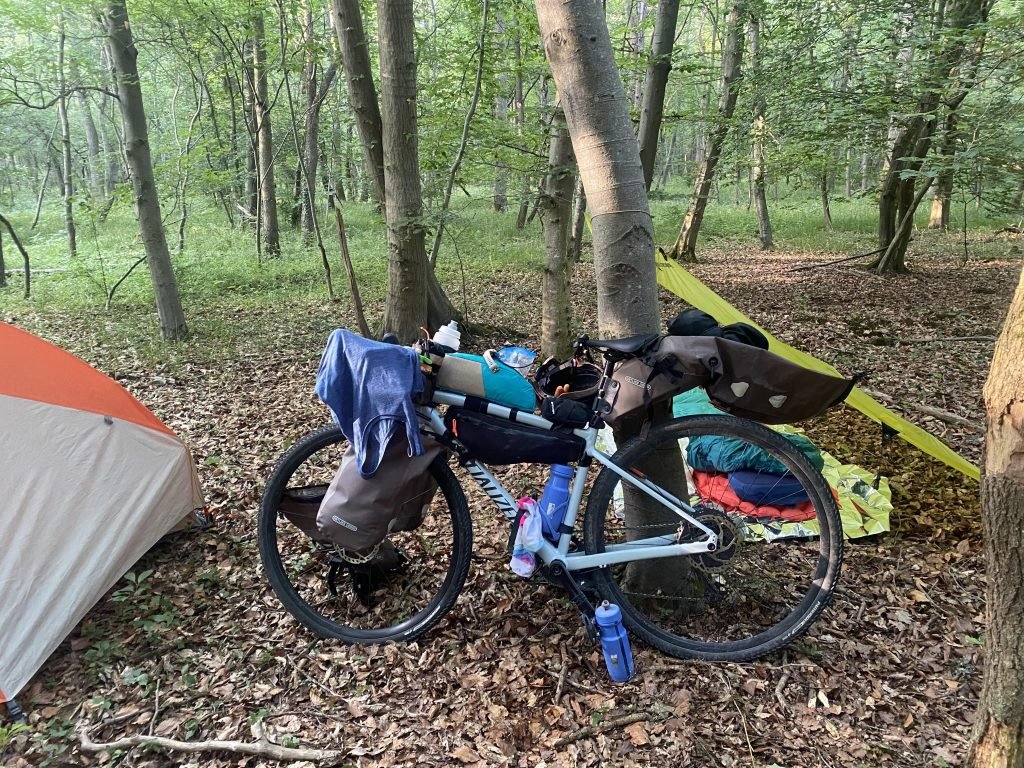
Setting up a tent after a long day of bikepacking can feel tricky, especially when your gear is packed tight on your bike. But what if you could make this step simple and stress-free?
In this guide, you’ll learn how to set up a tent using your bikepacking bike as part of your shelter. This clever trick saves space, speeds up your setup, and lets you rest sooner. Keep reading, and you’ll discover easy steps that turn your bike into more than just a ride—it becomes your camping partner.
Your next outdoor night just got a whole lot easier.

Credit: us.alpkit.com
Choosing The Right Tent
Setting up a tent with a bikepacking bike needs the right gear. Picking the right tent is very important for a good trip.
You want a tent that fits your needs and works well with your bike gear. This guide helps you choose the best tent for your trip.
Tent Size And Weight
Your tent should be light enough to carry but big enough to sleep comfortably. A heavy tent slows you down on the road.
Look for tents that fit one or two people. Make sure there is space for your gear inside or in a vestibule.
- Choose a tent weight under 3 pounds for easy carrying
- Pick a size that fits your body and gear comfortably
- Consider space for changing clothes inside the tent
Weather Resistance
Check the tent’s ability to protect you from rain, wind, and cold. Weather resistance is key for a safe trip.
Look for tents with strong waterproof materials and sturdy poles. Good ventilation helps reduce inside moisture.
- Waterproof rain fly and floor to stay dry
- Strong poles to hold the tent in wind
- Mesh panels for airflow to avoid condensation
Packability
A tent that packs small fits better on your bike. It saves space for other important gear.
Look for tents with compact designs and lightweight materials. Easy setup tents save time and effort after riding.
- Small packed size to fit bike bags or frame packs
- Lightweight materials to keep bike load low
- Simple setup designs for quick pitching and breaking down

Credit: www.reddit.com
Essential Gear For Bikepacking
Bikepacking combines biking and camping in one adventure. Carrying the right gear makes setting up a tent easy and quick. Having essential items keeps your trip safe and comfortable.
This guide covers important gear to bring for bikepacking. It focuses on bags, tent accessories, and tools.
Bikepacking Bags
Bikepacking bags help you carry your gear securely on your bike. They attach to different parts of the bike frame and keep your things organized.
Choose bags that fit your bike and hold your camping gear well. Waterproof bags protect your items from rain and mud.
- Frame bags fit inside the main triangle of the bike
- Handlebar bags carry lightweight but bulky items
- Saddle bags attach under the seat for extra storage
- Top tube bags keep essentials easy to reach
Tent Accessories
Tent accessories make pitching your tent easier and more stable. They also improve comfort and protection during your stay.
Bring items that help you set up your tent on different surfaces. Extras like footprints and guy lines add durability and security.
- Tent stakes to secure your tent to the ground
- Guy lines for extra wind resistance
- Tent footprint to protect the tent floor
- Repair tape for quick fixes on the tent fabric
- Small mallet or hammer to drive stakes
Tools And Repair Kits
Bike tools and repair kits are vital for fixing problems on the road. Carry basic tools to handle common bike issues quickly.
Also include repair items for your tent and gear. Being prepared helps you avoid delays and discomfort during your trip.
- Multi-tool with Allen keys and screwdrivers
- Spare inner tubes and patch kit
- Mini pump or CO2 inflator
- Chain tool for fixing broken chains
- Zip ties and duct tape for temporary repairs
Selecting The Campsite
Choosing the right campsite is important for a good bikepacking trip. A good spot keeps you safe and comfortable. It also protects the environment.
Think about the ground, safety, and water access before setting up your tent. These factors make your stay better and easier.
Terrain And Surface
Pick flat ground to set up your tent. A flat surface helps your tent stand firm. It also makes sleeping more comfortable.
Look for soft soil or grass. Avoid rocky or wet areas. Hard or uneven ground can damage your tent and hurt your sleep.
- Flat areas prevent tent damage
- Soft soil or grass is easy to stake
- Rocky or wet ground is uncomfortable
- Avoid slopes to prevent sliding
Safety Considerations
Check for hazards like falling branches or loose rocks. Avoid camping under dead trees or steep cliffs. These can be dangerous in wind or rain.
Keep your bike close but out of the path of falling debris. Also, set up away from animal trails or insect nests to stay safe at night.
- Avoid dead trees and unstable branches
- Stay clear of steep cliffs or rockfall zones
- Keep your bike nearby but safe from hazards
- Check for signs of animals or insects
Proximity To Water
Camp near water for easy access to drinking and cooking. But do not set up too close. Water can attract bugs and flood your tent in rain.
Stay at least 200 feet (60 meters) from lakes or streams. This distance helps protect water sources and keeps your campsite dry.
- Camp near water for convenience
- Keep a safe distance to avoid bugs and flooding
- Follow local rules about water protection zones
- Use a water filter before drinking
Tent Setup Techniques
Setting up a tent with a bikepacking bike needs special care. You use the bike as part of your tent setup.
These tips will help you pitch your tent safely and quickly. You will also learn how to use your bike to support the tent.
Unpacking And Organizing
Start by unpacking your tent from its bag. Lay out all parts like poles, stakes, and rainfly.
Keep your gear close to your bike. This helps you find items faster and avoid losing anything.
- Find a flat, clear spot to unpack
- Organize tent parts by type
- Check for all pieces before pitching
Pitching The Tent
Start by spreading the tent body on the ground. Make sure the door faces the right way.
Assemble the poles and insert them through the sleeves or clips. Raise the tent gently to avoid damage.
- Place tent on level ground
- Attach poles to tent body securely
- Stake down corners to hold shape
Securing The Tent With Bike Support
Use your bike to add extra support to the tent. Lean the bike against one side or use it to hold guy lines.
Make sure the bike is stable and will not fall. This helps keep the tent steady in wind or uneven ground.
- Place bike near tent edge for support
- Attach guy lines to bike frame if possible
- Check bike stability before sleeping
Using Your Bike As A Tent Anchor
Bikepacking often means limited space and gear. Using your bike as a tent anchor saves room and adds stability. This method works well if you don’t have many stakes or rocky ground.
Your bike’s frame and wheels can hold down guy lines and support the tent’s shape. It makes setting up quick and practical on rough terrain or tight campsites.
Attaching Guy Lines To The Bike
Attach guy lines to strong bike parts like the frame or handlebars. Avoid weak areas that might bend or break. Use straps or cords that won’t slip or damage paint.
Secure the lines tight but not too tight. This keeps the tent stable and stops the bike from tipping over.
- Use soft straps or cloth loops to protect the bike
- Fasten guy lines to the frame tubes or rear rack
- Keep tension balanced on all sides for stability
- Check knots to avoid slipping during wind
Stabilizing The Tent Frame
The bike acts as a strong anchor for the tent’s poles. Connect the tent’s corners or pole ends to the bike using guy lines. This helps the frame hold its shape in wind.
Use the bike’s weight to keep the tent from moving. Adjust the guy lines to keep the tent taut and balanced.
- Attach tent corners to the bike frame or wheels
- Distribute tension evenly to avoid stress points
- Check that poles stay straight and secure
- Use extra lines if needed for windy conditions
Avoiding Damage To The Bike
Protect your bike from scratches and pressure. Use padding where guy lines touch the frame. Avoid knots that tighten too much on thin parts.
Keep sharp tent parts away from cables and brakes. Remove dirt or moisture before packing to stop rust or wear.
- Use foam or cloth padding under straps
- Check for paint scratches after setup
- Don’t attach lines to brake or gear cables
- Clean and dry the bike before storage
Tips For Quick Assembly
Setting up a tent with a bikepacking bike can save time and energy. The right approach helps you enjoy your trip more.
These tips focus on preparing, packing, and practicing to make tent setup faster and easier.
Prepping Before Arrival
Before you reach your campsite, check your gear and plan your setup spot. Look for flat ground free of rocks and roots. Make sure your bike is stable when parked.
- Choose a flat and dry area to pitch your tent.
- Clear the ground of sharp objects.
- Park your bike where it won’t tip over.
- Unpack essential tent parts first.
Efficient Packing Methods
Organizing your gear inside your bags speeds up tent setup. Use packing cubes or stuff sacks to keep parts separate. Label bags for easy access.
| Bag | Contents |
| Stuff Sack 1 | Tent Poles |
| Stuff Sack 2 | Tent Body |
| Stuff Sack 3 | Rainfly & Stakes |
| Easy Access Pocket | Mallet & Repair Kit |
Practice Makes Perfect
Practice setting up your tent at home or a park. This helps you learn the process and find ways to speed it up. You will also spot missing parts early.
- Set up your tent a few times before your trip.
- Time yourself and try to beat your best time.
- Check instructions for any unclear steps.
- Practice folding and packing the tent neatly.
Common Challenges And Solutions
Setting up a tent with a bikepacking bike can be tricky. You may face wind, uneven ground, or tent pole problems.
Knowing how to handle these issues will make your camping easier and safer.
Dealing With Windy Conditions
Wind can blow your tent away or cause damage. You need to secure your tent well and use your bike to help block the wind.
- Place the bike as a windbreak on the tent’s windward side.
- Use extra guy lines and stakes to tighten the tent.
- Choose a sheltered spot, like behind bushes or rocks.
- Lower the tent profile by adjusting poles if the wind is strong.
Handling Uneven Ground
Uneven ground can make your tent unstable and uncomfortable. You can fix this by careful site choice and adjusting your setup.
| Problem | Solution |
| Slopes | Set tent across the slope, not up and down |
| Rocks and roots | Clear the area or move to a smoother spot |
| Soft ground | Use longer stakes or rocks to hold the tent firmly |
| Uneven surface | Use a sleeping pad to level your sleeping area |
Fixing Tent Pole Issues
Tent poles may bend, break, or not fit properly. Carry basic repair tools and know how to fix poles quickly.
- Bring spare pole sections or repair splints.
- Use duct tape or zip ties to hold broken poles together.
- Check pole joints before setup to avoid surprises.
- Practice quick fixes before your trip.

Credit: www.reddit.com
Packing Up And Leaving No Trace
Packing up your tent with a bikepacking bike needs care and respect for nature. Leaving no trace keeps outdoor areas clean and safe for others.
Properly cleaning and storing your tent, organizing your gear, and respecting the environment help protect wild places.
Tent Cleaning And Drying
Clean your tent before packing it away. Remove dirt, leaves, and bugs. Dry it fully to stop mold and bad smells.
- Shake out all debris from inside the tent
- Wipe down with a damp cloth if needed
- Air dry the tent completely before packing
- Store in a dry, cool place after the trip
Bike Packing Strategies For Departure
Organize your gear so you can pack quickly and safely. Secure everything tightly to your bike to avoid damage or loss.
- Empty all bags and check for trash
- Fold your tent neatly and pack it in its bag
- Place heavy items low and close to the frame
- Balance weight evenly on both sides
- Double-check all straps and clips are tight
Environmental Responsibility
Respect nature by following simple rules. Avoid disturbing plants and animals. Leave your campsite cleaner than you found it.
| Action | Reason |
| Pack out all trash | Keeps nature clean and safe |
| Use existing fire rings or stoves | Prevents new fire scars |
| Stay on marked trails | Protects plant life and soil |
| Respect wildlife distance | Prevents stress to animals |
Frequently Asked Questions
How Do I Choose The Best Spot For Tent Setup With A Bike?
Choose a flat, dry area away from wind and water. Avoid rocky or uneven ground. Look for natural windbreaks like trees or bushes. This ensures stability and comfort during your bikepacking trip. Clear debris and test the ground before pitching your tent.
What Gear Is Essential For Tent Setup On A Bikepacking Trip?
Essential gear includes a lightweight tent, stakes, guylines, and a compact sleeping pad. Bring a multitool and repair kit for emergencies. Pack a small mallet or rock to secure stakes. Organize gear for quick setup and breakdown to save time.
How Can I Secure My Tent Against Strong Winds While Bikepacking?
Use all guylines and stakes firmly in the ground. Pitch your tent with the smallest side facing the wind. Add extra guylines if available. Use natural barriers like rocks or bushes for additional protection. Tighten all cords regularly to maintain tent tension.
What Is The Best Way To Carry A Tent On A Bikepacking Bike?
Store your tent in a waterproof stuff sack. Attach it to the frame, handlebars, or seat pack securely. Use compression straps to minimize bulk. Keep it accessible for quick setup. Distribute weight evenly to maintain bike balance and ride comfort.
Conclusion
Setting up a tent with a bikepacking bike is now simple. Follow the steps, and you’ll be ready. Secure your tent gear efficiently on your bike. Choose a flat spot for a good rest. Practice makes you faster and more comfortable.
Enjoy the freedom of bikepacking and camping combined. The adventure awaits. Gear up, explore new trails, and sleep under the stars. Always respect nature and pack out your trash. Happy trails and peaceful nights under your tent!



