
Have you ever felt uneasy or unsafe while riding your bike because you couldn’t comfortably reach your brake levers? You’re not alone.
Many cyclists experience the same issue, but the good news is that it’s easily fixable. Adjusting your brake lever reach can transform your biking experience, making it more enjoyable and secure. Imagine the confidence you’ll feel when your bike responds perfectly to your touch, enhancing your control and safety.
By learning how to set your brake lever reach correctly, you’re not just adjusting a mechanism; you’re elevating your entire ride. Stick with us as we guide you through the simple steps to ensure your bike fits you like a glove, providing you with the assurance you need every time you hit the road. Ready to ride with confidence? Let’s dive in!

Credit: www.reddit.com
Understanding Brake Lever Reach
Brake lever reach is important for safety. It lets you adjust the distance. The reach ensures comfort and control while riding. A proper adjustment prevents hand strain. It also helps maintain control during sudden stops. Always check your reach before riding. If it’s too far, adjust it closer. If it’s too close, move it further away. This adjustment is done using a small screw. Turn the screw to change the lever’s position. Make small adjustments and test frequently. Aim for a natural grip position. This enhances your riding experience.

Credit: bikeco.com
Tools Needed For Adjustment
Adjusting brake lever reach is simple with the right tools. First, ensure you have a screwdriver. A Phillips or flat-head works best. You’ll also need an allen wrench. This is often required for the adjustment screws. A small ruleror tape measure helps measure the reach. A clean clothis useful to wipe the levers.
For some bikes, a special toolmight be needed. Check the bike’s manual for specifics. Having a flashlightcan be handy. It helps you see clearly in small spaces. Ensure your workspace is well-lit.
Keep all tools close by. This makes the adjustment process smoother. Always check the bike’s manual for any special requirements.
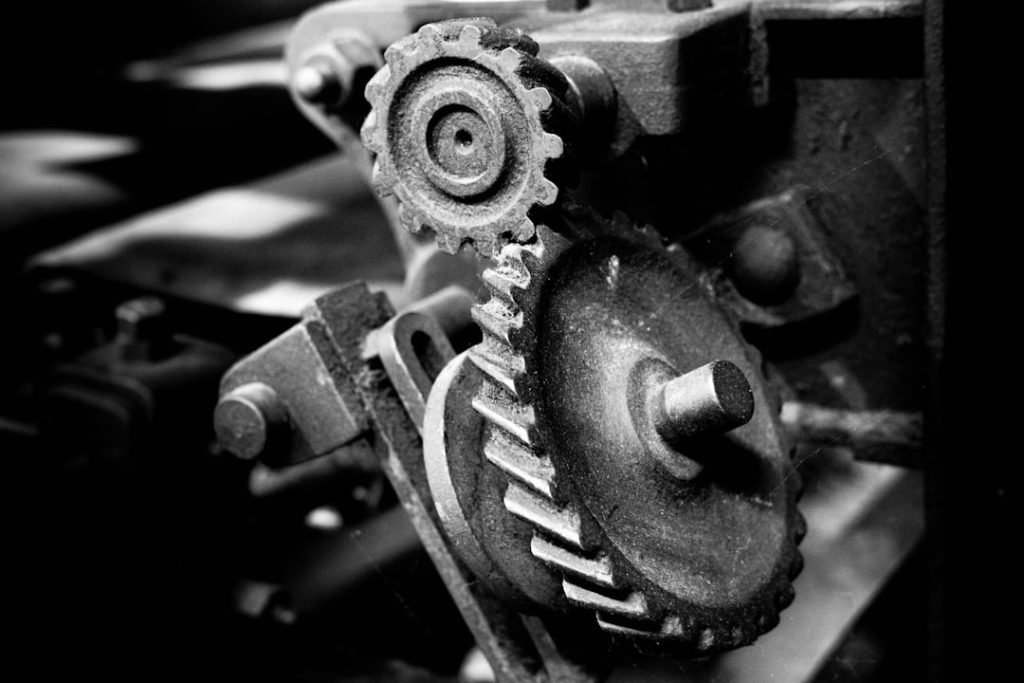
Locating The Adjustment Screw
Find the brake lever on your bike’s handlebars. Look closely at the lever. Spot the small screw near the brake lever pivot. This screw is called the adjustment screw. It helps you change the lever reach. Make sure your bike is on a stable surface. This will prevent it from tipping over. Hold the handlebars firmly while you work. The adjustment screw might be covered. Check if there is a rubber cap. If so, gently remove it.
Turning the screw changes the lever’s position. Clockwise makes the lever closer. Counter-clockwise makes it further. Use a small screwdriver for adjustments. Turn slowly and check the lever position. Adjust until it’s comfortable for your fingers. Test the brakes after adjusting. Ensure they work well and feel right.
Step-by-step Adjustment Process
Adjusting brake lever reach is crucial for comfortable cycling. Begin by loosening the adjustment screw near the lever. Turn it clockwise to decrease reach or counterclockwise to increase it. Test the feel and make further adjustments as needed, ensuring a secure grip for optimal control.
Preparing The Bike
Ensure the bike is stable and won’t tip over. Use a bike stand if available. Check the brake lever for any dirt or debris. Clean it with a soft cloth. Locate the adjustment screw on the lever. This screw is usually near the lever handle. Make sure you have the right tool to turn it.Turning The Adjustment Screw
Turn the adjustment screw slowly. Turn clockwise to shorten the reach. Turn counterclockwise to lengthen it. Do small turns and test in between. Feel the lever to check the distance from the handlebar. Aim for a comfortable grip for your hand size.Testing The Reach
Squeeze the brake lever gently. Ensure it feels comfortable and secure. Test it while riding slowly. Make sure you can stop safely. Adjust again if needed. Double-check that the brakes work well and are not too tight. `Common Mistakes To Avoid
Many people ignore the importance of brake lever reach. They think it doesn’t matter. But incorrect reach can be dangerous. One common mistake is setting the lever too far. This makes it hard to brake quickly. Another mistake is setting it too close. This can make the brakes feel jumpy. Balance is key.
Some don’t check both levers. They adjust one and forget the other. It’s important to have both levers set right. Also, forgetting to test after adjusting is a mistake. Always test in a safe place. This helps ensure safety before riding. Avoid these mistakes for a smoother ride.
Tips For Comfortable Lever Reach
Adjusting brake lever reach ensures comfort and control while riding. Customize lever positions to fit your hand size. This reduces strain and improves safety.
Considering Hand Size
Choose a brake lever that fits your hand. Small hands need closer reach. Big hands need more distance. Adjust the lever so it’s easy to grab. You should not stretch your fingers. Ensure a firm grip on the lever.
Adjusting For Riding Style
Different riding styles need different lever positions. Mountain bikers need quick access. Road cyclists need comfort for long rides. Adjust the lever to match your riding style. This helps in better control and comfort.
Checking For Ergonomic Position
Make sure your wrist is straight while holding the lever. A bent wrist can cause pain. Adjust the lever angle to avoid this. Ensure the lever is in line with your fingers. This helps you brake easily and safely.
Signs Of Incorrect Lever Reach
Brake lever reachis crucial for safe biking. If you can’t reach the lever comfortably, there’s a problem. Your fingers should easily wrap around the lever. Struggling to grip means the reach is wrong.
Hand fatigueduring rides is another sign. If your hands hurt or tire quickly, check the lever reach. Incorrect reach can cause discomfort and tiredness.
Look for uneven braking. If one brake works better, adjust the lever reach. Proper reach ensures both brakes work evenly. This helps in smooth and safe biking.
- Fingers should wrap easily.
- Hands shouldn’t get tired.
- Brakes should work evenly.
Check these signs and adjust the lever for a better ride.
Expert Recommendations
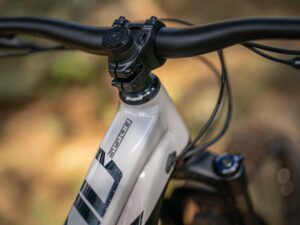
Proper brake lever reach is essential for comfortable riding. Begin by sitting on your bike. Ensure your hands rest naturally on the handlebars. Your fingers should easily touch the brake levers without stretching. If the levers are too far, adjust them closer.
Use the adjustment screw near the brake lever. Turn it clockwise to bring levers closer. Turn it counterclockwise to move them away. Always test the reach after adjustments. Ensure that you can brake easily and safely.
Check both levers for equal reach. This ensures balanced braking. A balanced setup helps in better bike control. Keep practicing until it feels right. Remember, safety comes first!
Credit: blog.rodalink.com
Frequently Asked Questions
How Do You Adjust The Reach Of Your Brake Levers?
To adjust your brake levers, locate the reach adjustment screw. Turn it clockwise to reduce reach or counterclockwise to increase. Ensure levers are comfortable and accessible. Test the brakes to confirm proper adjustment. Always prioritize safety and ensure adjustments suit your hand size.
How To Adjust 105 Lever Reach?
Turn the adjustment screw near the brake lever clockwise to reduce reach. Counterclockwise increases reach. Check lever position frequently for comfort and safety. Ensure proper brake function after adjustments. For detailed instructions, refer to the Shimano manual. Regularly check and adjust for optimal performance.
How To Position Brake Levers?
Position brake levers so they’re in line with your arms while riding. Ensure easy reach without straining fingers. The levers should be angled slightly downward for comfort. Adjust for instant braking response. Make sure they’re securely tightened. Test before riding to ensure safety and comfort.
How To Level Brake Levers?
To level brake levers, loosen the clamp bolts slightly. Adjust levers to align with your forearm angle. Tighten bolts securely, ensuring levers are comfortable and accessible during riding. Test by squeezing the brakes to confirm proper alignment. Regularly check for looseness and adjust as needed for optimal performance.
Conclusion
Adjusting brake lever reach enhances safety and control. It’s crucial for comfort. Ensure levers suit hand size. Small adjustments make a big difference. Prioritize comfort over speed. Test your brakes after any change. Feel the grip. Enjoy smoother rides. Regular checks prevent issues.
Keep tools handy for quick fixes. Practice makes perfect. Familiarize yourself with your bike’s mechanics. Confidence grows with each ride. Share tips with fellow riders. Everyone benefits from shared knowledge. Safety first, always. Happy cycling!


