
Are your mountain bike brakes starting to feel a little less responsive than they used to? Or maybe you’re hearing that unmistakable squeaking sound every time you hit the trails?
It might be time to replace your brake pads. Don’t worry, though—it’s easier than you think. In this guide, you’ll discover how to replace mountain bike brake pads with ease, even if you’re not a seasoned bike mechanic. Imagine the confidence you’ll feel hitting those trails with brakes that respond exactly when you need them to.
Plus, taking care of this yourself can save you a trip to the shop and some cash. Let’s dive into the step-by-step process so you can get back to riding safely and smoothly.

Credit: www.youtube.com
Types Of Brake Pads
Organic pads are made from natural materials. They are softer and quieter. These pads wear out faster. But they are gentle on the bike’s rotors. Ideal for easy rides on smooth trails. Organic pads suit beginners well. They offer a smooth braking experience.
Metallic pads contain metal fibers. They are strong and durable. Perfect for tough, rocky trails. These pads last longer and handle heat well. But they can be noisy. Metallic pads are best for experienced riders. They provide powerful stopping force.
Semi-metallic pads blend organic and metallic materials. They offer balanced performance. These pads are quieter than metallic ones. But they last longer than organic pads. Good for mixed terrain rides. Semi-metallic pads are versatile and reliable.
Tools Needed
Gather essential tools like a screwdriver, hex key set, and pliers. Ensure you have new brake pads and cleaning materials. A bike stand and gloves can make the process smoother and safer.
Basic Tools
- Allen wrench set:Essential for most bikes.
- Flathead screwdriver:Helps in removing brake pads.
- Needle nose pliers:Useful for grip and precision.
- Clean cloth:Keeps everything tidy.
Specialized Tools
- Brake pad spreader:Widens brake pads.
- Torque wrench:Ensures correct tightness.
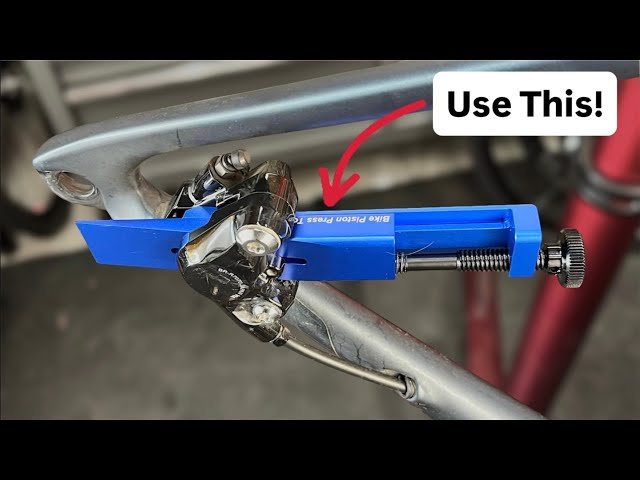
- Disc brake piston tool:Adjusts pistons safely.
Removing Old Brake Pads
Removing old brake pads is a simple task. Loosen the bolts holding the pads in place. Slide the worn pads out carefully.
Loosening The Caliper
First, find the caliper bolts on your bike. These bolts hold the brake pads. Use a wrench to loosen the bolts. Turn them counterclockwise. This will help you remove the caliper. Be careful not to lose any small parts. Keep them safe in a box or tray.
Extracting The Pads
With the caliper loose, gently pull out the old brake pads. They might be stuck, so use a little force. Avoid using too much force to not damage anything. Check the pads for wear. Worn pads are thin and may have grooves. If they are worn, they need replacing. Place the old pads in a safe spot. This helps you remember how they fit.
Installing New Brake Pads
Changing mountain bike brake pads enhances safety and performance. Start by removing the wheel to access the brakes. Slide out the old pads and insert new ones, ensuring they fit snugly. Reattach the wheel, then test the brakes to confirm proper function.
Positioning The Pads
Align the new pads with the brake caliper. Ensure pads face the wheel rim. Hold them steady while checking their position. Adjust if they look crooked. Keep them parallel to the rim surface. This ensures smooth braking. Double-check that they do not touch the tire.
Securing The Caliper
Tighten the caliper screws carefully. Make sure they are firm but not too tight. Test the brake lever for any loose feeling. Check the pad alignment once more. Ensure the wheel spins freely. Adjust screws if necessary. Repeat this until everything feels secure.
Adjusting Brake Calipers
Loosen the bolt on the brake caliper. Make sure it moves freely. This helps in proper alignment. Check the gap between the pads and the wheel rim. Ensure it’s equal on both sides. Tighten the bolt after adjusting. This keeps the caliper in place.
Aligning The Caliper
Spin the wheel slowly. Watch how the brake pads touch the rim. Adjust the caliper if needed. Make sure it doesn’t rub against the tire. Tighten the bolts once aligned. This ensures smooth braking.
Testing Brake Function
Pull the brake lever gently. Feel how the brakes respond. Make sure they stop the wheel quickly. Listen for any strange noises. Adjust the calipers again if needed. Test both front and rear brakes. Ensure both work well before riding.

Credit: www.tiktok.com
Maintenance Tips
Learn to replace mountain bike brake pads with ease. Ensure safety by checking pad wear regularly. Gather necessary tools, remove the wheel, and detach the old pads. Install new ones, align them properly, and test the brakes. Regular maintenance keeps your ride smooth and safe.
Regular Inspections
Check your bike’s brake pads often. Look for wear and tear. Worn-out pads need changing. Ensure the pads are not too thin. Thin pads can damage the bike. Also, listen for unusual noiseswhen braking. Squeaking can mean trouble. It might be time to replace the pads.
Cleaning And Care
Keep the brake pads clean. Dirt and grime affect the brakes. Use a soft clothto wipe them. Avoid harsh cleaners. They can damage the pads. Water and mild soap work best. Dry the pads after cleaning. Wet pads do not work well. Store your bike in a dry place. Moisture can harm the brake system.
Troubleshooting Common Issues
Replacing mountain bike brake pads involves removing the wheel and unscrewing the pad holder. Slide out the old pads, insert new ones, and ensure they align properly with the rotor. Check the adjustment by squeezing the brake lever to confirm smooth operation.
Squeaking Noises
Squeaking brakes can be annoying. Dirt and dust often cause this problem. Clean the brake pads using a damp cloth. Avoid using too much water. Check if the pads are wet. Wet pads can squeak. Let them dry completely. If the noise continues, inspect the brake pads. Look for any wear or damage. Replace them if necessary. Sometimes, pads need adjustment. Make sure they touch the rim properly.Uneven Wear
Uneven wear leads to poor braking. Check the pads regularly. Ensure they wear evenly on both sides. Misaligned brakes cause uneven wear. Adjust the brake arms to fix this. Look for loose or bent parts. Tighten or replace them as needed. Check the rim for damage. A damaged rim affects pad wear. Always keep an eye on the pad thickness. Replace them when they get too thin. `
Credit: www.youtube.com
Frequently Asked Questions
Can You Change Bike Brake Pads Yourself?
Yes, you can change bike brake pads yourself. Gather tools like a wrench and new brake pads. Follow the bike manufacturer’s instructions. Ensure safety by securing the bike and testing the brakes after replacement. It’s a simple process suitable for most riders.
How Often Should You Change Your Mtb Brake Pads?
Change MTB brake pads every 500-700 miles. Inspect regularly for wear and replace if less than 1. 5mm thick. Riding conditions like mud and rain can accelerate wear, so adjust accordingly. Always ensure optimal braking performance for safety.
Can You Replace Bike Brake Pads Without Removing The Wheel?
Yes, you can replace bike brake pads without removing the wheel. Ensure the bike is stable and secure. Loosen the pad retaining bolts or clips. Slide the old pads out and insert new ones. Adjust the alignment and tighten the bolts.
Test the brakes for proper function before riding.
What Is The Rule Of Thumb When Replacing Brake Pads?
Replace brake pads every 25,000 to 70,000 miles, depending on driving habits and conditions. Check thickness regularly. Replace when pads are less than 3mm thick. Listen for squealing noises, indicating wear. Ensure even wear on both sides. Regular maintenance ensures safety and optimal performance.
Conclusion
Replacing mountain bike brake pads is simple and rewarding. First, gather your tools and new brake pads. Remove the old pads carefully. Install the new ones securely. Check alignment and test brakes for safety. Regular maintenance keeps your bike reliable.
Enjoy smoother rides with effective braking. Ensure your safety on every trail. Remember, practice makes perfect. Follow these steps to master the process. Keep exploring with confidence. Brake pad replacement is a handy skill for every rider. Embrace the adventure with well-maintained equipment.
Happy cycling!



