
Is your commuter bike chain feeling loose or making strange noises? Replacing your bike chain might seem tricky, but it’s easier than you think—and it can save you money and keep your rides smooth.
In this guide, you’ll learn simple steps to swap out your chain quickly, even if you’ve never done it before. Keep reading to discover how to get your bike running like new again and enjoy every ride without worrying about chain problems.

Credit: www.reddit.com
Signs Your Chain Needs Replacing
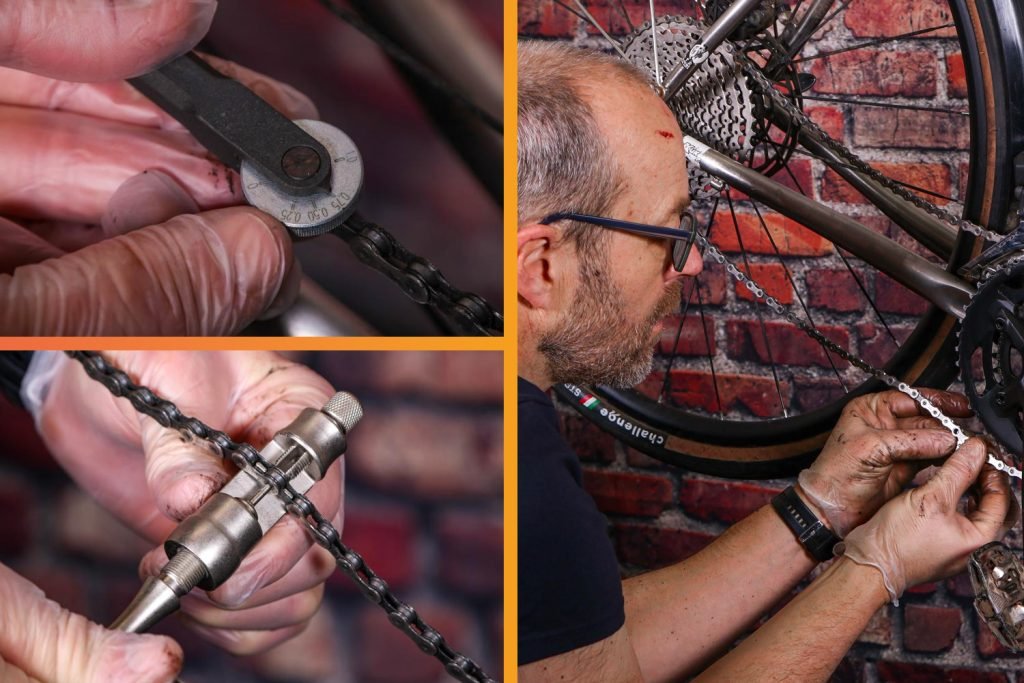
Chain wear indicatorsare small tools that measure how much your chain has stretched. A stretched chain can cause poor bike performance. If the indicator shows wear, it’s time to replace the chain.
Skipping and slippinghappen when your bike chain jumps over gears. This makes pedaling hard and unsafe. It usually means the chain or gears are worn out.
Rust and corrosionweaken the chain links. Rust can cause the chain to break or get stuck. Keep your chain clean and dry to avoid this problem.

Credit: www.youtube.com
Tools Required
A chain breaker toolis essential to remove the old bike chain. It pushes out pins easily without damaging the chain.
The replacement chainmust match your bike’s speed and length. Check the number of gears to get the right chain size.
- Lubricantkeeps the chain smooth and prevents rust.
- Cleanerremoves dirt and old grease before installing the new chain.
Removing The Old Chain
Find the master linkon the bike chain. It looks different from other links.
Some chains have a clip or a pin holding the master link together.
A chain breaker toolhelps to push out the pin in normal links.
Place the chain in the tool and turn the handle slowly.
This will push the pin out and break the chain.
Use the chain breaker carefully to avoid damaging other parts.
Once the pin is out, gently pull the chain apart.
The old chain is now ready to remove from the bike.
Measuring And Preparing The New Chain
Check the old chain length by laying it next to the new one. The new chain must be the same length as the old one. If the new chain is longer, remove extra links carefully.
Use a chain tool to push out the pins of the extra links. Remove only the number of links needed for the right length. Make sure the chain moves smoothly after removing links.
- Measure twice to avoid cutting too short.
- Align the chain on the bike before cutting.
- Keep the chain clean before fitting.
Installing The New Chain
Begin by threading the new chainthrough the bike’s derailleurand around the chainrings. Make sure the chain follows the same path as the old one. Avoid twisting the chain links.
Next is connecting the links. Align the two ends of the chain carefully. Use a chain tool to push the pin through the links, joining them securely. Check that the links move freely without stiffness.
Securing the master linkis the last step. Insert the master link into the chain ends. Push the link halves together until you hear a click. Pull the chain gently to ensure the link is locked firmly in place.
Testing And Final Adjustments
Test the bike chain by pedaling slowly to check for smooth movement. Adjust tension and alignment until shifting feels easy and quiet. Ensure the chain runs without slipping or noise before riding.
Checking Chain Tension
Ensure the chain is tight but not too tight. Press the chain with your finger. It should move a little, but not much. This keeps the bike working well. If the chain is too loose, it can fall off. If too tight, it can break. Adjust the tension using the bike’s screws. Keep the bike steady while doing this. Check the tension by spinning the wheels. Make sure everything feels smooth.
Test Ride Tips
Take a short ride to check the chain. Listen for any strange noises. Make sure the bike shifts gears smoothly. Stop and start a few times. This helps you know if the chain is right. Pay attention to how the bike feels. If something feels wrong, check the chain again. Safety is important. Always wear a helmet on your test ride.
Lubricating The Chain
Use bike oil to keep the chain moving smoothly. Oil helps the chain last longer. Put a little oil on each link. Use a cloth to wipe extra oil off. Don’t use too much oil. Too much can attract dirt. Spin the pedals to spread the oil. This will keep your ride smooth and quiet. Check the chain often to keep it in good shape.
Maintenance Tips For Longevity
Regularly check your bike chain for wear and rust to keep it working well. Replace the chain by removing the old one and fitting a new, properly sized chain for smooth rides. Proper chain care extends your bike’s life and improves performance.
Regular Cleaning
Cleaning keeps your bike chain happy. Use a soft brush to wipe dirt off. A clean chain lasts longer. Always dry the chain after cleaning. Wet chains rust quickly.
Proper Lubrication
Lubrication makes the chain move smoothly. Use bike oil sparingly. Too much oil attracts dust. After oiling, wipe off extra oil. This prevents sticky messes.
Routine Inspections
Check the chain for wear and tear. Look for rusty links. Tighten any loose parts. Listen for unusual noises. A quiet chain is a healthy chain.

Credit: www.youtube.com
Frequently Asked Questions
How Often Should I Replace A Commuter Bike Chain?
Replace your commuter bike chain every 2,000 to 3,000 miles. Frequent riding or harsh conditions may require earlier replacement. Regular checks help prevent drivetrain wear and ensure smooth shifting.
What Tools Do I Need To Replace A Bike Chain?
You need a chain breaker tool, a new chain, and optionally a chain wear indicator. A pair of gloves and bike lubricant also help for a cleaner, easier job.
How Do I Measure The Correct Chain Length?
Wrap the new chain around the largest chainring and rear cog. Add two full links for proper length. Use a chain breaker to remove any excess links.
Can I Replace A Bike Chain Without Removing The Wheel?
Yes, you can replace the chain without removing the wheel. Shift to the smallest chainring and cog for easier removal and installation. Using a chain tool simplifies the process.
Conclusion
Replacing your commuter bike chain keeps your ride smooth and safe. Regular checks help spot wear early and prevent bigger problems. With simple tools and steps, you save money and time. A fresh chain improves pedaling and bike performance. Stay consistent to enjoy a better cycling experience every day.
Keep your bike ready for all your journeys. Small efforts lead to long-lasting results. Easy to do, worth the effort.


