

Getting a flat tire on your mini velo bike can be frustrating, especially when you’re out and about. But what if you could fix that puncture quickly and get back on the road without any hassle?
In this guide, you’ll learn simple, step-by-step methods to patch punctures on your mini velo bike. No need to waste time or money—just grab your tools, follow along, and keep your ride smooth and worry-free. Ready to become your own bike repair expert?
Let’s dive in!
Tools Needed
Essential patch kit itemsinclude a patch, sandpaper, glue, and tire levers. The patch covers the hole in the tube. Sandpaper helps roughen the tube surface for better glue hold. Glue sticks the patch tightly to the tube. Tire levers help remove the tire without damage.
Additional helpful toolsmake the job easier and faster. A small pump or CO2 inflator is needed to refill air. A valve core remover can help if the valve is stuck. Carrying a small cloth can clean the area before patching. A multitool with screwdrivers and wrenches can fix other bike parts if needed.
Locating The Puncture
To find a puncture, first inflate the tire slightly. Listen closely for a faint hissing sound. This sound often shows where the air leaks.
Another way is to feel the tire surface with your hand. Look for any unusual soft spots or bumps. These can point to the hole.
Using water helps spot tiny holes. Submerge the inflated tube in water. Watch for bubbles escaping from the hole. Bubbles are a clear sign of air escaping.
This method works well when the leak is small or hard to hear. It makes finding the hole faster and easier.
Removing The Wheel
Mini Velo bikes often have two types of wheel attachments: quick releaseand bolt-on. Quick release wheels use a lever to loosen and remove the wheel. This makes removal fast and tool-free. Bolt-on wheels need a wrench or spanner to unscrew the nuts holding the wheel. This can take more time but feels very secure.
For mini velo bikes, quick release wheels are common for the front wheel. Rear wheels usually use bolt-on nuts due to the gear setup. Knowing which type your bike has helps prepare tools and plan wheel removal.
- Quick release: easy to open, no tools needed
- Bolt-on: needs wrench, more secure
- Check for extra parts like washers or spacers
- Keep nuts or levers safe to avoid losing them

Credit: www.primeauvelo.com
Taking Out The Tube
Remove the wheel carefully by loosening the nuts or quick-release lever. Gently pull the tire away from the rim to access the inner tube for repair.
Deflating And Loosening The Tire
First, find the valve on the tire. Press it to release air. The tire should become soft and loose. Use a tire lever to gently pry the tire edge. Work around the tire. Be careful not to tear it.Safely Removing The Inner Tube
Pull the tire away from the rim. Locate the inner tube inside. Carefully slide the tube out. Avoid sharp objects. They can puncture the tube again. Keep the tube safe and clean for repair. `Preparing The Tube
Remove the tube carefully from the tire to avoid further damage. Clean the tube and dry it completely before patching any holes. Check the tube for punctures by inflating it slightly and listening for escaping air.
Cleaning Around The Hole
Clean the tube surface around the hole with a cloth. Remove all dirt and grease. This helps the patch stick better. Use rubbing alcohol or water for cleaning. Let the area dry completely before moving to the next step.
Roughening The Surface
Use sandpaper or a metal file to roughen the tube surface near the hole. This creates a texture for the glue to hold on. Roughen only a small area, about the size of the patch. Be gentle to avoid making the hole bigger.
Applying The Patch
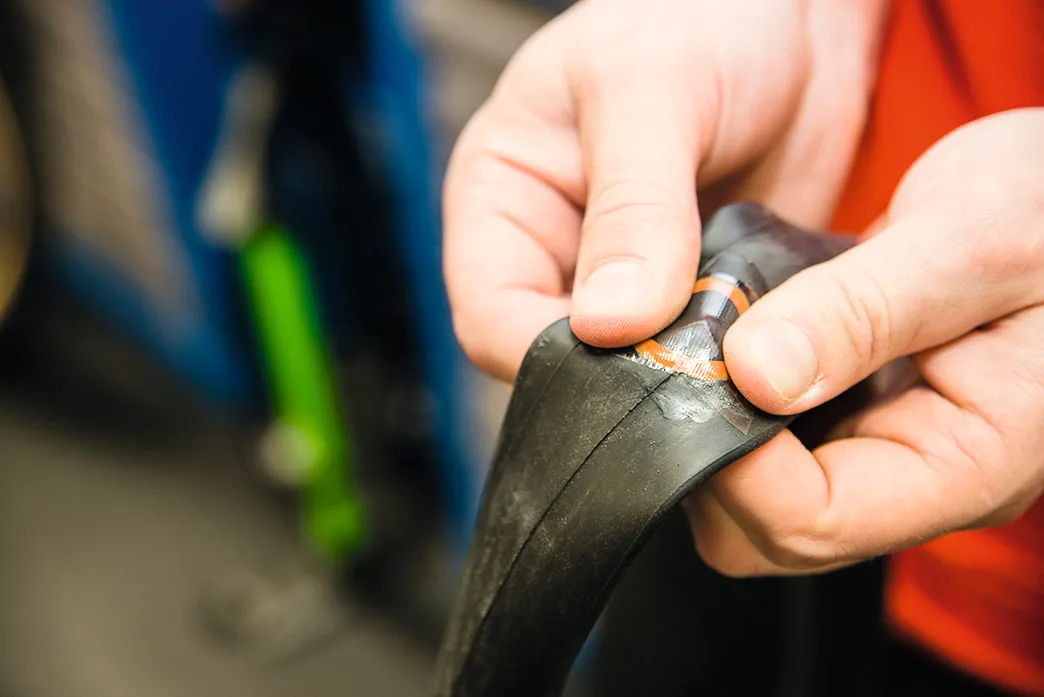
Choose between glue patchesand self-adhesive patchesbased on your preference. For glue patches, spread a thin layer of glue on the tube and patch. Let the glue dry until it is tacky. Press the patch firmly onto the puncture. Hold it in place for a minute or two.
Self-adhesive patches are easier to apply. Peel off the backing and stick the patch directly on the puncture. Press hard to remove air bubbles and ensure full contact.
- Clean the area around the puncture well.
- Make sure the patch covers the hole completely.
- Press firmly to avoid leaks.
- Wait a few minutes before inflating the tube.
Reinstalling The Tube And Tire
Place the tube inside the tire carefully. Make sure it lies flat without twists. Check that the tube sits evenly all around the rim. Avoid pinching the tube between the tire and rim.
Once the tube is in place, start pushing the tire bead back onto the rim. Do this evenly, working your way around the wheel. Use your hands instead of tools to avoid damage.
- Inflate the tube slowly at first.
- Stop and check the tire sits well on the rim.
- Inflate to the pressure marked on the tire sidewall.
- Use a pump with a pressure gauge for accuracy.
- Do not overinflate, or the tube may burst.
Credit: www.bikeradar.com
Preventing Future Punctures
Check your tires regularly for sharp objects and remove any debris quickly. Keep tire pressure at the recommended level to avoid damage. Use quality inner tubes and consider tire liners for extra protection against punctures.
Using Tire Liners
Tire linerscan help stop punctures. They fit between the tire and tube. Tire liners are made of tough material. This stops sharp objects from reaching the tube. They are easy to install. Just remove the tire and place the liner inside. This small step can save a lot of time. It keeps your bike rides smooth and safe.Regular Tire Inspection
Check your tires often for any small stones or glass. Look for cracks or cuts on the tire surface. Remove any sharp objects stuck in the tire. Check the air pressure with a gauge. Tires with low air can puncture easily. Pump them to the right pressure. Keeping tires clean can help spot problems early. Regular checks help in catching issues early. `
Credit: www.temu.com
Frequently Asked Questions
How Do I Find The Puncture On A Mini Velo Bike Tire?
To find a puncture, inflate the tire and listen for escaping air. You can also submerge the tube in water and watch for bubbles. Mark the puncture spot with chalk or a marker for easy patching.
What Tools Do I Need To Patch Mini Velo Punctures?
You need tire levers, a patch kit, sandpaper, and a pump. The patch kit includes adhesive and patches. These basic tools help you remove the tire, patch the tube, and reinflate it efficiently.
How Long Does It Take To Patch A Mini Velo Puncture?
Patching a puncture usually takes 15 to 30 minutes. Time varies based on your experience and puncture size. Proper preparation and following step-by-step instructions speed up the process.
Can I Patch A Puncture Without Removing The Wheel?
It’s best to remove the wheel for easier access. Patching without removal is possible but tricky. Removing the wheel ensures a better patch and prevents damage to the tire or tube.
Conclusion
Fixing punctures on mini velo bikes is simple with the right steps. Carry a patch kit and pump on your rides. Check your tires regularly to spot small holes early. Practice patching at home to build confidence. This saves time and money on the road.
Keep your bike ready for smooth, safe rides every day. Small repairs can make a big difference in your biking experience. Stay prepared, and enjoy every trip without worry.


