
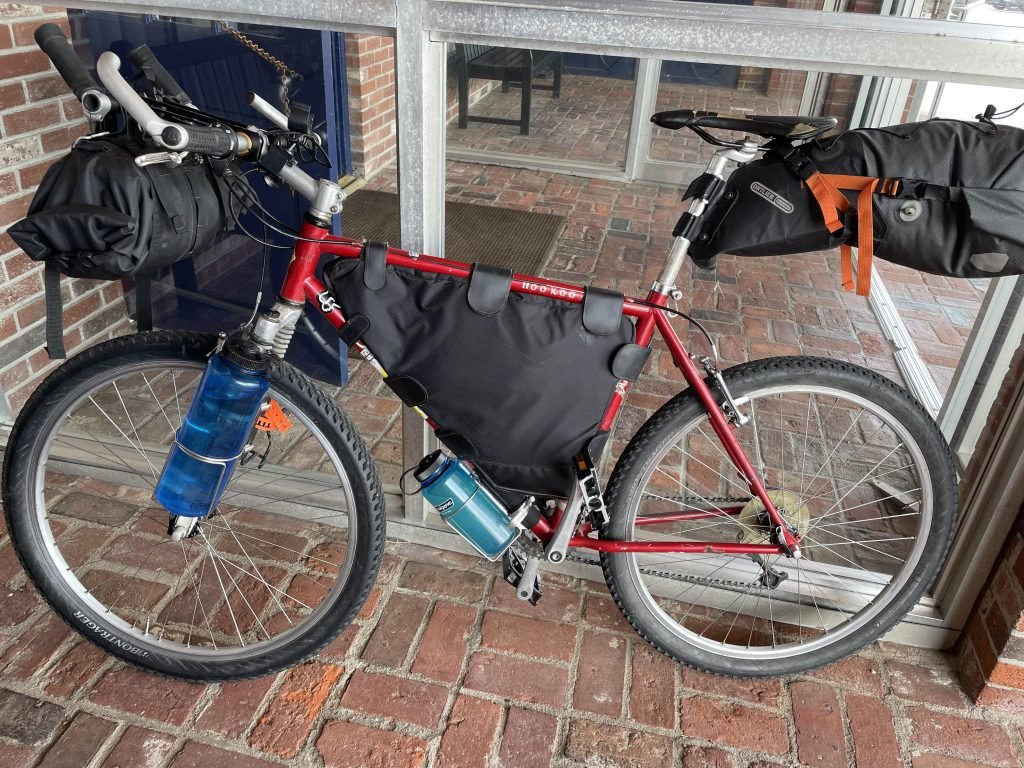
If you love bikepacking, you know how important staying hydrated is. Your hydration pack is your lifeline on the trail, keeping water close when you need it most.
But have you ever thought about how to keep that pack clean and working perfectly? Neglecting it can lead to bad tastes, leaks, or even health issues. You’ll discover simple and effective ways to maintain your hydration pack. Follow these tips, and your pack will stay fresh, safe, and ready for every ride.
Keep reading to make sure your hydration gear never lets you down.

Credit: www.reddit.com
Choosing The Right Hydration Pack
Picking the right hydration pack helps you stay hydrated while bikepacking. It also adds comfort and ease to your ride.
Consider size, material, and fit. These factors ensure the pack suits your needs and lasts long.
Size And Capacity
Choose a pack size that fits your trip length. Small packs hold less water but weigh less. Large packs carry more but can be bulky.
- Short trips: 1 to 1.5 liters capacity
- Day trips: 1.5 to 3 liters capacity
- Multi-day trips: 3 liters or more
Material And Durability
Look for strong materials that resist tears and water. Lightweight fabrics help reduce load. Check for easy-to-clean linings to prevent mold.
| Material | Durability | Weight | Cleaning |
|---|---|---|---|
| Nylon | High | Light | Easy |
| Polyester | Medium | Light | Medium |
| Thermoplastic Polyurethane (TPU) | Very High | Medium | Easy |
Comfort And Fit
A pack that fits well prevents chafing and discomfort. Look for adjustable straps and padded back panels. Weight distribution is key for long rides.
- Adjust shoulder straps to keep the pack close to your body
- Use chest and waist straps for extra support
- Choose a pack size that matches your torso length
- Try the pack with water inside before your trip
Cleaning After Every Ride
Maintaining your hydration pack is essential for hygiene and performance. Clean it after each ride to keep it fresh.
This guide will help you with steps to ensure your hydration pack remains in top condition.
Emptying And Rinsing
After your ride, empty the bladder completely. This prevents any leftover liquid from going stale.
- Detach the tube and bite valve
- Rinse the bladder with warm water
- Ensure the tube is also flushed with water
Using Cleaning Tablets
Cleaning tablets are effective for deep cleaning. They remove any lingering bacteria or odors.
- Fill the bladder with warm water
- Add a cleaning tablet
- Let it sit for about 15 minutes
- Rinse thoroughly to remove any residue
Drying Techniques
Proper drying prevents mold and extends the life of your hydration pack. Make sure it is completely dry before storing.
Use these techniques to dry your pack:
- Hang the bladder upside down to air dry
- Use a towel to absorb excess moisture
- Place it in a well-ventilated area
Preventing Mold And Bacteria
Hydration packs are great for bikepacking trips. Keeping them clean stops mold and bacteria growth.
Proper care helps you stay healthy and keeps your pack working well for a long time.
Regular Inspection
Check your hydration pack after each trip. Look inside the bladder and hose for any signs of mold or slime.
Clean your pack if you see any discoloration or smell a bad odor. Early checks help stop germs from spreading.
Proper Storage
Dry your hydration pack completely before storing it. Moisture helps mold grow fast inside the bladder.
Store the pack in a cool, dry place. Leave the bladder open or hang it to air out.
- Remove the hose and bite valve to dry separately
- Keep the bladder out of direct sunlight
- Use a clean towel to speed up drying
Using Antimicrobial Solutions
Use safe antimicrobial cleaners to kill germs inside your hydration pack. These reduce mold and bacteria growth.
Follow the cleaner instructions and rinse the pack well. Regular cleaning keeps your water fresh and healthy.
- Use a mix of water and mild bleach (1:100 ratio) for deep cleaning
- Try baking soda or lemon juice for natural cleaning
- Rinse thoroughly to remove all cleaning solution

Credit: www.reddit.com
Maintaining The Drinking Tube
Hydration packs are great for bikepacking trips. The drinking tube needs regular care to keep water flowing well.
Proper maintenance stops clogs, bad tastes, and damage. Clean tubes make drinking easier and safer.
Flushing The Tube
Flush the tube after each use to remove leftover water and germs. Use warm water and mild soap.
Run clean water through the tube until no soap or dirt remains. This keeps the tube fresh and clear.
- Detach the tube from the bladder
- Use warm water with mild soap
- Flush water through the tube completely
- Rinse several times with clean water
- Hang to dry fully before storing
Replacing Bite Valves
Bite valves wear out or get dirty over time. Replace them to keep your hydration pack working well.
New valves prevent leaks and keep water tasting fresh. Change them if they feel sticky or cracked.
- Remove the old bite valve carefully
- Check for cracks or damage
- Buy a compatible replacement valve
- Push the new valve firmly onto the tube
- Test for leaks before your next ride
Avoiding Kinks And Damage
Kinks block water flow and damage the tube. Handle the tube gently to avoid bends and cracks.
Store your hydration pack flat or hung up. Avoid folding or crushing the tube during packing or riding.
- Do not bend the tube sharply
- Keep the tube free from heavy gear
- Use clips or holders to secure the tube
- Check the tube for holes or cracks often
- Replace damaged tubes quickly to prevent leaks
Repairing Common Issues
Hydration packs need care to work well on bike trips. Small damages can cause leaks or make parts stop working.
Fixing these issues early helps avoid bigger problems. Learn simple fixes for common hydration pack troubles.
Fixing Leaks
Leaks are the most common problem. Check the bladder and hose for holes or cracks. Clean the area around the leak before repair.
Use repair kits made for hydration packs. These kits have patches and glue to seal leaks. Let the patch dry fully before use.
Patching Small Holes
Small holes can let water out and dirt in. Fix them quickly to keep water clean. Use a patch or tape designed for hydration gear.
- Clean and dry the hole area.
- Cut a patch bigger than the hole.
- Apply glue or adhesive if needed.
- Press the patch firmly on the hole.
- Let it sit for several hours to bond.
Replacing Parts
Sometimes parts wear out. You may need to replace the bite valve, hose, or bladder. Use parts made for your pack model.
| Part | Common Problem | Replacement Tips |
| Bite Valve | Leaking or hard to bite | Buy exact size for easy fit |
| Hose | Cracked or blocked | Use hose with same length and diameter |
| Bladder | Leaks or smells | Replace with original brand if possible |
Tips For Long-term Storage
Keeping your hydration pack clean and safe helps it last longer. Proper storage stops damage and bad smells. Follow these tips for long-term care.
Store your pack right after each trip. This keeps it ready for your next adventure.
Cleaning Before Storage
Clean your hydration pack thoroughly before storing. Dirt and leftover liquids cause mold and odors. Use warm water and mild soap to wash the bladder and hose.
Make sure to rinse well. Dry all parts completely to stop mold growth. You can hang it upside down to air dry inside and out.
- Remove the bladder from the pack
- Wash with warm water and gentle soap
- Rinse until no soap remains
- Dry fully before storing
Storing In A Cool, Dry Place
Store your hydration pack in a cool and dry place. Heat and moisture can damage the materials and cause mold. Avoid direct sunlight or damp areas.
Choose a spot with good air flow to keep the pack fresh. A closet or a storage shelf inside your home works well.
- Avoid basements or garages that get damp
- Keep away from heaters or sunny windows
- Use a shelf or hang it loosely
Using Protective Covers
Use a protective cover to keep your hydration pack clean and safe. Covers stop dust and dirt from settling on it. They also protect from accidental tears or scratches.
Choose a breathable cover to avoid moisture buildup. You can use a cloth bag or a pillowcase. Avoid plastic bags because they trap moisture.
- Use a cloth or mesh bag
- Avoid sealed plastic bags
- Keep the pack loose inside the cover

Credit: www.reddit.com
Frequently Asked Questions
How Often Should I Clean My Hydration Pack?
You should clean your hydration pack after every trip or at least once a week. Regular cleaning prevents bacteria and mold build-up, ensuring safe drinking water and extending the pack’s lifespan.
What Is The Best Way To Dry A Hydration Pack?
Air drying is best for hydration packs. Hang the reservoir upside down with the cap open in a well-ventilated area to prevent mold and odors.
How Can I Prevent Mold In My Hydration Bladder?
Clean and dry the bladder thoroughly after each use. Store it open and empty to avoid moisture build-up, which causes mold growth.
What Cleaning Tools Do I Need For Hydration Packs?
Use a soft brush, mild soap, and a cleaning tablet designed for hydration reservoirs. These tools help remove dirt and bacteria effectively.
Conclusion
Keeping your hydration pack clean and dry helps it last longer. Flush the bladder after each ride to avoid germs. Let all parts air dry completely before storing. Check for leaks or damage regularly to stay safe. Proper care means your pack works well every trip.
Simple steps keep you hydrated and ready to ride. Don’t skip maintenance—it saves time and money later. Enjoy your bikepacking adventures with a reliable hydration pack.



