
Ever felt the thrill of cycling down a winding path, wind in your hair, only to realize your brake levers aren’t responding the way they should? It’s a situation no cyclist wants to be in, and yet, many find themselves there due to a simple lack of knowledge about brake lever installation.
Imagine the confidence and control you’ll feel once you know how to install brake levers yourself. This guide is crafted just for you, making sure you have the power to not only enjoy your ride but also ensure your safety.
You don’t need to be a bike mechanic to master this skill; just a bit of guidance can transform your cycling experience. Dive into this guide and discover how you can take control of your bike’s performance and safety. Your next ride could be smoother and safer than ever.
Tools And Materials Needed
To install brake levers, you will need some essential tools. Gather a set of Allen wrenches for adjustments. A screwdriver is also necessary. You may need a torque wrench for precise tightening. Grease helps in smooth operation. A clean cloth is useful for wiping parts. Ensure you have new brake levers ready.
Check if your bike needs cable housing. Make sure to have cable cutters. Have a cable end cap handy. You might need a hex key for specific bolts. Always keep a bike stand for easy access. A repair manual can guide you. Gather everything before starting.
Removing Old Brake Levers
Start by loosening the brake cables. Use a small wrench for this. Be gentle with the cables. Next, find the screws holding the brake levers. These are usually on the handlebar. Use a screwdriver to remove them. Keep the screws safe for later use.
Once the screws are out, slide the brake lever off. Sometimes, they might be tight. Wiggle them a bit if needed. Ensure you don’t damage the handlebar. Check for any dirt or rust on the bar. Clean it with a cloth if necessary. This helps the new levers fit well.
Inspect the cables for wear. Replace them if frayed. Proper cables ensure safety. Keep all tools and parts organized. This makes the process smoother. Always work in a well-lit area. It helps you see small parts better.
Preparing The Handlebar
Ensure your handlebar is clean and dry. Check for any worn-out grips. Replace if needed. Position the brake levers properly. Keep them within easy reach. Use a screwdriver to loosen the clamp screws. Slide the levers onto the handlebar. Adjust to a comfortable angle. Tighten the screws securely. Avoid overtightening. Check for any movement. Adjust if necessary. Test the levers’ position. Make sure they don’t interfere with other components. Recheck the grip alignment. Secure everything firmly. Ensure cables are not twisted or bent. They should move freely. This helps in smooth braking. Always keep safety first. Follow these steps carefully.

Credit: www.instagram.com
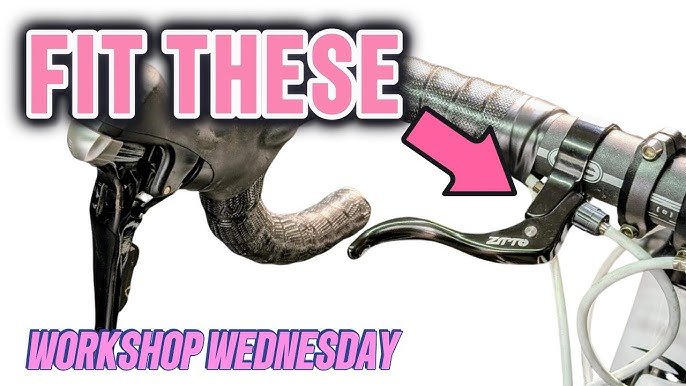
Installing New Brake Levers
First, loosen the screws holding the brake levers. Use a screwdriver for this. Carefully remove the brake levers from the handlebar. Check for any damage or wear. If needed, clean the handlebar area.
Align the new brake levers with the handlebar. Make sure they fit snugly. Tighten the screws securely. Use a screwdriver again for this. Ensure the levers are tight but can move freely.
Insert the brake cable into the lever’s slot. Pull the cable tight to remove slack. Secure it with the screw on the lever. Double-check that the cable is not loose.
- Squeeze the brake levers gently.
- Ensure the brakes engage properly.
- Check for any unusual sounds or resistance.
- Adjust if necessary for smooth operation.
Adjusting Brake Cable Tension
First, ensure the bike is stable. Use a stand or lean it against a wall. Check the brake lever position. It should be easy to reach. Now, locate the barrel adjuster. It’s near the brake lever or caliper. Turn it counterclockwise to increase tension. This makes the brake tighter. Turn it clockwise to decrease tension. This makes the brake looser. Test the brake lever. Pull it to see if it feels right. It should not be too tight or too loose. Make small adjustments if needed. After adjusting, check the brake pads. They should touch the rim evenly. If not, adjust them too. Ensure everything is secure. Tighten any loose bolts. The brakes should feel firm and smooth. Test them by squeezing the lever hard. The bike should stop quickly and safely. Always double-check your work. Safety is very important.

Credit: www.youtube.com
Testing Brake Functionality
Press the brake lever gently. Observe how the brake responds. It should stop the wheel smoothly. Ensure the lever feels firm and secure. Listen for unusual sounds. Grinding noises indicate a problem. Check the brake pads. They should touch the wheel rim evenly. Adjust if necessary.
Inspect the brake cable tension. It should be tight, not loose. Loose cables affect braking. Examine the brake lever position. It should be within easy reach. Adjust it to fit your hand comfortably.
Verify the brake alignment. The pads should be parallel to the rim. Misalignment can cause uneven wear. Test the brakes at different speeds. Slow and fast stops should feel consistent. Repeat the process to ensure accuracy. Proper testing ensures safe rides.
Troubleshooting Common Issues
Brake levers might not work properly due to simple reasons. Loose cables can cause problems. Check if cables are tight. Sometimes, dirt can block lever movement. Clean levers if they feel sticky. Misaligned levers might make brakes slow. Ensure levers are straight. If levers feel stiff, lubricate them. Use a small amount of oil for smooth movement. Incorrect lever size can also be a problem. Make sure levers fit your bike. If brakes squeak, it may be due to wrong tension. Adjust tension for quiet operation. Worn-out parts need replacing. Check pads regularly. Always ensure all parts are in good condition. These steps can solve many brake lever issues.
Maintenance Tips
Installing brake levers requires careful alignment and secure tightening. Ensure compatibility with your handlebar type before starting. Adjust lever position for comfort and accessibility, keeping safety in mind.
Brake Lever Adjustment
Regularly check the tightness of brake levers. Loose levers can be dangerous. Use a wrench to tighten if needed. Ensure the levers are not too tighteither. They should move smoothly when pulled.
Inspect Brake Cables
Examine the brake cablesfor wear and tear. Replace any frayed or damaged cables. Clean them with a soft cloth. Lubricate the cables lightly to avoid rust.
Check Brake Pads
Inspect the brake pads for wear. Replace them if they are thin. Make sure they are aligned with the rim. Misaligned pads can cause poor braking.
Keep Levers Clean
Wipe the brake levers with a damp cloth. Remove any dirt or debris. Clean levers ensure smooth operation. Avoid using harsh chemicals that may damage them.
Test Brakes Regularly
Test the brakes before every ride. Squeeze the levers to check for resistance. Ensure the bike stops smoothly. Adjust if the brakes feel weak or spongy.
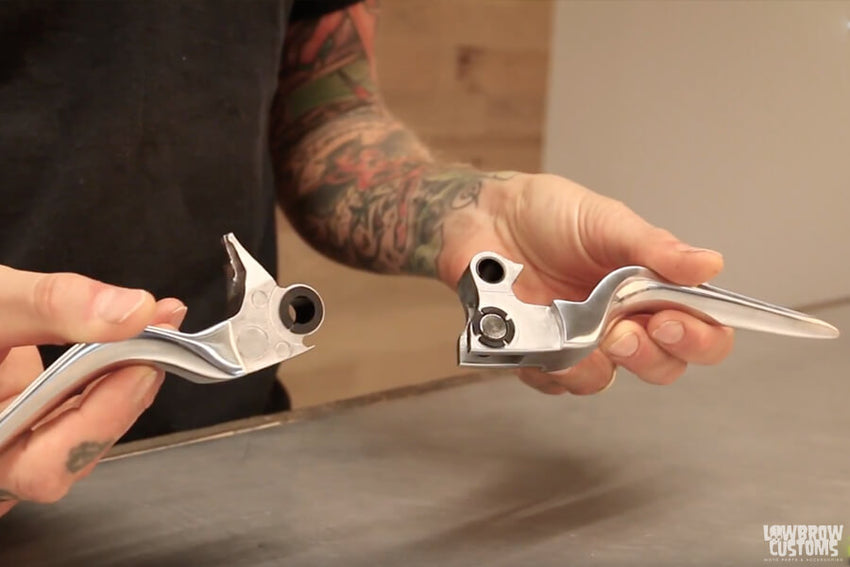
Credit: www.lowbrowcustoms.com
Frequently Asked Questions
How To Attach Brake Levers?
To attach brake levers, position them on the handlebars. Secure them using a hex key to tighten the bolts. Ensure alignment for comfort and accessibility. Adjust the lever’s reach according to hand size. Test the brakes to confirm proper function.
Can You Replace Just The Brake Lever?
Yes, you can replace just the brake lever. Ensure compatibility with your bike model and purchase a suitable lever. Always follow the manufacturer’s instructions during installation for safety. If unsure, consult a professional for assistance. Regular maintenance helps ensure optimal braking performance and safety.
What Is The Best Position For Brake Levers?
Position brake levers for easy reach with fingers while maintaining a comfortable grip. Align levers at a 45-degree angle for efficient braking. Ensure they are accessible from both seated and standing positions. Adjust according to personal comfort and riding style for optimal control.
How To Install Brake Pad Retaining Clips?
To install brake pad retaining clips, first remove the old clips. Position the new clips correctly on the caliper bracket. Ensure they are securely fitted. Align the brake pads with the clips, then reassemble the brake components. Verify everything is tightly secured before finishing.
Conclusion
Installing brake levers is easy with the right steps. First, gather your tools. Then, remove old levers carefully. Next, position new levers correctly. Secure them tightly. Adjust them for comfort. Test them to ensure safety. Regular maintenance is key. Keep your bike in top shape.
Enjoy smooth rides with new levers. Feel confident on the road. Share these tips with friends. Riding a bike is fun and safe. Always prioritize safety. Follow these simple steps. Install your brake levers with ease. Happy cycling!


