
Are you tired of arriving at your destination covered in mud splatters and drenched from unexpected rain? Installing bike fenders might be the solution you’ve been searching for.
These handy accessories protect you from the elements, keeping you dry and clean while you ride. You might think adding fenders to your bike is complicated, but that’s far from the truth. In this guide, we’ll walk you through the simple steps to install bike fenders with ease.
Imagine the joy of cruising along without worrying about the weather or muddy trails. Intrigued? Let’s dive into the process so you can transform your rides into a more enjoyable experience.
Choosing The Right Fenders
Bike fenders come in different types. There are full-coverage and clip-on fenders. Full-coverage fenders protect your bike and clothes well. Clip-on fenders are easy to attach and remove. Choose based on your riding needs.
Fenders are made from various materials. Plastic fenders are light and affordable. Metal fenders are strong and last longer. Think about where you ride most often. Choose a material that fits your riding style.
Fenders must fit your bike properly. Check your bike’s frame for mounting points. Some bikes have special fittings for fenders. Measure your tire width before buying fenders. Proper fit ensures maximum protection.
Gathering Necessary Tools
Gather tools like a wrench, screwdriver, and measuring tape before installing bike fenders. Ensure all parts are compatible with your bike. Proper preparation saves time and effort during installation.
Basic Tools Required
To install bike fenders, you need some basic tools. A wrench is important for loosening and tightening bolts. You’ll also need a screwdriver to adjust screws. Make sure you have a measuring tape. This helps in getting the right fit. A pair of pliers can be handy too. It helps in gripping and turning small parts.
Safety Gear
Wearing safety gear keeps you safe while working. Gloves protect your hands from sharp edges. Goggles shield your eyes from dust and tiny particles. A helmet is good if you are working in a busy area. Make sure your work area is well-lit. This helps you see everything clearly.
Preparing Your Bike
Installing bike fenders is essential for protection against mud and water. Begin by selecting fenders that fit your bike’s size. Secure the fender mounts to the frame, ensuring they align correctly. Adjust for clearance and tighten all bolts to prevent rattling during rides.
Cleaning The Bike
Start by cleaning your bike thoroughly. Use water and a mild soap. Scrub gently to remove dirt and grime. Pay attention to the wheels and frame. A clean bike makes installation easier. Dry it using a soft cloth. Ensure no water remains on metal parts.
Inspecting The Frame
Check the bike frame for any damage. Look for cracks or bends. Ensure the frame is strong and intact. This is important for safe riding. Inspect the attachment points for the fenders. They should be free from rust. Clean them if necessary. A good frame ensures proper fender fitment.
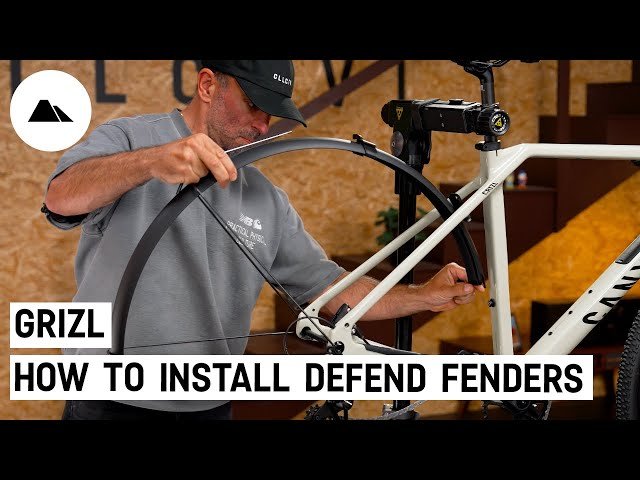
Installing Front Fender
Position the front fender correctly over the bike’s tire. Secure it using the bolts and brackets provided. Ensure the fender is aligned and does not interfere with the tire movement.
Aligning The Fender
Place the fender over the bike wheel. Ensure it fits snugly. Adjust its position for symmetry. The fender should cover the wheel evenly. This prevents splashes and dirt. Check both sides of the wheel. Make sure they match. The fender should not touch the tire. Leave a small gap for movement. This ensures smooth riding.
Securing With Bolts
Use bolts to attach the fender. Find the holes on the fender. Align them with the bike frame. Insert the bolts through the holes. Use a wrench to tighten them. Make sure they are firm. Loose bolts might cause accidents. Double-check each bolt’s tightness. This keeps the fender stable. A secure fit ensures safety.
Installing Rear Fender
Start by attaching the rear fender to the bike frame near the back wheel. Ensure screws are tight and fender is aligned properly for smooth rides.
Positioning The Fender
First, find the right spot for the rear fender. It should cover the wheel well. This keeps your bike and clothes clean. Use your hands to hold the fender in place. Make sure it lines up straight. The fender should sit close to the tire. But not touching it.
Adjusting For Clearance
Check the fender’s fit. Is there enough space between the fender and tire? You should be able to slide a finger through. If not, adjust the fender. Move it up or down. Use the screws provided. Tighten them securely. This prevents the fender from moving.

Credit: www.tiktok.com
Final Adjustments
Ensure fenders align properly with wheels, checking for even spacing. Tighten bolts securely, preventing any wobble or movement. Adjust angle for optimal splash protection, guaranteeing a smoother ride in wet conditions.
Checking Stability
Ensure the fendersare tightly attached to the bike. Use a wrench to check all bolts. They should not be loose. Wiggle the fenders gently. They should not move much. If they do, tighten them more. A stable fender keeps you safe while riding.
Testing For Fit
Make sure the fenders fit the bike wheels well. Spin the wheels slowly. They should not touch the fenders. If they rub, adjust the fender position. Check both front and back wheels. Proper fit helps in keeping the bike clean and dry.
Maintenance Tips
Installing bike fenders is essential for keeping dry while riding in wet conditions. Secure the fender brackets to the bike frame. Align the fenders with the tires for optimal protection.
Regular Cleaning
Keep your bike fenders cleanto work well. Dirt can block them. Use a damp cloth to wipe them. Scrub gently to remove stuck dirt. Clean after each ride for best results. Dry them to prevent rusting.
Inspecting For Wear
Check fenders for cracks or damageoften. Look for loose screws and bolts. Tighten them if needed. Ensure the fender is not bent. Bent fenders can rub the tire. Replace worn fenders to stay safe.

Credit: sim-works.com

Credit: velo-orange.com
Frequently Asked Questions
How To Put A Bike Fender On?
Start by aligning the fender with your bike wheel. Secure it using the bolts or clips provided. Ensure it’s tightly fixed to avoid wobbling. Adjust the fender to ensure it covers the wheel adequately, offering protection from splashes. Test by spinning the wheel to ensure no interference.
Is It Easy To Install A Fender?
Installing a fender is generally straightforward. Basic tools and instructions are usually sufficient. Ensure you have the right fender for your vehicle. Follow the manufacturer’s guidelines for best results. If unsure, professional installation is recommended for safety and precision.
Can You Add Fenders To Any Bike?
Yes, you can add fenders to most bikes. Check compatibility with your bike’s frame and fork. Ensure correct size and fit for optimal performance. Fenders help protect against mud and water, improving ride comfort. Installation may require specific tools, depending on bike design.
Are Mudguards Easy To Install?
Yes, mudguards are generally easy to install. Most come with clear instructions and require basic tools. Installation varies by vehicle type and mudguard design. Ensure proper alignment for effective protection. Consult your vehicle manual or a professional if needed.
Conclusion
Installing bike fenders is simple with the right steps. Fenders keep you dry and clean during rides. Start by choosing the right fenders for your bike. Follow each step carefully, ensuring secure attachment. Check your tools, and prepare your workspace for ease.
Adjust fenders to fit snugly and test for stability. Regular maintenance helps them last longer. Enjoy smoother rides without dirt or water splashes. With fenders, biking becomes more comfortable and practical. Stay dry, stay clean, and ride happy. A little effort goes a long way in improving your biking experience.


