
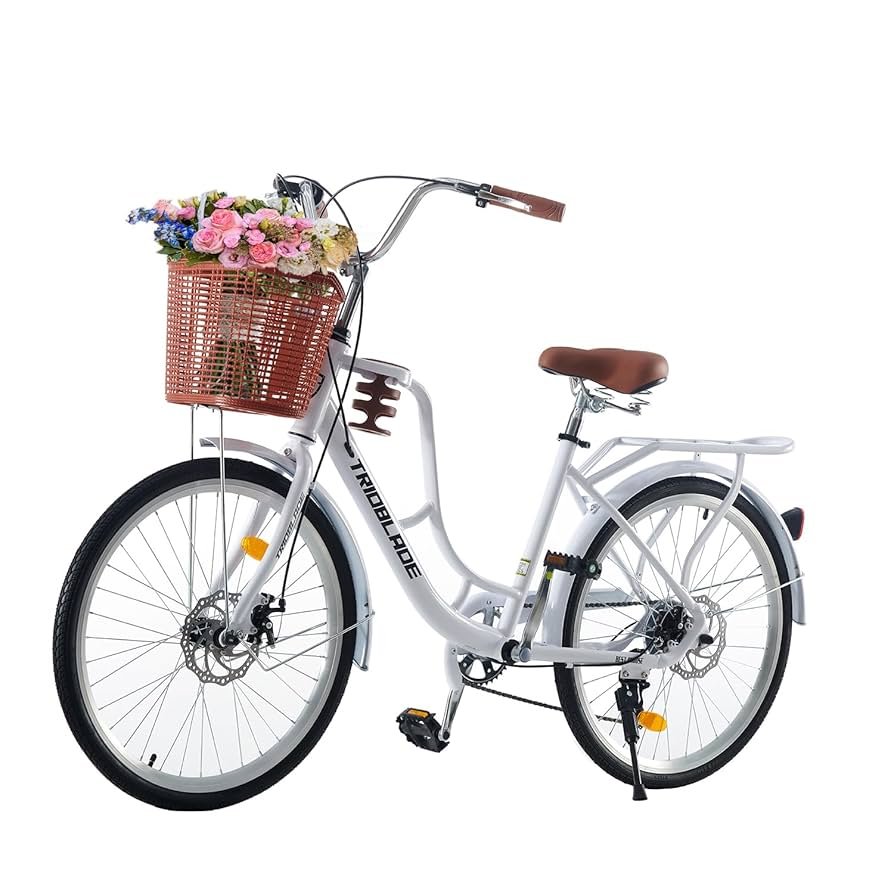
Looking to make your bike more stylish and practical? Adding a basket and lights to your women’s bike is a simple way to boost its look and safety.
Imagine having a handy basket to carry your essentials and bright lights to keep you visible on every ride. In this guide, you’ll discover easy steps to install both, even if you’re not a bike expert. Keep reading to transform your bike into a perfect companion for all your adventures!

Credit: leoguarbikes.com
Choosing The Right Basket
Adding a basket to a women’s bike makes carrying things easy. Picking the right basket helps balance and style.
Think about basket type, material, size, and weight before buying. This guide helps you choose the best one.
Types Of Bike Baskets
Bike baskets come in many styles. Front baskets attach to the handlebars. Rear baskets fit over the back wheel.
Some baskets clip on and off easily. Others need tools to fix them in place. Choose one that fits your needs.
- Front handlebar baskets – easy to reach items
- Rear rack baskets – carry heavier loads
- Detachable baskets – remove when not needed
- Under-seat baskets – small and hidden
Material Options
Baskets come in different materials. Each material offers strength and style in its own way.
Think about weather resistance and weight when choosing material for your bike basket.
- Wicker – classic look, but not very weatherproof
- Metal – strong and durable, can rust if not coated
- Plastic – lightweight and weatherproof
- Fabric – soft, often foldable, less sturdy
Size And Weight Considerations
Pick a basket size that fits what you plan to carry. Large baskets hold more but add weight.
Heavy baskets can make riding harder. Choose a basket that is light and strong for easy cycling.
- Small baskets – good for light items like a purse or snacks
- Medium baskets – fit groceries or a small bag
- Large baskets – carry bulky or heavy items but add weight
- Check weight limits on baskets before buying

Credit: www.amazon.co.uk
Selecting Suitable Lights
Choosing the right lights is important for safety on your bike. Good lights help you see and be seen at night or in low light.
There are many types of bike lights. Think about where you will ride and what kind of light fits your needs.
Front And Rear Light Options
Front lights help you see the road ahead. Rear lights make you visible to drivers behind you.
Front lights can be white and bright. Rear lights are usually red and often blink to catch attention.
- Front lights: steady or flashing white LEDs
- Rear lights: steady or blinking red LEDs
- Some lights mount on handlebars or seat posts
- Others clip on clothes or backpacks
Battery Vs. Rechargeable
Battery-powered lights use replaceable batteries. Rechargeable lights charge with a USB cable.
Battery lights are easy to swap but cost more over time. Rechargeable lights save money and reduce waste.
- Battery lights: use AA or AAA batteries
- Rechargeable lights: charge via USB
- Rechargeable lights need charging time
- Battery lights work immediately with fresh batteries
Brightness And Visibility
Brightness is measured in lumens. Higher lumens mean brighter light for better visibility.
Choose bright lights if you ride in dark areas. Use lights with different modes for day and night.
- Low brightness for city riding
- High brightness for rural or dark roads
- Flashing mode increases visibility
- Steady mode helps see the road clearly
Tools Needed For Installation
Installing a basket and lights on a women’s bike needs the right tools. These tools help make the process easy and safe.
Using the correct tools saves time and prevents damage to the bike or accessories.
Basic Tools Checklist
You need a few basic tools to attach the basket and lights. These tools fit most bike models and parts.
- Adjustable wrench for tightening bolts and nuts
- Phillips screwdriver for screws on lights and basket mounts
- Flathead screwdriver for certain clips or brackets
- Allen (hex) keys for bolts on modern bike parts
- Pliers to hold small parts or bend wires
- Measuring tape or ruler to align the basket and lights
- Bike stand or support to keep the bike steady during work
Optional Accessories
Some extra tools and items can help with installation but are not required. These make the job smoother or add safety.
- Electrical tape to secure light wires neatly
- Zip ties for extra holding strength
- Rubber washers to reduce vibration and noise
- Small level to check basket alignment
- Cleaning cloth to wipe surfaces before attaching parts
- Grease or lubricant to ease bolt tightening and prevent rust

Credit: www.amazon.co.uk
Preparing The Bike
Before installing a basket and lights on a women’s bike, it is important to prepare the bike properly. This helps ensure a safe and secure fit for all new attachments.
Cleaning and inspecting the bike first will make the installation process easier and more effective.
Cleaning And Inspecting
Start by wiping down the frame and handlebars with a damp cloth. Remove dirt, dust, and grease that could affect mounting parts.
- Check for any rust or damage on the frame where you want to install the basket or lights.
- Look closely at the brake and gear cables to make sure they are not worn out.
- Inspect the mounting points for any cracks or weaknesses.
- Make sure the bike is stable and the tires are properly inflated.
Removing Existing Attachments
Remove any items currently attached to the bike that might get in the way. This includes racks, old baskets, or lights.
| Attachment | Tools Needed | Notes |
| Old Basket | Wrench or Allen key | Keep screws for reuse if possible |
| Rear Rack | Screwdriver and wrench | Check if removal affects brake cables |
| Front Lights | Phillips screwdriver | Unplug wiring carefully if electric |
Installing The Basket
Adding a basket to your women’s bike makes it easier to carry items. It also adds style and convenience. This guide helps you install the basket safely and securely.
There are several ways to attach the basket. You can mount it on the handlebars, attach it to the front frame, or secure it with straps or bolts. Each method has its benefits.
Mounting On Handlebars
Mounting the basket on the handlebars is the most common method. It keeps the basket within easy reach and does not affect the bike’s balance much.
First, place the basket so it sits evenly on the handlebars. Use the mounting bracket or hooks that came with the basket. Tighten all screws or clamps firmly to avoid movement.
- Check if the basket blocks your view.
- Ensure the handlebars can turn freely.
- Tighten all fasteners securely.
Attaching To Front Frame
Some baskets attach to the bike’s front frame for extra support. This method is good for heavier loads. It keeps the basket steady during rides.
Locate the mounting points near the front fork or the frame under the handlebars. Use bolts or clamps to fix the basket’s support arms to these points. Make sure the basket is level and tight.
- Find strong frame points for mounting.
- Use correct size bolts or clamps.
- Double-check for tightness before riding.
Securing With Straps Or Bolts
Straps and bolts help keep the basket in place. Straps are easy to use and adjust. Bolts provide a permanent hold for heavy baskets.
Wrap straps around the frame or handlebars and through the basket loops. Tighten the straps firmly. For bolts, align holes in the basket and frame, then insert and tighten bolts with a wrench.
- Use strong straps or bolts for safety.
- Check tightness regularly.
- Replace worn straps immediately.
Mounting The Lights
Adding lights to a women’s bike is important for safety. Properly mounting the lights helps you see and be seen.
This guide focuses on how to mount the front and rear lights on your bike.
Positioning Front Light
Place the front light on the handlebar or front fork. It should point straight ahead.
Make sure the light is not blocked by other parts like the basket or brake cables.
- Center the light for the best road view
- Attach it firmly to avoid movement
- Adjust angle to shine on the road, not the sky
Attaching Rear Light
Fix the rear light to the seat post or rear rack. It should face backward.
Check that the light is visible from behind and not blocked by the rider or accessories.
- Use the mounting bracket or strap that comes with the light
- Secure tightly to prevent wobbling
- Position the light low enough to be seen by cars
Testing Light Functionality
Turn on both lights after mounting. Check if they work properly.
Test the brightness and beam direction in a dark place.
- Make sure the front light shines straight ahead
- Confirm the rear light is bright and steady
- Replace batteries or charge if needed
Safety Tips And Maintenance
Installing a basket and lights on a women’s bike can improve safety and convenience. Regular care keeps your bike ready to ride.
Follow these tips to keep your basket and lights secure and working well. Check your bike often for any issues.
Regular Checks
Look over your basket and lights before every ride. Make sure they are tightly fastened and not loose. Loose parts can cause accidents.
- Check basket mounts for tight screws
- Test lights to ensure they turn on and off
- Inspect wires for damage or wear
- Make sure lights face forward and rear correctly
- Examine basket for cracks or dents
Cleaning And Battery Care
Keep your basket and lights clean to avoid damage. Dirt and moisture can harm electrical parts and reduce light brightness.
| Cleaning Task | Method |
| Basket | Wipe with damp cloth, dry well |
| Light Covers | Use soft cloth, avoid harsh chemicals |
| Batteries | Remove and dry contacts if wet |
| Battery Storage | Store in cool, dry place when not used |
Adjustments For Comfort
Adjust your basket and lights to fit your riding style. Proper placement improves comfort and safety.
- Position basket low to keep bike balanced
- Set lights at eye level for best visibility
- Use adjustable mounts to change angles
- Test adjustments on short rides before longer trips
Frequently Asked Questions
How Do I Install A Basket On A Women’s Bike?
Attach the basket to the handlebar or front fork using included brackets. Tighten screws securely for stability. Adjust height and alignment for comfort and safety before riding.
What Tools Are Needed To Mount Bike Lights?
Common tools include a screwdriver, Allen wrench, and adjustable spanner. Some lights come with mounting clips requiring minimal tools. Check your light kit instructions for specific tools.
Can I Install Front And Rear Lights On My Bike?
Yes, most bikes support both front and rear lights. Mount the front light on the handlebar and rear light on the seat post or rear rack for visibility.
How To Secure Bike Lights For Night Rides?
Use sturdy mounts or brackets to attach lights firmly. Test lights before riding and use batteries or rechargeable options to ensure continuous brightness.
Conclusion
Installing a basket and lights on a women’s bike is simple and useful. A basket helps carry items easily while riding. Lights keep you safe, especially at night. Follow the steps carefully to attach both securely. Take your time and check each part.
Enjoy your bike rides with added comfort and safety. This small upgrade makes a big difference. Now, your bike is ready for errands and evening rides. Happy cycling!



