
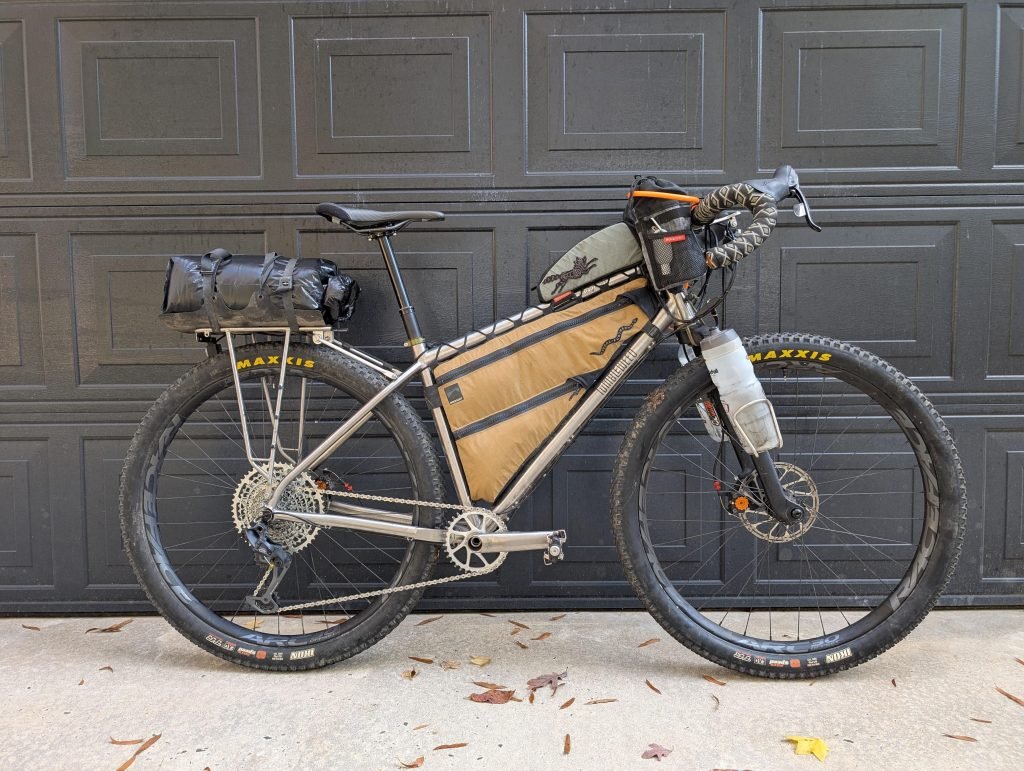
If you’re planning a bikepacking trip, fitting racks to your touring bike is one of the first and most important steps. Without the right setup, carrying your gear can become a struggle, making your ride less enjoyable and more tiring.
But don’t worry—this guide will show you exactly how to fit racks to your bike quickly and correctly. You’ll learn the simple tricks that make your load stable and your ride smooth. Keep reading, and you’ll be ready to hit the trail with confidence and ease.
Choosing The Right Racks
Fitting racks to your touring bike is key for bikepacking. The right racks hold your gear safely and keep your bike balanced.
Choose racks that fit your needs and bike type. This guide helps you pick the best racks for your adventure.
Types Of Touring Racks
There are front and rear racks for touring bikes. Front racks hold smaller bags and keep weight low. Rear racks carry bigger loads and support panniers.
Some racks are designed for heavy loads. Others focus on light weight for faster rides. Choose racks that match your bikepacking style.
- Front racks: for light loads and front bags
- Rear racks: support heavy bags and panniers
- Lowrider racks: keep bags close to the ground
- Clip-on racks: easy to install and remove
Material And Weight Considerations
Racks come in different materials. Steel racks are strong and durable but heavier. Aluminum racks weigh less but can be less strong.
Consider how much weight you will carry. Heavy gear needs strong racks. Light gear allows for lighter racks, which saves energy on long rides.
- Steel: strong and durable, heavier
- Aluminum: light and rust-resistant
- Carbon fiber: very light, expensive
- Titanium: strong, light, and costly
Compatibility With Your Bike
Check if your bike has eyelets for rack mounting. Most touring bikes have these. Some racks fit without eyelets using clamps or adapters.
Measure your bike’s frame and wheel size. Make sure the rack fits without rubbing tires or brakes. Compatibility ensures safe and stable gear carrying.
- Look for mounting eyelets on frame and fork
- Match rack size to wheel size (26″, 27.5″, 29″)
- Check clearance for tires and brakes
- Use adapters if your bike lacks eyelets

Credit: www.reddit.com
Gathering Tools And Equipment
Fitting racks to a touring bike needs the right tools. Using proper equipment makes the job easier and safer.
Before starting, collect all tools and materials. This saves time and prevents interruptions during installation.
Essential Tools Needed
You need some basic tools to fit racks on your bike. These help secure the rack tightly and correctly.
- Allen keys (usually 4mm, 5mm, and 6mm sizes)
- Adjustable wrench or spanner
- Screwdriver (Philips or flathead depending on bolts)
- Torque wrench for correct tightness
- Bike grease to prevent rust and ease fitting
- Measuring tape to check rack alignment
Optional Accessories For Installation
Some extra accessories help during rack fitting. They make the process smoother but are not always required.
- Thread locker to keep bolts from loosening
- Zip ties for cable management around the rack
- Rubber washers to reduce noise and vibration
- Rag or cloth to clean surfaces before fitting
- Work stand to hold the bike steady while working
Preparing Your Bike
Fitting racks to a touring bike needs careful preparation. Your bike must be ready to hold extra weight safely.
Start by checking the parts where the racks will attach. Clean and inspect these areas well.
Cleaning And Inspecting Mounting Points
Look for mounting points on your bike frame. These are usually near the wheels and the rear triangle.
Clean these spots with a cloth and mild soap. Dirt can hide damage or rust.
- Use a brush to remove stubborn dirt
- Check for rust or cracks
- Ensure bolts and threads are in good shape
- Look for any bent or damaged parts
Removing Existing Components
Some bikes have racks or fenders already installed. Remove these parts before fitting new racks.
Use the right tools to avoid damage. Keep bolts and small parts safe for reuse.
- Use a wrench or Allen keys for bolts
- Loosen but do not force stuck parts
- Store screws and washers together
- Check for any hidden mounts or clips
Installing Front Racks
Fitting front racks to a touring bike is key for bikepacking trips. It helps carry gear safely and keeps your bike balanced.
Follow clear steps to attach the rack properly. This guide covers aligning mounts, attaching to forks, and securing the rack.
Aligning Rack Mounts
Start by finding the mounting points on your bike’s fork. These are small threaded holes near the wheel axle and near the fork crown.
Hold the rack up to the bike to check if the mounting holes line up with the rack’s attachment points. Adjust the rack position if needed.
- Locate lower eyelets near the fork dropouts
- Find upper eyelets close to the fork crown
- Match rack arms to these eyelets
Attaching Rack To Forks
Use the bolts that came with your rack or bike. Insert bolts through the rack arms into the fork eyelets. Tighten them by hand first.
Make sure the rack sits evenly on both sides. Avoid forcing bolts as that can damage the threads or rack.
- Insert bolts into lower mount points first
- Attach upper arms to fork crown eyelets
- Hand tighten bolts to keep rack stable
Securing And Adjusting
Use a wrench to tighten all bolts firmly. Check the rack is straight and does not touch the tire or brake parts.
If the rack wobbles, loosen bolts and adjust the arms. Some racks come with adjustable struts to help fit different fork shapes.
- Tighten all bolts with a wrench
- Check clearance from tire and brakes
- Adjust struts or arms for a secure fit
- Recheck all bolts after test ride
Installing Rear Racks
Fitting racks to a touring bike helps carry gear for bikepacking trips. Rear racks hold bags and supplies securely.
Proper installation ensures the rack stays stable and does not affect bike handling. Follow key steps for best results.
Positioning On Seat Stays And Dropouts
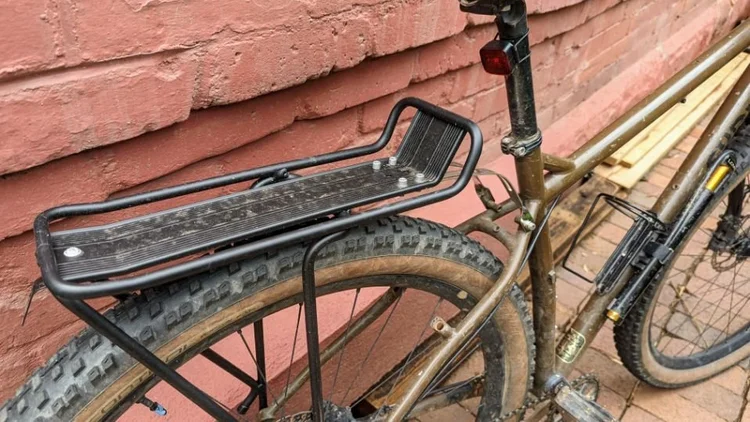
Rear racks attach mainly to the seat stays and dropouts of your bike frame. These points provide strong support.
Place the rack arms along the seat stays. The lower rack supports connect at the dropouts near the rear wheel axle.
- Align rack arms parallel to seat stays
- Use the dropout holes for lower rack mounts
- Ensure rack sits level from side to side
- Check there is enough space for the rear wheel
Using Mounting Hardware
Use bolts and washers to attach the rack to frame mounts. Most racks come with the needed hardware.
Tighten bolts firmly but do not overtighten. Loose bolts cause rack wobble, too tight can damage threads.
- Start bolts by hand to avoid cross-threading
- Use appropriate sized washers for secure fit
- Check for any missing or extra mounting parts
- Use threadlocker if recommended to prevent loosening
Ensuring Stability And Clearance
Make sure the rack is stable and does not touch the tire or brakes. Clearance prevents damage and safe riding.
Test the rack by pressing down and shaking it lightly. Adjust mounting points if the rack moves or rubs parts.
- Check clearance between rack and tire sides
- Allow space between rack and brake parts
- Secure all bolts after adjustments
- Load the rack lightly and test stability before riding
Adjusting And Testing
Fitting racks on a touring bike needs careful adjustment and testing. These steps help ensure your rack stays secure and balanced.
Proper fitting prevents damage to your bike and gear. You will learn how to check alignment, avoid interference, and test the load safely.
Fine-tuning Rack Alignment
Start by making sure the rack sits evenly on both sides of the bike. Align the rack with the frame to avoid stress on mounting points.
- Loosen mounting bolts slightly for adjustment
- Shift the rack side to side to center it
- Check that the rack is level from front to back
- Tighten bolts gradually and evenly
- Recheck alignment after tightening
Checking For Interference
Look for any parts of the rack that touch your bike’s moving parts. Interference can cause noise or damage during riding.
| Bike Part | Check Point | Adjustment Tip |
|---|---|---|
| Rear Wheel | Clearance from rack stays | Move rack slightly outward |
| Brake Cables | Not pinched by rack mounts | Re-route cables if needed |
| Derailleur | Free movement behind rack | Adjust rack height |
| Fenders | Enough space to avoid rubbing | Shift rack or fender |
Load Testing And Safety Checks
After fitting, test the rack with weight similar to your usual load. This step confirms stability and safety before long rides.
- Attach your bags or panniers securely
- Load the rack with typical weight
- Push the bike to check rack movement
- Listen for unusual noises or loosening parts
- Make final bolt tightness check
Tips For Maintenance
Keeping your touring bike racks in good shape helps your bikepacking trips go smoothly. Regular care stops problems before they start.
Simple maintenance tasks save you time and money. They also keep your gear safe and stable on the road.
Regular Inspection
Check your racks often for cracks, bends, or rust. Look closely at the joints and welds. Early damage can get worse fast.
Inspect the mounting points where the rack meets the bike frame. Make sure nothing is loose or broken.
- Look for cracks or dents
- Check for rust or corrosion
- Examine welds and joints
- Inspect mounting points
Tightening Bolts
Loose bolts can cause racks to shift or fall off. Use a wrench to tighten all bolts regularly. Do this before every big trip.
Don’t overtighten bolts. This can strip threads or damage parts. Use the right size tool for each bolt.
- Check bolts at mounting points
- Use a wrench or Allen key
- Tighten bolts firmly but gently
- Recheck bolts after long rides
Handling Wear And Tear
Racks face rough conditions on bikepacking trips. Dirt, water, and bumps cause wear. Clean racks after rides to stop rust.
Replace worn or broken parts quickly. Using damaged racks risks your safety and gear. Keep spare bolts and parts handy.
- Clean racks with water and a soft brush
- Dry racks fully to prevent rust
- Replace damaged bolts and mounts
- Carry spare parts on long trips

Credit: www.reddit.com
Credit: www.treelinereview.com
Frequently Asked Questions
How Do I Choose The Right Rack For Touring Bikes?
Choose racks based on weight capacity, material, and compatibility with your bike. Steel racks are durable; aluminum is lightweight. Ensure the rack fits your bike’s frame and mounting points for stability and safety during bikepacking.
What Tools Are Needed To Fit Racks On Touring Bikes?
You need Allen keys, screwdrivers, a wrench set, and possibly a torque wrench. These tools help tighten bolts securely and adjust rack positioning. Having the right tools ensures a proper, safe installation.
Can I Fit Racks Without Pre-drilled Mounting Holes?
Yes, but it requires additional clamps or P-clamps for attachment. Ensure the rack is firmly secured to avoid movement. This method is common for frames lacking rack mounts but requires careful fitting.
How Much Weight Can A Touring Bike Rack Hold?
Most touring racks support 25-55 pounds (11-25 kg). Check the manufacturer’s specifications for exact limits. Avoid overloading to maintain balance and prevent damage to the bike or rack.
Conclusion
Fitting racks to your touring bike makes bikepacking trips easier. You get more space to carry your gear safely. Choose racks that fit your bike’s size and style. Use the right tools to avoid damage and ensure stability. Test the racks before long rides to confirm they hold well.
A well-installed rack adds comfort and convenience on the road. Enjoy your journey with organized and balanced packing. Ready for your next bikepacking adventure?



