
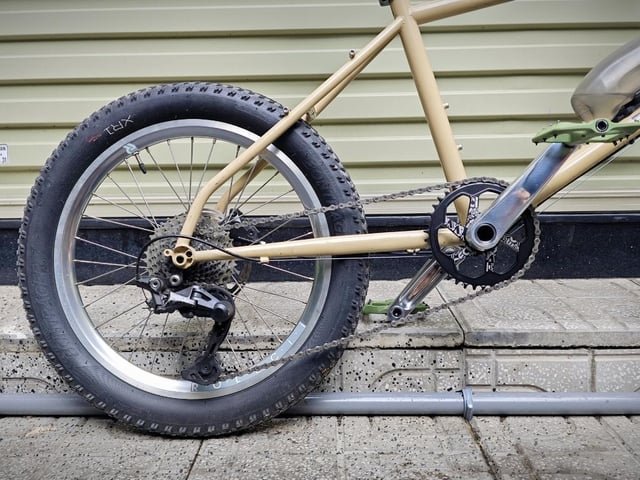
If you love traveling with your Mini Velo bike, you know how tricky it can be to fit it into your car or luggage. But what if you could make it much easier by disassembling your bike quickly and safely?
Imagine saving space, protecting your bike from damage, and traveling stress-free. This guide will show you exactly how to take apart your Mini Velo bike step-by-step, even if you’re not a mechanic. By the end, you’ll feel confident and ready to pack your bike for any trip.
Keep reading to discover simple tips that will change the way you travel with your Mini Velo forever.
Tools Needed
Essential tools help you take apart a Mini Velo bike safely and easily. A set of Allen wrenchesis key for loosening bolts. A adjustable wrenchfits different sizes of nuts. You will also need a screwdriverfor small screws and clips. A tire leverhelps remove tires without damage.
Optional accessories make the process smoother. A bike standholds the bike steady. Zip tieskeep small parts organized. A soft clothprotects the bike’s frame from scratches. A small containeris useful for keeping screws and bolts safe.
Preparing The Bike
Start by cleaning your Mini Velo bike. Dirt and grease can make disassembly harder. Use a soft cloth and mild soap to wipe the frame, wheels, and chain. Dry the bike well to avoid rust.
Choose a clean, flat workspacewith good lighting. This helps keep small parts safe and easy to find. A large table or garage floor works well. Keep tools and parts organized.
- Clear the area from clutter
- Use a mat or towel to protect the bike and floor
- Have containers ready for screws and small parts
- Good light helps see parts and avoid mistakes
Removing Wheels
Start by loosening the quick-release lever or axle nuts on the front wheel. Then, gently lift the bike frame while pulling the wheel down to detach it. Be careful not to damage the brake cables or disc brakes during removal.
For the rear wheel, shift the chain to the smallest gear to reduce tension. Loosen the quick-release lever or axle nuts. Carefully pull the wheel out from the frame, guiding the chain off the sprockets. Keep the derailleur away to avoid damage.
Detaching Handlebars
Start by locating the boltsholding the handlebars. Use a wrenchor Allen keyto loosenthem carefully. Avoid removing the bolts completely unless necessary.
Once the bolts are loose, you can either foldor removethe handlebars.
- Folding:Gently push the handlebars down or to the side until they fold flat against the frame.
- Removing:Fully unscrew the bolts and lift the handlebars off the stem.
Be sure to keep all bolts in a safe place. This prevents losing small parts during travel.
Taking Off Pedals
Removing pedals from a mini velo bike is simple with the right tools. Loosen the pedal nuts by turning them counterclockwise to detach. This step helps make your bike more compact for travel.
Identifying Pedal Threads
Pedals have different threads. The right pedal has normal threads. Turn it counterclockwise to remove. The left pedal has reverse threads. Turn it clockwise to unscrew. Look for an “R” or “L” mark on pedals. This shows right or left threads. Check to avoid damage.Using Proper Tools
Use a pedal wrench or Allen key. These tools help remove pedals easily. Place the tool on the pedal bolt. Turn the wrench in the correct direction. Apply steady pressure. Avoid sudden force. The right tool protects threads from damage. Always keep tools clean. This ensures safe disassembly. `Lowering Or Removing Seat Post
Lowering or removing the seat post makes the bike more compact for travel. Loosen the seat clamp, then slide the post down or pull it out carefully. This step helps fit the mini velo into smaller spaces.
The seat clamp holds the seat post tight. Loosen the clamp to lower or remove the seat. Use an Allen wrench for the job. Turn the wrench counterclockwise. The clamp will open up. Make sure not to lose any small parts. They are important for putting it back. Once the clamp is loose, pull the seat post up. Be gentle to avoid damage. If it’s stuck, twist it a little. Pull until it comes out. Keep the seat post in a safe place. You will need it later. Make sure all parts stay together. This makes it easy to put back. `Folding Frame Mechanism
The folding frame of a Mini Velo bike has special points that allow easy folding. These folding pointsare usually near the bike’s center and handlebars. Finding these points is important to fold the bike properly and avoid damage.
After folding, securing the frame is necessary to keep it compact. Use the built-in locks or clamps to hold the frame parts together. This prevents the bike from unfolding during travel.
- Check for quick-release levers or knobs at folding joints.
- Fold the frame gently along these points.
- Lock the frame tightly using the clamps.
- Use additional straps if needed for extra security.

Credit: www.reddit.com
Packing Tips
Protecting the bike parts is very important before packing. Use soft cloths or foam to wrap delicate parts like the chain, gears, and brakes. This helps prevent scratches and damage during travel. Small pieces, like bolts and screws, should go into a sealed bag to avoid loss. Avoid putting heavy items on top of the bike parts to keep them safe.
Choosing the right bag or case makes travel easier and safer. A hard case offers great protection but can be heavy. Soft bags are lighter and easier to carry but need extra padding. Check the bag size matches your bike when disassembled. Look for bags with straps or wheels for easy movement.
Reassembly Tips
Align the frame parts carefully to fit them back together. Tighten all screws and bolts securely but avoid overtightening.
Reconnect the handlebars, pedals, and wheels. Make sure each part clicks or locks into place.
Check the brakes and gears for smooth operation. Adjust cables if needed to ensure safety.
- Ensure tires are properly inflated before riding.
- Test brakes by squeezing the levers firmly.
- Spin wheels to check for wobbling or unusual noises.
- Verify the chain is clean and well-lubricated.
- Wear a helmet and protective gear before riding.

Credit: www.reddit.com

Credit: www.reddit.com
Frequently Asked Questions
How Do I Safely Disassemble A Mini Velo Bike?
Start by removing pedals, wheels, and handlebars carefully. Use appropriate tools to avoid damage. Keep small parts organized for easy reassembly.
What Tools Are Needed To Disassemble Mini Velo Bikes?
You typically need Allen keys, a pedal wrench, and tire levers. A bike multi-tool can be handy for quick adjustments and removals.
How To Protect Mini Velo Parts During Travel?
Wrap delicate parts with bubble wrap or foam padding. Use a sturdy bike travel case to prevent scratches and impacts.
Can I Disassemble Mini Velo Bikes Without Professional Help?
Yes, with basic bike knowledge and proper tools, most riders can disassemble Mini Velo bikes themselves safely and efficiently.
Conclusion
Disassembling a Mini Velo bike makes travel easier and safer. Take your time with each step to avoid mistakes. Keep all small parts in a secure place. Practice disassembly before your trip to build confidence. Packing your bike properly saves space and prevents damage.
Enjoy your journey with a bike ready to ride again quickly. Simple steps lead to smooth travels and happy rides.



