
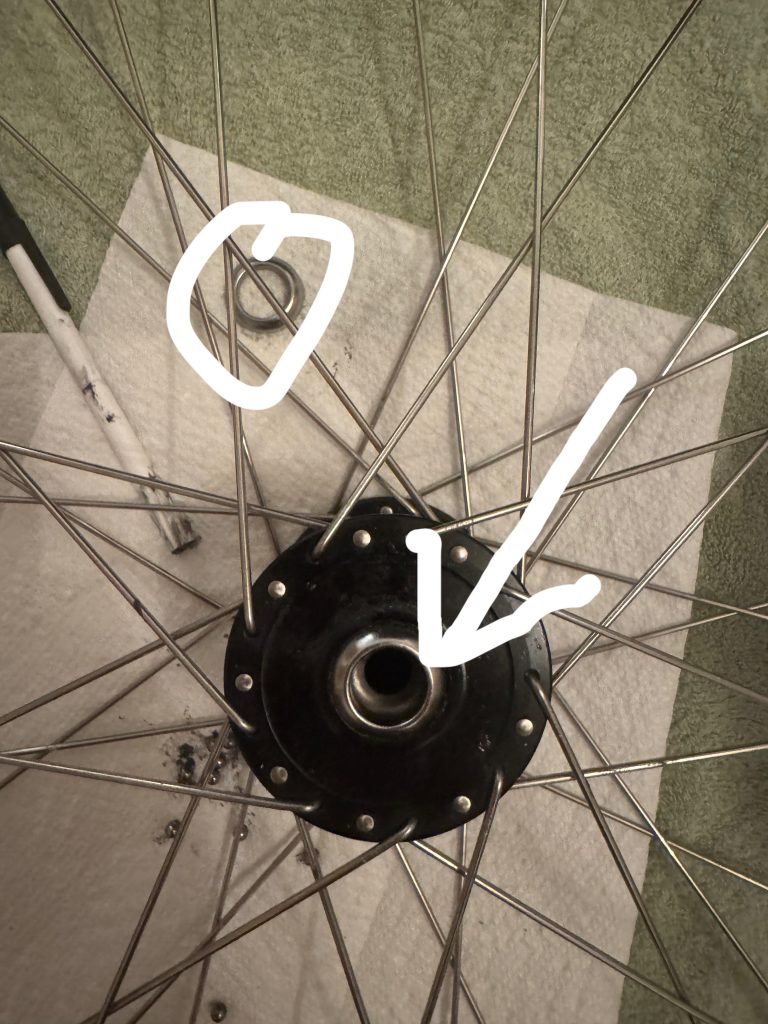
If your dirt jump bike isn’t feeling as smooth as it used to, the bearings might be the problem. Knowing how to replace your bike’s bearings can save you time, money, and frustration.
You don’t need to be a mechanic to do it yourself. In this guide, you’ll learn simple, step-by-step tips to get your bike back in top shape. Keep reading, and soon you’ll be jumping higher and riding smoother than ever.
Tools Needed
Replacing bearings on a dirt jump bike needs the right tools. Using proper tools makes the job easier and safer.
Gather all tools before you start. This helps avoid delays and keeps the process smooth.
Essential Tools List
You need a few basic tools to remove and install bike bearings correctly. These tools help you work without damage.
- Bearing puller or bearing press
- Hex wrenches (typically 4mm to 8mm sizes)
- Grease for bearings
- Rubber mallet
- Clean rags or paper towels
- Bike stand or a way to hold the bike steady
These tools make sure you can safely remove old bearings and fit new ones without extra force.
Optional Tools For Ease
Optional tools are not required but help make the job faster and cleaner. They improve your control and comfort.
- Torque wrench to tighten bolts to exact specs
- Needle nose pliers for small parts
- Cleaning brush to remove dirt from parts
- Plastic or wooden drift to avoid bearing damage
- Gloves to keep hands clean and improve grip
- Work mat to keep parts organized
Using these tools reduces mistakes and helps protect your bike parts during bearing replacement.

Credit: cyclingmagazine.ca
Preparing Your Bike
Before replacing the bearings on your dirt jump bike, you need to prepare it. This makes the job easier and safer. Proper preparation helps you avoid damage to your bike parts.
Start by cleaning the bike and removing the wheels. These steps give you better access to the bearings and keep dirt away from the work area.
Cleaning The Bike
Clean your bike well before you start. Dirt and grime can get into the bearings and cause problems later. Use a gentle bike cleaner and a soft brush.
Focus on the frame, fork, and areas around the wheels. Avoid spraying water directly into the bearings or hubs. Dry the bike with a clean cloth after washing.
- Use bike-specific cleaner or mild soap
- Brush off mud and dirt gently
- Rinse with low-pressure water
- Dry all parts with a clean towel
Removing The Wheels
Take off the wheels to access the bearings easily. Use the right tools like a wrench or quick-release lever. Make sure the bike is stable while you work.
Remove the front wheel first, then the rear wheel. Keep track of any washers or spacers. Place the wheels on a clean surface to avoid dirt.
- Use a bike stand or flip the bike upside down
- Open the quick-release or loosen axle nuts
- Pull the wheel out carefully
- Keep small parts in a safe place
Removing Old Bearings
Replacing dirt jump bike bearings starts with removing the old ones carefully. This process keeps your bike running smoothly and safely. Take your time and use the right tools for best results.
Old bearings can be stuck or dirty. Proper removal helps avoid damage to the bike parts. Follow the steps below for a clean bearing removal.
Accessing The Bearings
First, remove the wheel from the bike frame. This lets you reach the bearings easily. Next, take off the tire and rim tape to expose the hub. Use a wrench to loosen the axle nuts or quick-release lever.
Clean the area around the hub to avoid dirt getting inside. You may need to remove dust covers or seals carefully. Keep all small parts in a safe place to avoid losing them.
Techniques For Bearing Removal
Removing bearings needs some care to avoid damage. Use the right tools and follow these methods to get bearings out safely.
- Use a bearing puller tool to press out the bearing evenly.
- If no puller is available, use a small punch and hammer to tap the bearing out from the opposite side.
- Apply penetrating oil to loosen stuck bearings before removal.
- Do not pry or force the bearing, as this can damage the hub shell.
- Work slowly and check progress often to prevent mistakes.
| Tool | Purpose | Notes |
|---|---|---|
| Bearing Puller | Removes bearing evenly | Best tool for safe removal |
| Hammer and Punch | Taps bearing out gently | Use with care, avoid damage |
| Penetrating Oil | Loosens stuck bearings | Apply before removal |
| Wrench | Removes axle nuts | Allows wheel removal |

Credit: www.danscomp.com
Selecting Replacement Bearings
Replacing bearings on your dirt jump bike keeps it running smooth and safe. Choosing the right bearings is key for good performance.
This guide helps you pick suitable bearings by explaining types and quality factors.
Bearing Types
Dirt jump bikes use different bearing types depending on the part. Common types include ball bearings, cartridge bearings, and sealed bearings.
- Ball Bearings:Small balls inside a race, simple design, easy to replace.
- Cartridge Bearings:Self-contained units, sealed to keep dirt out.
- Sealed Bearings:Protected with seals to prevent dirt and water damage.
Choosing Quality Bearings
Good bearings last longer and reduce friction. Look for quality materials and proper sealing to avoid early wear.
| Feature | What to Look For |
|---|---|
| Material | Steel or ceramic for durability |
| Seals | Rubber or metal seals to keep dirt out |
| Brand | Reputable brands ensure quality and precision |
| Size | Exact fit for your bike model |
| Load Rating | Supports the weight and impact of dirt jumps |
Installing New Bearings
Installing new bearings is key to keeping your dirt jump bike running smoothly. Good bearings help your wheels spin freely and last longer.
Take your time during installation. Proper steps ensure the bearings fit right and work well.
Proper Alignment
Make sure the new bearings align correctly with the hub and frame parts. Wrong alignment can damage the bearing or cause rough spinning.
Check that the bearing sits evenly and flat in its seat before pressing it in. This helps avoid bending or warping the bearing.
- Clean the bearing seat and hub carefully
- Place the bearing straight into the seat
- Check the bearing is flush and level
- Avoid tilting or forcing the bearing at an angle
Pressing Bearings In
Use a bearing press or a suitable tool to push the bearing into place. Press evenly to protect the bearing’s parts.
Do not hit the bearing directly with a hammer. Use a block or sleeve that matches the bearing’s outer edge to press it in safely.
- Place the bearing on the hub seat
- Use a press or socket to apply even pressure
- Press slowly until the bearing is fully seated
- Check that the bearing spins smoothly after installation
Lubrication Tips
Keeping your dirt jump bike bearings well-lubricated helps them run smoothly. Proper lubrication also protects against dirt and water damage.
Use the right lubricant and apply it carefully. This guide covers best lubricants and how to apply them correctly.
Best Lubricants
Choose lubricants made for bike bearings. They must resist dirt, water, and heavy pressure.
- Water-resistant grease is ideal for dirt jump bikes.
- Light oil works for quick lubrication but may need frequent reapplication.
- Dry lubricants keep dirt from sticking but wear off faster in wet conditions.
- Use synthetic grease for long-lasting protection and smooth bearing movement.
Applying Lubricant Correctly
Clean the bearings before applying lubricant. Dirt or old grease can harm the bearing’s performance.
| Step | Action |
| 1 | Remove the bearing from the bike. |
| 2 | Wipe off old grease and dirt with a clean cloth. |
| 3 | Use a degreaser to clean thoroughly, then dry completely. |
| 4 | Apply a small amount of lubricant evenly around the bearing. |
| 5 | Spin the bearing to spread lubricant inside. |
| 6 | Reinstall the bearing carefully on your bike. |
Do not use too much lubricant. Excess grease can attract dirt and slow the bearing.
Reassembling The Bike
After replacing the bike bearings, you need to put the bike back together. This step is important to make sure the bike works well.
Take your time and follow each step carefully. Proper reassembly helps your bike ride smoothly and safely.
Reattaching Wheels
Start by putting the wheels back on the bike frame. Make sure the bearings fit well inside the hubs.
Align the wheel with the dropouts and slide the axle in place. Tighten the nuts or quick-release levers securely.
- Check the wheel spins freely without wobbling
- Confirm the axle is fully seated in the frame
- Tighten all bolts to the correct torque
Final Adjustments
After reattaching the wheels, check the brakes and gears. Adjust them to ensure smooth operation.
Test the bike by spinning the wheels and pressing the brakes. Make small adjustments if needed for safety.
- Tighten bolts and nuts one last time
- Align the brake pads with the rims
- Shift through gears to check smooth changes
- Lubricate the chain if needed

Credit: jetcars.co.za
Maintenance Tips
Keeping your dirt jump bike bearings in good shape is key to smooth rides. Regular care helps prevent damage and costly repairs.
This guide covers simple steps to inspect and extend the life of your bike bearings.
Regular Inspection
Check your bearings often to catch problems early. Look for rough spinning or noise during rides.
- Spin the wheel and feel for smooth rotation
- Listen for clicking or grinding sounds
- Check for play or wobble in the wheel
- Inspect seals for dirt or damage
- Clean the hub area regularly
Extending Bearing Life
Proper care can make bearings last longer. Use the right tools and keep parts clean and lubricated.
| Care Tip | Reason |
| Keep bearings dry | Prevents rust and corrosion |
| Use quality grease | Reduces friction and wear |
| Replace seals if damaged | Keeps dirt out |
| Do not over-tighten nuts | Avoids bearing damage |
| Store bike indoors | Protects from weather |
Frequently Asked Questions
How Often Should I Replace Dirt Jump Bike Bearings?
Replace dirt jump bike bearings every 6 to 12 months. Frequent jumping wears out bearings faster. Inspect for roughness or noise regularly to ensure smooth rides and avoid damage.
What Tools Are Needed For Bearing Replacement?
You’ll need bearing pullers, grease, a rubber mallet, and hex wrenches. These tools help remove old bearings and install new ones safely and efficiently.
How Do I Know If My Bike Bearings Need Replacement?
Signs include grinding sounds, rough rotation, and bike wobbling. If bearings feel sticky or loose, it’s time to replace them to maintain performance.
Can I Replace Bike Bearings Myself Safely?
Yes, with the right tools and guidance, you can replace bearings safely. Follow step-by-step instructions carefully to avoid damage and ensure proper installation.
Conclusion
Replacing dirt jump bike bearings keeps your ride smooth and safe. Clean and check parts carefully before installing new bearings. Use the right tools to avoid damage. Regular maintenance extends bearing life and improves performance. Take your time and follow each step closely.
Soon, you will enjoy a smoother, more reliable dirt jump bike. Keep practicing these skills for better bike care. Your bike deserves the best attention for every jump.



