
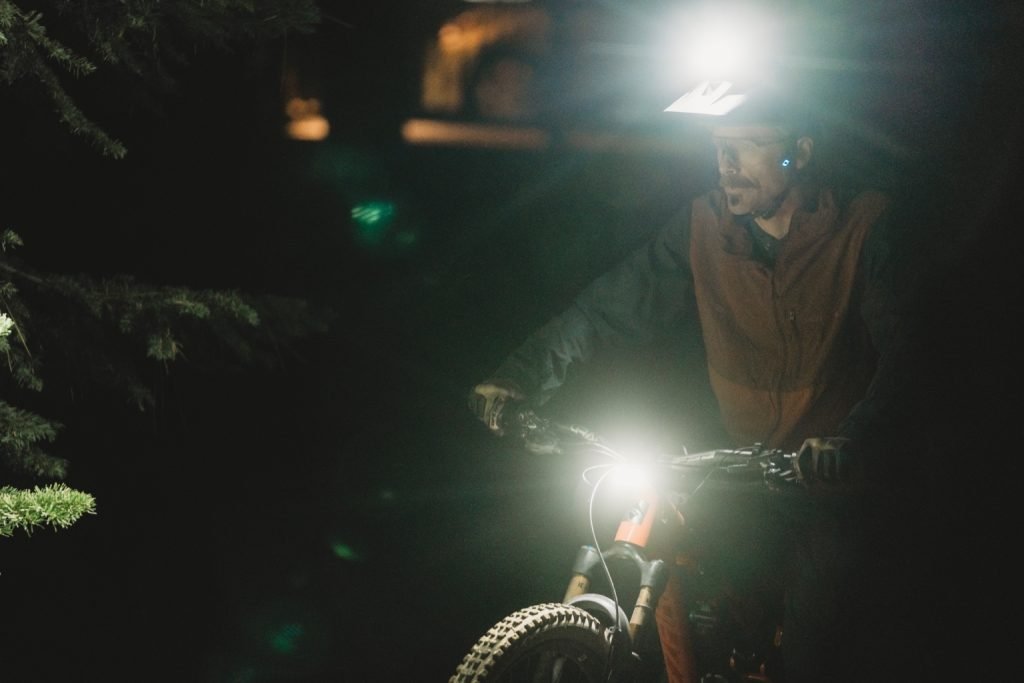
When you’re out on a night bikepacking ride, the right lighting can make all the difference between a smooth adventure and a risky struggle. You need lights that not only brighten your path but also keep you safe and comfortable.
But with so many options out there, how do you pick the perfect setup for your ride? This guide will help you understand exactly what to look for in bike lights, so you can focus on the thrill of the night without worrying about visibility.
Keep reading to discover how to choose lighting that fits your needs and transforms your night rides.

Credit: alpkit.com
Importance Of Night Lighting
Lighting is very important for night bikepacking rides. It helps you see the path ahead and avoid obstacles.
Good lights also make you visible to others. This lowers the chance of accidents during night rides.
Safety And Visibility
Bright lights show the road clearly. They help you spot rocks, holes, or branches on the trail.
Lights also make sure drivers and other riders see you. This reduces the risk of crashes.
- Use a strong front light to see ahead.
- Attach a red rear light to be seen from behind.
- Wear reflective gear for extra visibility.
Legal Requirements
Many places require lights on bikes after dark. Laws help keep riders safe on public roads.
Check local rules before your ride. This avoids fines and keeps you riding legally.
- Most areas require a white front light.
- A red rear light is often mandatory.
- Some places need reflectors on pedals or wheels.
Enhancing Riding Experience
Good lighting makes night rides more fun. It helps you feel confident and safe on the trail.
Lights with adjustable brightness let you save battery and suit different conditions.
- Choose lights with long battery life for longer trips.
- Use lights with different modes for various paths.
- Headlamps can add extra light where needed.

Credit: hk-swinnertoncycles.glopalstore.com
Types Of Bike Lights
Choosing the right lighting is important for safe night bikepacking rides. Different lights serve different purposes.
Knowing the types of bike lights helps you pick what fits your needs best.
Headlights
Headlights light the path in front of you. They help you see obstacles and road details clearly.
Choose headlights with enough brightness for dark trails. Look for lights with adjustable beam settings.
- Bright and focused beam for clear vision
- Rechargeable or battery-powered options
- Multiple modes for different conditions
Taillights
Taillights make you visible to others from behind. They are essential for safety on roads and trails.
Pick taillights that are bright and have flashing modes to catch attention easily.
- Red lights to signal your position
- Steady and flashing modes for visibility
- Water-resistant and durable design
Helmet Lights
Helmet lights add extra light where you look. They help light turns and spots off your bike’s path.
These lights are useful for seeing around corners and scanning the trail ahead quickly.
- Light moves with your head
- Good for tight turns and technical trails
- Usually lightweight and easy to attach
Handlebar And Frame Lights
Handlebar and frame lights add side visibility. They help others see your bike’s full size at night.
These lights improve safety by lighting up your bike’s outline and making you more visible from all angles.
- Side visibility for safety
- Can be steady or flashing
- Easy to mount on different parts of the bike
Key Features To Consider
Choosing the right lighting is important for safe night bikepacking rides. Good lights help you see the trail and make you visible to others.
Look at several features before buying a bike light. These features affect how well the light works for your needs.
Brightness And Beam Pattern
Brightness is measured in lumens. Higher lumens mean more light. Choose brightness based on the trail and speed.
Beam pattern shows how light spreads. Wide beams light up more area. Focused beams shine farther ahead.
- Use wide beams for slow, technical trails
- Choose focused beams for fast rides on clear paths
- Adjustable beams add flexibility
Battery Life And Power Source
Battery life determines how long your light works. Pick lights with enough runtime for your trip length.
Some lights use rechargeable batteries. Others use replaceable ones. Consider what is easier for you to manage.
- Rechargeable batteries save money over time
- Replaceable batteries are quick to swap on the road
- Check charging options and time
Weight And Size
Lightweight gear is better for long rides. Heavy lights add load and can slow you down.
Small lights fit easily on your bike. Make sure size does not affect brightness or battery life too much.
- Choose lights that balance weight and power
- Consider compact designs for easy packing
- Test how the light feels on your bike
Durability And Weather Resistance
Bikepacking lights face rough conditions. Pick lights that resist water and dust.
Look for strong materials and good seals. This helps lights last longer in rain or mud.
- Check the IP rating for water and dust protection
- Choose shock-resistant designs
- Read reviews about durability
Mounting Options
Mounting affects how stable and easy to use your light is. Check if mounts fit your bike’s handlebars or helmet.
Some lights have quick-release mounts. Others need tools to install. Choose what works best for your setup.
- Quick-release mounts allow fast removal
- Adjustable mounts help aim the light correctly
- Ensure mounts are secure for rough trails

Credit: www.reddit.com
Choosing Lights For Different Terrains
Choosing the right lights is key for safe night bikepacking rides. Different terrains need different types of lighting. Brightness, beam pattern, and battery life all matter.
Understanding how to pick lights for urban, off-road, and mixed terrain helps you see better and stay safe. Below are tips for each terrain type.
Urban Night Rides
Urban rides require lights that make you visible to cars and pedestrians. A steady, bright white beam helps you see street signs and avoid obstacles.
- Use a front light with 300 to 500 lumens
- Choose a flashing rear light for visibility
- Select a beam with a wide, even spread
- Ensure lights have good battery life for long trips
Off-road And Trail Riding
Off-road trails need strong, focused beams to spot roots and rocks. Lights must handle bumps and dirt well.
| Light Feature | Recommended | Reason |
|---|---|---|
| Brightness | 800 to 1500 lumens | See obstacles clearly in dark woods |
| Beam Pattern | Focused with some side spill | Lights path ahead and sides for safety |
| Durability | Waterproof and shockproof | Withstands rough terrain and weather |
| Mounting | Secure handlebar mount | Prevents light from shaking |
Mixed Terrain Adventures
Mixed terrain rides need versatile lights that adjust to changing conditions. You may switch from smooth roads to trails in one ride.
Consider these tips for mixed terrain lighting:
- Choose a light with multiple brightness settings
- Pick a beam that can switch between wide and focused
- Carry a backup light or extra batteries
- Use rechargeable lights for longer rides
Battery Management Tips
Good battery management keeps your lights running all night. Planning helps avoid sudden power loss. This guide shares smart ways to manage battery power on night bikepacking rides.
Managing battery power means understanding charging, carrying extras, and saving energy while riding. Each part helps stretch your light’s runtime for safety and visibility.
Charging Strategies
Charge your batteries fully before the ride. Use a reliable charger that matches your battery type. Avoid partial charging to get the best runtime. If your ride lasts multiple nights, plan charging stops ahead.
- Charge batteries to 100% before leaving.
- Use chargers with correct voltage and current.
- Carry a portable solar charger for long trips.
- Charge during breaks or meal stops.
- Keep batteries warm while charging in cold weather.
Spare Batteries And Power Banks
Bringing spare batteries or power banks adds backup power. Store spares in a dry, safe place. Make sure spares are fully charged. Power banks can charge lights or phones on the go.
| Item | Storage Tip | Charging Tip |
| Spare Battery | Keep in padded case | Charge fully before trip |
| Power Bank | Protect from moisture | Charge after each use |
| Extra Cables | Organize with clips | Test before ride |
Energy-efficient Riding Practices
Saving light energy helps batteries last longer. Adjust your riding to reduce power use. Use light modes wisely and keep your speed steady.
- Use the lowest light setting needed for safety.
- Turn off lights when stopped for long periods.
- Ride at steady speeds to avoid sudden power spikes.
- Use motion sensors if available to save energy.
- Plan your route to avoid unnecessary detours.
Additional Lighting Accessories
Choosing the right lighting accessories helps you stay safe on night bikepacking rides. These extras improve your visibility and make your ride easier.
Good lighting accessories work well with your main bike lights. They add layers of safety and convenience.
Reflective Gear
Reflective gear makes you visible without power. It reflects light from car headlights and other sources.
Common reflective items include vests, ankle bands, and stickers. These are easy to add and lightweight.
- Wear reflective clothing to increase visibility
- Add reflective tape to your bike frame and bags
- Use reflective ankle and wrist bands for side visibility
Light Controllers And Sensors
Light controllers help manage your bike lights easily. Some have sensors that turn lights on or off automatically.
These devices save battery and adjust brightness based on surroundings. They make night riding more comfortable and safe.
- Use handlebar-mounted controllers for quick light adjustments
- Install light sensors for automatic brightness changes
- Choose controllers compatible with your bike lights
Backup Lighting Options
Backup lights keep you safe if your main light fails. Carry extra batteries or small portable lights.
Having backup options ensures you won’t be left in the dark on remote trails. Choose lightweight and reliable backups.
- Carry spare batteries for your main lights
- Use a small clip-on light as a backup
- Consider rechargeable backup lights for longer rides
Budgeting For Night Riding Lights
Choosing the right lighting for night bikepacking is important for safety. Lights come in many price ranges. You can find good options that fit your budget.
Think about how often you ride at night and the conditions you face. This helps decide how much to spend. Let’s look at options from entry-level to premium.
Entry-level Options
Entry-level lights are affordable and good for occasional night rides. They usually have lower brightness and fewer features but still improve visibility. These lights often use AA or AAA batteries.
- Simple to use and lightweight
- Brightness ranges from 100 to 300 lumens
- Basic mounting systems
- Battery life between 3 to 6 hours
Mid-range Choices
Mid-range lights offer better brightness and longer battery life. They have more mounting options and may include rechargeable batteries. These lights suit regular night riders.
| Feature | Entry-level | Mid-range |
| Brightness (lumens) | 100–300 | 300–700 |
| Battery Type | Disposable AA/AAA | Rechargeable lithium-ion |
| Battery Life | 3–6 hours | 6–12 hours |
| Mounting | Basic | Flexible with multiple options |
| Price Range | Low | Medium |
Premium Lighting Systems
Premium lights provide high brightness and long battery life. They include advanced features like multiple light modes and strong mounts. These lights are for serious night riders and long trips.
- Brightness over 700 lumens
- Rechargeable with USB or external battery packs
- Multiple modes for different conditions
- Durable, weather-resistant design
- Smart features like light sensors or app control
Maintenance And Troubleshooting
Good lighting is key for safe night bikepacking. Taking care of your lights keeps them working well.
Learn how to clean, care for batteries, and fix common problems with your bike lights.
Regular Cleaning
Dirt and mud can block light and damage your bike light. Clean your lights often for clear beams.
Use a soft cloth and mild soap to wipe the lens and body. Avoid harsh chemicals that can harm plastic.
- Remove the light from the bike before cleaning
- Wipe lens gently with a damp cloth
- Dry completely before reattaching
- Check for cracks or loose parts while cleaning
Battery Care
Proper battery care extends the life of your lights. Charge batteries fully before each ride.
Store batteries in a cool, dry place. Avoid leaving them in direct sunlight or freezing temperatures.
- Charge batteries with the correct charger
- Do not overcharge or leave charging unattended
- Replace old batteries that hold less power
- Carry spare batteries on long rides
Common Issues And Fixes
Your bike light might fail or flicker during rides. Check simple issues before replacing parts.
Loose connections or dirty contacts can cause problems. Tighten mounts and clean battery contacts.
- Light won’t turn on: Check battery charge and switch position
- Light flickers: Clean contacts and ensure tight connections
- Beam is dim: Replace old batteries or clean the lens
- Light falls off: Secure mounting bracket and check straps
Frequently Asked Questions
What Type Of Bike Light Is Best For Night Bikepacking?
LED lights are best due to their brightness and energy efficiency. Choose lights with multiple brightness settings. A combination of a strong front light and rear red light is ideal for safety and visibility.
How Many Lumens Do I Need For Night Bikepacking?
For night bikepacking, 500 to 1000 lumens is recommended. This range provides enough brightness for trails and roads. Adjust brightness according to terrain and speed to conserve battery life.
Should I Use Rechargeable Or Disposable Bike Lights?
Rechargeable bike lights are more eco-friendly and cost-effective long term. They offer consistent brightness and quick recharge times. Disposable lights are less sustainable and can be costly over many rides.
How Can I Extend Battery Life During Long Rides?
Use lower brightness settings when possible to save power. Carry extra batteries or a power bank for recharging. Turn off lights during well-lit sections or breaks to conserve energy.
Conclusion
Choosing the right lighting ensures safe night bikepacking. Brightness is key. Look for adjustable settings for different trails. Battery life matters too. Long rides need reliable power. Consider weight and size. Compact lights are easier to handle. Waterproof lights stand up to weather.
Test your setup before heading out. Practice makes perfect. Safety should always come first. Enjoy your ride with confidence. Good lighting enhances every adventure. Stay visible and safe.



