

Charging your electric velomobile might seem tricky at first, but it’s easier than you think. Knowing how to charge your vehicle properly can save you time and extend your battery’s life.
In this guide, you’ll discover simple steps to get your velomobile ready for every ride. Whether you’re new to electric vehicles or just want to make sure you’re doing it right, this article will give you clear, practical advice. Keep reading, and you’ll never worry about running out of power again.

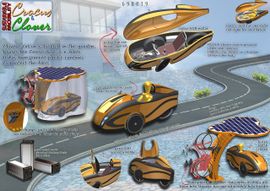
Credit: www.hammacher.com
Types Of Electric Velomobile Batteries
Electric velomobiles use different battery types for power. Each battery has unique features. Knowing these helps you choose the best one.
This guide covers lithium-ion, lead-acid, and nickel-metal hydride batteries. Learn how they work and their pros and cons.
Lithium-ion Batteries
Lithium-ion batteries are common in electric velomobiles. They are light and hold a lot of energy. These batteries charge fast and last long.
- High energy density
- Lightweight and compact
- Long cycle life
- Fast charging capability
- More expensive than other types
Lead-acid Batteries
Lead-acid batteries are older but still used in some velomobiles. They are heavier and have less energy capacity. These batteries cost less upfront.
| Feature | Lead-acid Batteries |
| Weight | Heavy |
| Energy Density | Low |
| Cost | Low |
| Charge Time | Long |
| Life Span | Short |
Nickel-metal Hydride Batteries
Nickel-metal hydride batteries offer a middle ground. They weigh less than lead-acid but more than lithium-ion. These batteries last longer than lead-acid types.
- Moderate energy density
- Medium weight
- Better lifespan than lead-acid
- Slower charging than lithium-ion
- Less expensive than lithium-ion
Essential Charging Equipment
Charging your electric velomobile needs the right tools. This ensures safe and efficient power supply. Using proper equipment protects your battery and charger.
Below are key equipment types you should know about. Each one plays a role in the charging process.
Charger Types
There are several chargers for electric velomobiles. The most common are Level 1 and Level 2 chargers. Level 1 uses a standard outlet and charges slowly. Level 2 needs a special outlet and charges faster.
- Level 1 Chargers: Use regular 120V outlets, slow charging.
- Level 2 Chargers: Use 240V outlets, faster charging.
- Portable Chargers: Compact and easy to carry.
Charging Cables
Charging cables connect the charger to your velomobile. They come in different lengths and thicknesses. Longer cables offer flexibility but may reduce charging speed. Always use cables rated for your charger’s power.
| Feature | Importance |
| Length | Long enough to reach outlet safely |
| Thickness | Thicker cables handle more current |
| Connector Type | Must match charger and velomobile ports |
| Durability | Resists wear and weather conditions |
Adapters And Connectors
Adapters and connectors link different charging parts. They help connect your charger to various outlet types or velomobile ports. Using the right adapter avoids damage and poor connections.
- Power Adapters: Convert outlet types to fit your charger.
- Connector Plugs: Match charger output to velomobile input.
- Safety Features: Include fuses or circuit breakers.
- Compatibility: Check voltage and current ratings carefully.
Preparing Your Velomobile For Charging
Charging your electric velomobile safely keeps it in good condition. Proper preparation helps avoid damage. Follow simple steps before you start charging.
This guide covers safety tips, battery checks, and how to find charging ports.
Safety Precautions
Safety is important when charging your velomobile. Always use the charger made for your model. Avoid charging near water or in wet places.
- Turn off the velomobile before charging
- Use a grounded power outlet
- Keep the charging area clean and dry
- Do not touch the charger plug with wet hands
- Disconnect the charger if you see sparks or smoke
Checking Battery Health
Check your battery before plugging in the charger. Look for cracks, leaks, or swelling. A damaged battery can be dangerous.
| Battery Condition | Action Needed |
| Good | Proceed with charging |
| Swollen or leaking | Do not charge, get service |
| Loose connections | Secure before charging |
| Corroded terminals | Clean carefully, then charge |
Locating Charging Ports
Find the charging port on your velomobile before you plug in. It is often near the rear or side. Check your owner’s manual for exact location.
Common places to check for charging ports:
- Behind a small flap on the side panel
- Near the rear wheel
- Under a cover near the seat
Step-by-step Charging Process
Charging an electric velomobile is simple and safe if you follow the correct steps. This guide helps you connect, monitor, and disconnect your charger properly.
Each part of the process is important to keep your velomobile’s battery healthy and ready for use.
Connecting The Charger
Start by parking your velomobile in a dry, well-ventilated area. Make sure the power source matches the charger’s voltage and current requirements.
- Turn off the velomobile before charging.
- Locate the charging port on your velomobile.
- Plug the charger connector firmly into the charging port.
- Connect the charger to the power outlet.
Monitoring The Charging Progress
Keep an eye on the charger and battery indicators to ensure everything works correctly. Most chargers have lights or displays that show the charging status.
| Indicator | Meaning |
| Red Light | Charging in progress |
| Green Light | Fully charged |
| Flashing Light | Charging error or fault |
Disconnecting Safely
Do not rush when disconnecting the charger. Follow these steps to avoid damage to the battery or charger.
- Turn off the charger using its power switch if available.
- Unplug the charger from the power outlet.
- Remove the charger connector from the velomobile’s charging port.
- Store the charger and cables in a dry place.
Optimizing Battery Life
Taking care of your electric velomobile’s battery helps it last longer. Simple charging habits can keep the battery healthy. This guide explains how to charge it right.
Learn the best ways to avoid damage and get the most from each charge. Follow these tips to maintain strong battery performance.
Avoiding Overcharging
Overcharging can reduce battery life and cause overheating. Always unplug the charger once the battery is full. Many modern chargers stop charging automatically, but it is best to check.
Do not leave your velomobile charging overnight or for long periods. This helps prevent stress on the battery cells and maintains their capacity.
Charging Frequency Tips
Charge your battery regularly, but avoid letting it fully drain. Keeping the battery between 20% and 80% charge is best for health. This range reduces wear and extends its life.
- Charge after short rides instead of waiting for full discharge
- Use the recommended charger for your velomobile battery
- Avoid frequent full charges to 100% unless needed for long trips
- Keep the battery cool during charging by charging in a shaded area
Storage Recommendations
Proper storage keeps the battery safe when you do not use your velomobile. Store the battery at about 50% charge in a cool, dry place. Avoid extreme heat or cold.
| Storage Condition | Recommended Battery Charge | Notes |
| Short-term (less than 1 month) | 30% – 50% | Keep in moderate temperature |
| Long-term (over 1 month) | 40% – 60% | Check charge monthly to avoid full discharge |
| Extreme temperatures | Avoid storage | Can damage battery cells |
Credit: www.instructables.com
Troubleshooting Charging Issues
Charging an electric velomobile should be easy. Sometimes, problems can stop the charging process.
Knowing how to fix common issues helps you get back on the road quickly and safely.
Common Problems
Many charging issues come from simple causes. These include loose connections, faulty cables, or power supply problems.
- Charger not turning on
- Slow or no charging
- Battery not accepting charge
- Overheating during charging
Quick Fixes
Try easy fixes before calling for help. Check the charger and cable for damage or loose plugs.
- Unplug and plug the charger again firmly
- Use a different power outlet to test
- Inspect the charging port for dirt or debris
- Restart the velomobile’s power system
- Let the battery cool if it feels hot
These steps often solve minor problems and save time.
When To Seek Professional Help
If the charger or battery shows damage, stop using it. Persistent problems also need expert attention.
- Charger does not power on after testing outlets
- Battery does not charge after multiple attempts
- Visible damage to charger or battery pack
- Unusual smells or smoke during charging
- Warning lights or error messages on the display
Contact a qualified technician to avoid safety risks and protect your velomobile.
Charging On The Go
Electric velomobiles need power to keep moving. Charging on the go helps you stay mobile without long stops.
Knowing different charging options makes your trips easier and less stressful.
Portable Chargers
Portable chargers let you recharge your velomobile anywhere. They are small and easy to carry.
Some chargers plug into a car or a power bank. Choose one that fits your battery type and voltage.
- Look for lightweight and compact models
- Check compatibility with your velomobile battery
- Carry extra cables for different outlets
Public Charging Stations
Public charging stations are found in cities and rest stops. They offer a safe place to power up your velomobile.
Many stations work with simple plugs. Some need a special card or app to use.
- Plan your route near charging spots
- Bring the correct adapter for the station
- Follow safety rules at public chargers
Emergency Charging Tips
Sometimes you may run low on power with no charger nearby. Prepare for these moments to avoid trouble.
Keep spare batteries or a portable power pack. Know how to use your charger quickly and safely.
- Carry a fully charged power bank
- Store spare battery packs if possible
- Learn quick charging steps for emergencies
- Find shaded or cool spots to charge safely

Credit: www.instructables.com
Frequently Asked Questions
How Long Does It Take To Charge An Electric Velomobile?
Charging time varies by battery size and charger power. Typically, it takes 3 to 6 hours for a full charge using a standard charger. Fast chargers can reduce this time significantly. Always refer to the manufacturer’s guidelines for accurate charging times.
What Type Of Charger Is Needed For Electric Velomobiles?
Most electric velomobiles use a standard lithium-ion battery charger. Use the charger provided by the manufacturer for compatibility and safety. Avoid using generic chargers, as they can damage the battery or reduce its lifespan. Check the voltage and current specifications carefully.
Can I Charge An Electric Velomobile At Home?
Yes, electric velomobiles can be charged at home using a standard electrical outlet. Ensure the charger is compatible with your home power supply. Charging at home is convenient and safe when following all manufacturer instructions and safety precautions.
How Do I Maintain My Velomobile Battery During Charging?
Avoid overcharging by unplugging once fully charged. Charge in a cool, dry place to prevent overheating. Regularly inspect the battery and charger for damage. Proper maintenance extends battery life and ensures efficient charging cycles.
Conclusion
Charging an electric velomobile is simple with the right steps. Use compatible chargers and follow safety guidelines. Always check the battery’s condition before starting. Consistent charging habits extend battery life. A well-maintained battery ensures a smooth ride. Remember to store chargers properly.
Avoid overcharging to prevent damage. Keep an eye on charging indicators. Regular maintenance boosts performance and longevity. With these tips, your velomobile stays ready for your next adventure. Enjoy the ride and embrace eco-friendly travel. Stay safe and keep your velomobile charged for every journey.


