
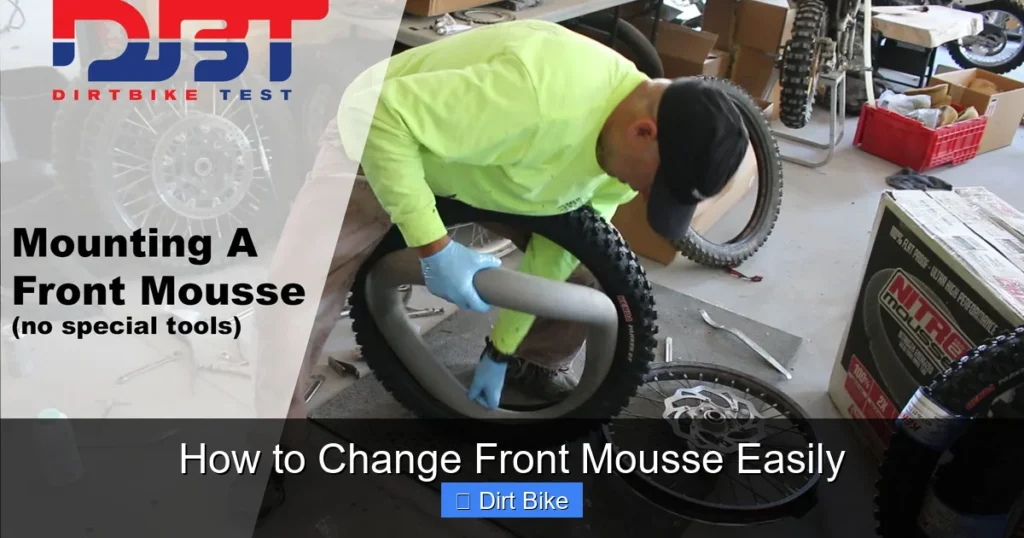
Changing your dirt bike’s front mousse doesn’t have to be a headache. This guide walks you through the entire process—from removal to installation—with clear, easy-to-follow steps. You’ll save time, reduce frustration, and get back on the trail faster.
Key Takeaways
- Understand what mousse is: A foam insert that replaces air in your tire, giving you puncture-proof performance off-road.
- Gather the right tools first: You’ll need a tire lever, mousse lubricant, valve core tool, and a clean workspace.
- Remove the front wheel safely: Loosen axle nuts, lift the bike, and slide out the wheel without damaging components.
- Lubricate the mousse properly: Use a water-based lube to reduce friction and prevent tearing during installation.
- Install the new mousse evenly: Work it into the tire gradually, ensuring no twists or gaps for a smooth ride.
- Reassemble and test: Reinstall the wheel, torque bolts to spec, and take a short test ride to confirm everything’s secure.
- Maintain your mousse: Check for wear every few rides and replace when compressed or damaged.
How to Change Front Mousse Easily
If you ride dirt bikes, you know how frustrating it is to deal with flat tires on the trail. That’s where front mousse comes in—a foam insert that fits inside your tire and eliminates the need for air. It’s durable, reliable, and perfect for rocky or thorny terrain. But when it’s time to replace it, many riders dread the process. The good news? Changing front mousse is easier than you think—if you follow the right steps.
In this guide, we’ll show you exactly how to change front mousse easily, safely, and efficiently. Whether you’re a weekend warrior or a seasoned racer, you’ll learn the best techniques, avoid common mistakes, and get your bike ready for the next adventure. No special skills required—just the right tools and a little patience.
What Is Front Mousse?
Before we dive into the how-to, let’s quickly explain what front mousse actually is. Mousse (pronounced “moose”) is a high-density foam insert that replaces the air in your dirt bike tire. It’s made from a closed-cell polyurethane material that compresses under load but returns to shape, providing consistent cushioning and support.
Unlike traditional tubes, mousse doesn’t go flat. It’s ideal for aggressive off-road riding where punctures are common. However, it does wear out over time—usually after 30 to 50 hours of riding—depending on terrain and riding style. When it starts to feel stiff, lose rebound, or show visible cracks, it’s time for a replacement.
Tools and Materials You’ll Need
Before you start, make sure you have everything ready. Having the right tools on hand will make the job faster and prevent frustration.
Here’s what you’ll need:
- Tire levers (2–3): Strong, plastic or nylon levers work best to avoid scratching rims.
- Mousse lubricant: A water-based, non-petroleum lube (like Mousse Magic or soapy water) reduces friction during installation.
- Valve core tool: To remove the valve core and deflate the tire completely.
- Clean rag or towel: For wiping down parts and keeping things tidy.
- Work stand or bike lift: Keeps your bike stable and at a comfortable height.
- Torque wrench: Ensures axle nuts are tightened to manufacturer specs.
- New front mousse: Make sure it’s the correct size for your tire (check sidewall markings).
Pro tip: Work in a clean, well-lit area. Dirt and grease can make handling mousse more difficult.
Step 1: Prepare Your Bike
Safety first. Before touching anything, make sure your bike is stable and secure.
Lift the Front Wheel
Place your bike on a stand or lift that supports the frame—not the engine or swingarm. If you don’t have a stand, you can use a sturdy block under the engine or frame to lift the front wheel off the ground. Make sure the bike won’t tip over.
Loosen the Axle Nut
Use a socket wrench to loosen (but don’t remove yet) the front axle nut. It’s usually on the right side of the wheel. Don’t fully remove it yet—this helps prevent the wheel from shifting while you work.
Remove the Brake Caliper (If Needed)
On some bikes, the brake caliper may block the wheel from coming off. If so, loosen the two bolts holding the caliper and gently swing it aside. Don’t disconnect the brake line—just let it hang safely.
Step 2: Remove the Front Wheel
Now it’s time to take the wheel off.
Slide Out the Axle
Fully remove the axle nut and washer. Then, gently tap the axle out from the left side using a soft-faced hammer or a punch. Don’t force it—most axles slide out easily once loose.
Lift Off the Wheel
Once the axle is out, carefully lift the front wheel away from the forks. Set it on a clean surface, tire-side up.
Step 3: Deflate and Break the Bead
Even with mousse, there might be some air left in the tire. We need to remove it completely.
Remove the Valve Core
Use your valve core tool to unscrew the valve core from the tire valve stem. This lets any remaining air escape quickly. You’ll hear a hiss—that’s normal.
Break the Bead
The bead is the edge of the tire that seals against the rim. To remove the tire, you need to break this seal.
Stand on the tire near the rim and press down firmly. Rock the tire back and forth to loosen the bead on both sides. You can also use your body weight or a bead breaker tool if you have one.
Once the bead is loose, the tire should come off easily with tire levers.
Step 4: Remove the Old Mousse
Now that the tire is off, it’s time to take out the old mousse.
Pull Out the Mousse
Reach inside the tire and grab one end of the mousse. Gently pull it out in a continuous loop. It should come out in one piece if it’s still intact. If it’s broken or crumbly, remove it in sections.
Clean the Tire and Rim
Wipe down the inside of the tire and the rim with a clean rag. Remove any dirt, debris, or old lube residue. A clean surface helps the new mousse seat properly.
Step 5: Install the New Mousse
This is the most important step—and the one many riders struggle with. But with the right technique, it’s straightforward.
Lubricate the Mousse
Apply a generous amount of mousse lubricant to the entire length of the new mousse. Use your hands to work the lube in. This reduces friction and prevents the mousse from tearing when you install it.
Start Inserting the Mousse
Begin by feeding one end of the mousse into the tire. Work it around the inside circumference, pushing it in bit by bit. Use your fingers to guide it—don’t force it.
Use Tire Levers if Needed
If the mousse gets stuck, use a tire lever to gently pry the tire lip open and tuck the mousse in. Be careful not to pinch or cut the mousse.
Ensure Even Placement
Once the mousse is fully inside, rotate the tire and check that it’s seated evenly. There should be no twists, gaps, or bulges. The mousse should form a smooth, continuous ring.
Step 6: Reinstall the Tire on the Rim
Now that the mousse is in, it’s time to put the tire back on the rim.
Start at the Valve Stem
Position the tire so the valve stem lines up with the rim hole. This makes it easier to seat the bead later.
Use Tire Levers to Seat the Bead
Start at one side of the tire and work your way around, using tire levers to push the bead over the rim. Go slowly and alternate sides to keep even pressure.
Once one side is on, do the same for the other side. The last few inches are usually the hardest—take your time.
Check the Bead
Spin the tire and make sure the bead is fully seated on both sides. You should see an even gap between the tire and rim all the way around.
Step 7: Reinstall the Front Wheel
With the tire back on, it’s time to put the wheel back on the bike.
Slide the Wheel Into the Forks
Lift the wheel and align it with the fork dropouts. Make sure the brake rotor (if applicable) slides into the caliper properly.
Insert the Axle
Slide the axle back through the left fork leg, wheel hub, and right fork leg. Make sure it’s fully seated.
Tighten the Axle Nut
Replace the washer and axle nut. Tighten it by hand first, then use a torque wrench to tighten to the manufacturer’s specification (usually listed in your owner’s manual). Over-tightening can damage the hub.
Reattach the Brake Caliper (If Removed)
If you moved the caliper, bolt it back in place. Make sure it’s aligned and doesn’t rub against the rotor.
Step 8: Test and Final Checks
Before you hit the trails, do a few quick checks.
Spin the Wheel
Lift the front wheel and spin it by hand. It should rotate freely without wobbling or rubbing.
Check Bolt Torque
Double-check that all bolts—especially the axle nut and caliper bolts—are properly torqued.
Take a Short Test Ride
Ride slowly in a safe area. Listen for unusual noises and feel for vibrations. If everything feels smooth, you’re good to go!
Troubleshooting Common Issues
Even with careful work, things can go wrong. Here’s how to fix common problems:
- Mousse won’t go in: You likely didn’t use enough lube. Remove the mousse, add more lube, and try again.
- Tire bead won’t seat: Make sure the mousse isn’t pinched. Deflate completely, reposition, and try again.
- Wheel wobbles after install: Check axle alignment and torque. Also ensure the tire isn’t damaged.
- Mousse feels too stiff: It may need a few rides to break in. Avoid over-lubing, as it can degrade the foam.
Conclusion
Changing front mousse doesn’t have to be a nightmare. With the right tools, a little patience, and this step-by-step guide, you can do it easily in under an hour. Not only will you save money on shop fees, but you’ll also gain confidence in maintaining your bike.
Remember: always use mousse lube, work in a clean space, and double-check your work. A properly installed mousse gives you reliable, flat-free performance—so you can focus on the ride, not the repair.
Now get out there and enjoy the trail!



