
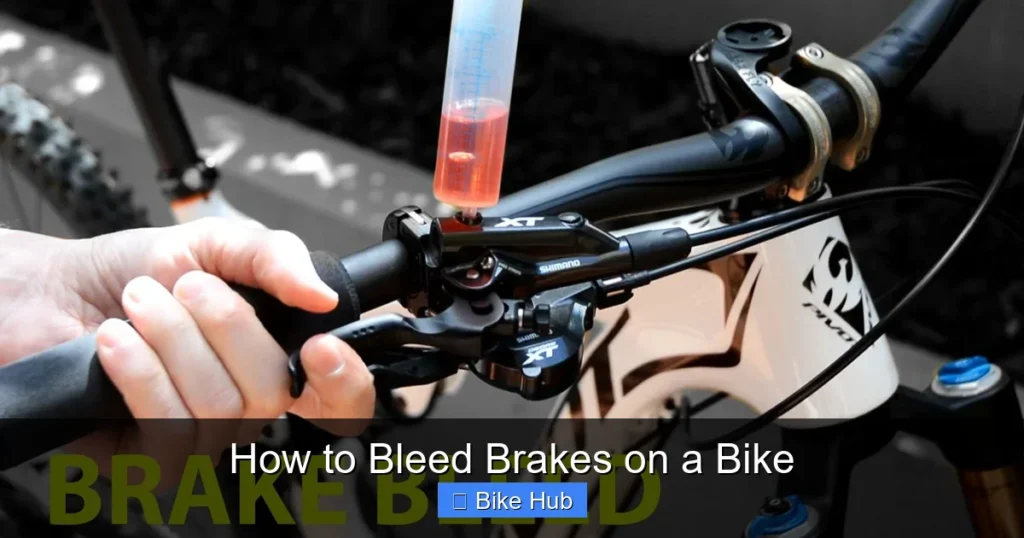
Learning how to bleed brakes on a bike is essential for maintaining safe, responsive stopping power. Whether you’re a weekend rider or a daily commuter, regular brake maintenance ensures your hydraulic system performs at its best. This guide walks you through the entire process with clear, beginner-friendly steps.
Key Takeaways
- Know when to bleed: Spongey levers, reduced braking power, or air bubbles are signs your brakes need bleeding.
- Use the right tools: A brake bleed kit specific to your brake brand (Shimano, SRAM, etc.) is essential for success.
- Work cleanly: Keep fluid off paint and components—brake fluid is corrosive and can damage finishes.
- Follow manufacturer steps: Each brand has a slightly different bleed procedure—always check your manual.
- Test after bleeding: Always do a lever feel test and short ride to confirm proper function before hitting the trails.
- Prevent air entry: Keep the reservoir cap on when not actively bleeding to avoid moisture and debris.
- Maintain regularly: Bleed your brakes every 6–12 months or after major servicing.
Quick Answers to Common Questions
How often should I bleed my bike brakes?
Most riders should bleed their brakes every 6 to 12 months, or whenever you notice a spongy lever or reduced stopping power.
Can I bleed my brakes without a kit?
While possible with improvised tools, it’s not recommended. A proper bleed kit ensures a clean, safe, and effective process.
What happens if I mix DOT fluid and mineral oil?
Mixing fluid types can damage seals and cause brake failure. Always use the fluid specified by your brake manufacturer.
Do I need to bleed both brakes?
Yes. Even if only one feels off, air can affect the entire system. Bleed both front and rear for best results.
Can I bleed my brakes upside down?
Yes, flipping the bike upside down can help keep the lever level, but make sure the reservoir doesn’t leak and the bike is stable.
📑 Table of Contents
Why Bleeding Bike Brakes Matters
Imagine you’re descending a steep hill, and your brake lever suddenly feels soft or sinks all the way to the handlebar. That’s not just unsettling—it’s dangerous. Hydraulic brakes rely on fluid to transfer force from the lever to the caliper. When air gets into the system, it compresses instead of transferring power, leading to weak or unresponsive braking. This is where learning how to bleed brakes on a bike becomes a vital skill.
Over time, tiny air bubbles can enter the system through seals, or fluid can degrade and absorb moisture. Even if your brakes seem fine, a quick bleed every 6 to 12 months can restore that crisp, confident lever feel. Whether you ride a mountain bike, road bike, or gravel bike with hydraulic disc brakes, regular maintenance keeps you safe and your ride smooth. Think of it like changing the oil in your car—it’s preventive care that pays off in performance and peace of mind.
Signs Your Brakes Need Bleeding
You don’t need to wait for a total failure to bleed your brakes. In fact, catching issues early saves time and improves safety. Here are the most common signs that it’s time to bleed:
Spongy or Soft Lever Feel
If your brake lever feels mushy or requires multiple pumps to engage, air is likely trapped in the system. Unlike brake fluid, air compresses, which reduces the direct connection between your hand and the brake pads.
Lever Goes to the Bar
When you pull the lever and it touches the handlebar with little resistance, that’s a red flag. This usually means there’s too much air or the fluid level is critically low.
Reduced Stopping Power
Even if the lever feels firm, you might notice you’re not stopping as quickly as usual. This can happen gradually as air builds up over time.
Visible Bubbles in the Reservoir
After removing the bleed port screw, you might see tiny bubbles rising in the fluid. That’s a clear sign air has entered the system.
After Replacing Components
Whenever you replace brake lines, calipers, or levers, bleeding is necessary to remove air introduced during installation.
Tools and Supplies You’ll Need
Before you start, gather the right tools. Using the correct kit for your brake brand ensures compatibility and prevents damage. Here’s what you’ll typically need:
- Brake bleed kit: Specific to your brake manufacturer (e.g., Shimano, SRAM, Magura). These include syringes, tubing, and adapters.
- Brake fluid: DOT 4 or DOT 5.1 for most road and mountain bikes (check your manual—SRAM uses DOT 5.1, Shimano uses mineral oil).
- Allen keys: Usually 2.5mm or 3mm for bleed port screws.
- Clean rags: To wipe spills and protect your bike’s paint.
- Gloves and safety glasses: Brake fluid is corrosive—protect your skin and eyes.
- Zip ties or clamps: To hold the brake lever in place during the process.
- Container for old fluid: Never pour used fluid down the drain—dispose of it properly.
Pro tip: Lay down an old towel or plastic sheet under your work area. A single drop of DOT fluid can ruin a paint job in seconds.
Step-by-Step Guide to Bleeding Bike Brakes
Now that you’re prepared, let’s walk through the bleeding process. We’ll use a general method that works for most Shimano and SRAM systems, but always refer to your specific manual for exact steps.
Step 1: Prepare Your Bike
Secure your bike in a stand or flip it upside down so the brake lever is level. This prevents air from getting trapped in the reservoir. Remove the wheel to access the caliper easily.
Step 2: Open the Bleed Port
Locate the bleed port on the caliper—it’s usually a small screw near the brake hose connection. Use the correct Allen key to loosen it slightly. Attach one end of the bleed tubing to the port and place the other end into a container to catch old fluid.
Step 3: Fill the Syringe
Fill one syringe with fresh brake fluid. Attach it to the bleed port on the lever side (usually under the hood or behind a cap). Make sure the connection is tight to prevent leaks.
Step 4: Push Fluid Through the System
Slowly push fluid from the lever syringe into the system. Watch for air bubbles exiting through the caliper tubing. You may need to tap the hose gently to dislodge stubborn bubbles. Keep the reservoir topped up to avoid introducing more air.
Step 5: Pull Old Fluid Out
Attach a second syringe to the caliper bleed port. Gently pull fluid out while continuing to push from the lever side. This two-way method ensures a complete flush. Repeat until the fluid runs clear and bubble-free.
Step 6: Close the Ports and Test
Once the fluid is clean, close the caliper bleed port first, then remove the lever syringe. Wipe away any spills immediately. Reinstall the reservoir cap and zip-tie the lever in a firm position for 10–15 minutes to let any remaining air rise and escape.
Step 7: Final Check and Ride Test
Squeeze the lever a few times. It should feel firm and responsive. Reinstall the wheel and take a short test ride in a safe area. Apply the brakes gently at first to confirm they’re working properly.
Brand-Specific Tips
Not all brakes are the same. Here’s how to adjust your approach based on your setup:
Shimano Brakes
Shimano uses mineral oil, which is less toxic than DOT fluid but still requires care. Their bleed process often involves a “reverse bleed” method—pushing fluid from the caliper up to the lever. This helps remove trapped air more effectively.
SRAM Brakes
SRAM uses DOT 5.1 fluid and a “pump and pull” method. They also recommend using their proprietary bleed kit for best results. Be extra cautious—DOT fluid absorbs moisture quickly, so keep containers sealed.
Magura Brakes
Magura brakes are known for their sealed systems and often require a special adapter. Some models use a vacuum bleed method, which can be more effective but requires additional equipment.
Common Mistakes to Avoid
Even experienced riders make errors when bleeding brakes. Here are the top pitfalls and how to avoid them:
- Mixing fluid types: Never mix DOT fluid with mineral oil—it can damage seals and cause failure.
- Overfilling the reservoir: This can cause leaks when the fluid expands. Fill to the “MAX” line only.
- Not bleeding both brakes: Always bleed both front and rear, even if only one feels off. Air can migrate between systems.
- Skipping the lever hold: Letting the lever sit clamped helps purge final air bubbles.
- Rushing the process: Take your time. Rushing leads to mistakes and incomplete bleeding.
Maintaining Your Brakes After Bleeding
Once your brakes are bled, keep them in top shape with regular care. Wipe down levers and calipers after muddy rides. Check pad wear every few months—thin pads reduce braking efficiency. Store your bike in a dry place to prevent moisture from entering the system.
Also, consider upgrading to high-quality brake fluid if your brand allows it. Some aftermarket fluids offer better heat resistance and longer life. And remember: if you’re unsure or uncomfortable doing it yourself, a local bike shop can bleed your brakes quickly and safely.
Conclusion
Mastering how to bleed brakes on a bike might seem intimidating at first, but with the right tools and a little patience, it’s a manageable task that pays huge dividends in safety and performance. A well-maintained hydraulic system gives you confidence on every ride, whether you’re navigating city streets or tackling mountain trails.
By learning to recognize the signs, using the correct procedure, and avoiding common mistakes, you’ll keep your brakes feeling crisp and responsive. So grab your bleed kit, protect your workspace, and give your bike the care it deserves. Your future self—and your brake levers—will thank you.
Frequently Asked Questions
What is brake bleeding?
Brake bleeding is the process of removing air bubbles from a hydraulic brake system. Air reduces braking efficiency, so bleeding restores firm lever feel and full stopping power.
How do I know if my brakes have air in them?
Common signs include a spongy lever, reduced braking power, or the lever touching the handlebar. You may also see bubbles in the fluid reservoir.
Can I bleed my brakes at home?
Yes, with the right tools and a clean workspace, most riders can bleed their brakes at home. Just follow your manufacturer’s instructions carefully.
Is brake fluid dangerous?
Yes, especially DOT fluid, which is corrosive and can damage paint and skin. Always wear gloves and safety glasses, and clean spills immediately.
What’s the difference between DOT 4 and mineral oil?
DOT 4 is glycol-based and absorbs moisture, while mineral oil is inert and doesn’t mix with water. They are not interchangeable—use only what your brakes require.
Do I need to bleed brakes after replacing pads?
Not usually, unless you opened the hydraulic system. However, if the pads were worn down significantly, a quick bleed can help restore optimal performance.



