
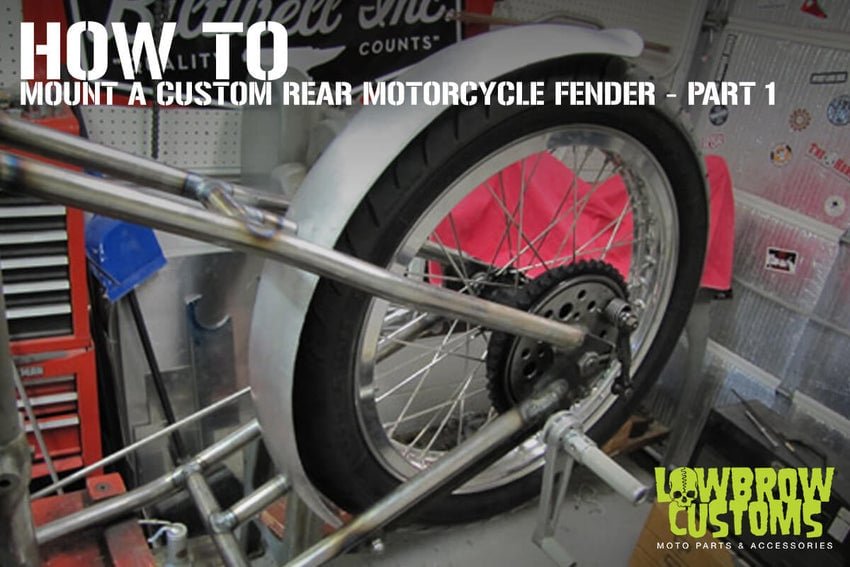
Are you ready to enhance your bike’s look and protect yourself from splashes? Attaching a rear fender to your bike frame might seem tricky, but it’s easier than you think.
Imagine riding freely, knowing that you’re shielded from mud and water. This guide will walk you through every step, ensuring you do it right the first time. You’re going to discover simple techniques that can save you time and frustration.
Whether you’re a beginner or an experienced cyclist, this process will transform your riding experience. Dive in, and let’s get that rear fender securely attached!
Tools And Materials Needed
Attaching a rear fender requires some simple tools. Gather these items before starting. A screwdriver is necessary for tightening screws. You will need a wrench to adjust bolts. Allen keys are useful for specific fittings. Fender brackets help secure the fender to the frame.
For materials, ensure you have proper screws and bolts. Rubber washers are useful to prevent vibrations. Protective gloves can keep your hands safe. A clean cloth is handy for cleaning the area. Lubricant can ease the process.
Keep all items nearby to avoid delays. Check that you have everything needed. Organize tools for easy access. This makes the process faster and smoother.
Preparing The Frame
Remove any dirt from the frame. Use a clean cloth for this. A damp cloth works best. Ensure the area is dry after cleaning. Dry with a towel. A clean area helps the fender stay in place. This prevents it from falling off.
Look for cracks or bends on the frame. Check every corner for damage. Damaged spots need fixing first. Use a flashlight to see better. Fixing damage is important. It keeps the fender secure. A strong frame holds the fender well.
Choosing The Right Fender
Attaching a rear fender securely involves aligning it with the frame, ensuring stability. Use appropriate bolts and brackets to fasten it. Tighten them evenly to prevent wobbling during rides.
Material Considerations
Fenders come in different materials. Plastic fenders are light and cheap. Metal fenders are strong and last long. Think about the weather. Wet areas may need rust-proof materials. Also, think about the bike’s weight. Heavy fenders can slow it down.
Size And Fit
Check the bike’s size before buying a fender. Fenders should match the tire size. Measure the wheel diameter and width. This helps in finding the perfect fit. A perfect fit keeps the fender stable. It also looks better. Installing the wrong size can cause issues. It might rub against the tire. This can wear out the fender fast.
Aligning The Fender
Aligning the Fender Secure the rear fender to the bike frame using bolts and brackets. Ensure all screws are tightly fastened for stability. Double-check alignment to prevent rubbing or noise while riding.
Positioning For Clearance
Ensure the fender has enough space. This prevents rubbing against the tire. Check the gap between the fender and the wheel. Adjust if necessary to maintain a safe distance. Use spacers if the fender is too close. Check both sides for even clearance. This helps in smooth rides.
Adjusting For Symmetry
Make sure the fender looks the same on both sides. Center the fender on the frame. Check from the front and back views. Align evenly with the tire edges. Symmetry keeps the bike balanced. Use a ruler to measure distances. This ensures perfect alignment. Tighten screws once symmetry is achieved.
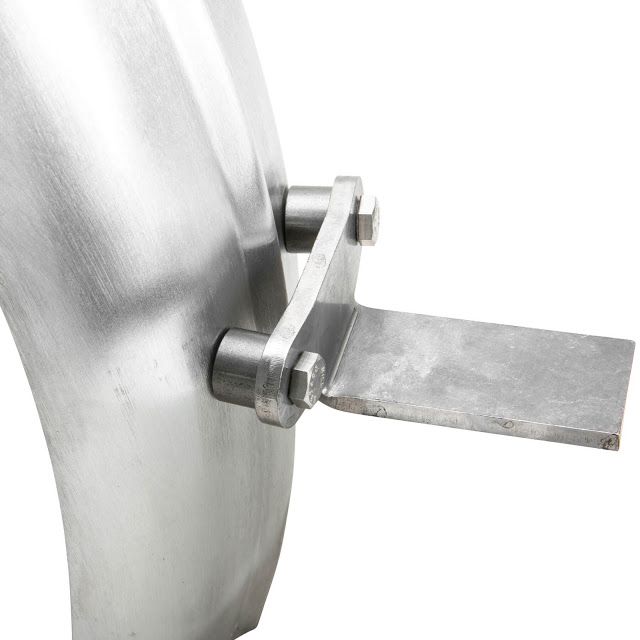
Securing The Fender
Securing the rear fender to the frame involves aligning the fender with mounting holes. Insert bolts through the holes and tighten securely. Check for stability, ensuring the fender sits straight and does not wobble.
Using Bolts And Screws
First, gather all needed tools and parts. Check the fender’s holes align with the frame. Insert bolts into the holes. Use a screwdriver to tighten them. Make sure they are snug but not too tight. Over-tightening can damage the threads. Repeat this for each bolt. Check the fender is stable. If loose, tighten again.
Tightening For Stability
Ensure all bolts are equally tight. This keeps the fender balanced. Use a wrench for final adjustments. Check the fender doesn’t wobble. Test by shaking gently. If it moves, tighten more. Always double-check each bolt. A stable fender keeps the bike safe. Regular checks are important too.

Credit: www.lowbrowcustoms.com
Checking Fender Alignment
Make sure the fender sits evenly on the bike frame. Look at the space between the tire and fender. The gap should be the same all around. Uneven gaps can cause the fender to rub against the tire. This can make biking harder. Use a ruler or tape measure if needed. Adjust the fender until the spacing is equal. Tighten the screws to hold it in place.
Consider the type of roads you ride on. Bumpy roads might need more space between the tire and fender. This helps prevent the fender from touching the tire. Smooth roads can allow for a closer fit. Always check the fender after a long ride. It might move from its position.
Testing The Installation
Secure the rear fender by aligning it with the bike frame. Use bolts or clips to attach it firmly. Make sure the fender sits evenly without wobbling. Test the installation by gently shaking the fender to ensure stability.
Riding For Stability
Start with a slow ride. Ensure the bike feels stable. Focus on the rear fender. It should not wobble. Test on a straight path first. Then, try mild turns. Check if the fender stays in place. Adjust if necessary for a better fit.
Listening For Noise
During the ride, listen carefully. Any unusual noise is a sign. It could be a loose fender. Rattling sounds indicate a problem. Stop and inspect the installation. Tighten screws if needed. Keep listening for any changes. A quiet ride means success.

Credit: www.lowbrowcustoms.com
Troubleshooting Common Issues
Attaching a rear fender to a frame can be tricky. Ensure all necessary tools are ready and follow instructions carefully. Align the fender with the frame, checking for any obstructions. Secure it tightly with screws or bolts to avoid wobbling.
Dealing With Vibration
Vibration often happens when the rear fenderis not attached tightly. Check if the fasteners are snug. If they’re loose, use a wrench to tighten them. Make sure the fender aligns with the wheel. A misaligned fender can cause wobbling. Inspect the fender material for cracks. Cracks can make the fender vibrate more. Replace damaged parts if needed. Add rubber washers to reduce vibration. They act as cushions between metal parts. This makes the ride smoother.
Handling Loose Fasteners
Loose fasteners can make the fenderfall off. Always check them before each ride. If they’re loose, tighten them with a screwdriver. Use a thread locker for added security. It keeps the screws from loosening. Avoid over-tightening as this can strip threads. Stripped threads make fastening harder. If threads are damaged, replace with new screws. Consider using lock washers. They help fasteners stay in place. Check fasteners regularly for a safe ride.
Maintenance Tips
Attaching the rear fender to the frame requires a few simple steps. Ensure all bolts and screws align properly. Secure tightly to avoid any movement while riding. Regularly check for loosened parts to maintain stability and safety.
Regular Inspections
Check the rear fender often for any loose screwsor bolts. Make sure the fender is not damagedor bent. Ensure the attachment points are secure. Look for any signs of rustor wear. Use a flashlight to see under the fender. Listen for any strange noiseswhen riding. Tighten any parts that are loose. This helps keep the fender safe.
Cleaning And Care
Keep the rear fender clean to prevent damage. Use a soft cloth to wipe away dirt. Avoid using harsh chemicalsthat can harm the fender. Dry the fender after washing to prevent rust. Apply a thin layer of protective wax. This adds shine and protection. Store the bike in a dry place. This keeps the fender in good condition.
Credit: www.lowbrowcustoms.com
Frequently Asked Questions
How To Mount Bicycle Fenders?
Attach the fender stays to the bike frame using bolts. Align the fenders with your tires. Secure tightly. Adjust for clearance. Check alignment for smooth rides. Ensure no contact with the wheels. Follow manufacturer instructions for specific models.
How To Install Fender Flares Without Drilling?
Use adhesive tape to attach fender flares securely. Clean the surface thoroughly before application. Align the flares carefully and press firmly. Ensure proper adhesion by applying even pressure along the edges. Choose high-quality automotive adhesive tape for best results.
Do Clip-on Fenders Work?
Yes, clip-on fenders work effectively for bikes. They are easy to install and remove. These fenders offer good protection against mud and water. They are ideal for those who need temporary or occasional use. Clip-on fenders are a practical choice for quick and convenient bike rides.
How To Get Fender Flares To Stick?
Clean the surface and fender flare thoroughly. Use high-quality adhesive tape or glue. Press firmly for secure attachment. Ensure the area is dry and free from dust. Allow sufficient time for curing before use.
Conclusion
Attaching a rear fender to a frame is simple. Follow the steps carefully for a secure fit. Use proper tools to avoid damage. Double-check alignments for smooth rides. Tighten screws firmly, ensuring stability. Regular checks prevent loose fittings. Enjoy riding with confidence.
A properly attached fender protects from mud and splashes. Keep your bike clean and stylish. Safety and comfort matter the most. Happy cycling!


