
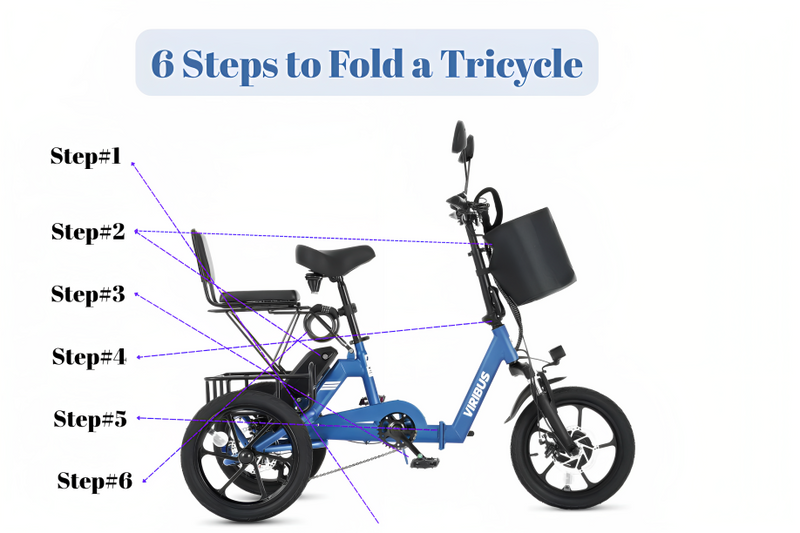
Are you ready to build your own adaptive trike but don’t know where to start? Putting together an adaptive trike might seem tricky at first, but with the right steps, you can have it ready to ride in no time.
This guide will walk you through each part clearly and simply, so you won’t feel overwhelmed. By the end, you’ll feel confident and proud of the trike you’ve assembled yourself. Keep reading—you’re just a few easy steps away from enjoying a smooth, comfortable ride tailored just for you.
Choosing The Right Adaptive Trike
Adaptive trikes help people with different abilities enjoy cycling. Picking the right trike is important for comfort and safety.
This guide will help you understand what types of adaptive trikes exist and what features to look for.
Types Of Adaptive Trikes
Adaptive trikes come in several types. Each type suits different needs and abilities.
- Recumbent Trikes:Riders sit back with legs forward. Good for comfort and stability.
- Upright Trikes:Riders sit like on a normal bike. Easier to steer and balance.
- Handcycles:Powered by hand pedals. Ideal for people with limited leg use.
- Tandem Trikes:Two riders pedal together. Great for social riding and assistance.
Key Features To Consider
Look for features that match your needs and skill level. These features affect comfort and control.
- Seat Type:Adjustable seats improve comfort and support.
- Steering System:Choose between direct or indirect steering based on ease of use.
- Brake Type:Reliable brakes are a must for safety.
- Frame Material:Aluminum frames are light; steel frames are strong.
- Storage Options:Some trikes offer baskets or racks for carrying items.
Sizing And Fit
Proper sizing helps you ride safely and comfortably. Measure your body before choosing a trike.
Check these points to find the right fit:
- Seat height and distance to pedals
- Handlebar reach and position
- Weight capacity of the trike
- Adjustability of footrests and seat angle
Essential Tools And Parts
Assembling an adaptive trike needs the right tools and parts. Using the correct equipment helps you build safely and correctly.
This guide covers the tools and parts you need. It also shows how to get ready before starting assembly.
Required Tools Checklist
You need specific tools to put together your adaptive trike. Having them ready saves time and avoids mistakes.
- Allen wrench set for bolts and screws
- Adjustable wrench for nuts
- Screwdrivers (Phillips and flathead)
- Rubber mallet for gentle tapping
- Grease or lubricant for moving parts
- Torque wrench to tighten bolts correctly
- Measuring tape for frame alignment
- Bike pump for tire inflation
Identifying Trike Components
The adaptive trike comes with many parts. Knowing each part helps in easy and correct assembly.
- Frame: the main structure of the trike
- Wheels: usually three, two in back and one front
- Seat: designed for comfort and support
- Handlebars: used to steer the trike
- Pedals and crankset: for leg power
- Brake system: for safe stopping
- Chain and gears: help with pedaling speed
- Footrests or supports: for stability and balance
Preparing Your Workspace
Set up your workspace before you start. A clean and organized area makes assembly easier and safer.
- Clear a flat surface with enough room
- Lay down a mat to protect parts and floor
- Keep all tools and parts nearby
- Ensure good lighting to see small parts
- Have a trash bin for packaging and waste
- Keep instructions close for quick reference
Step-by-step Assembly Guide
Assembling an adaptive trike might seem difficult. This guide breaks down the process into simple steps. Follow each part carefully for a safe and smooth assembly.
Take your time and check all parts before you start. Keep tools handy to make the process easier.
Frame Setup
Start by laying out the frame on a flat surface. Make sure all frame parts are free from damage or defects.
Attach the main frame tubes using the bolts provided. Tighten all bolts but avoid over-tightening to prevent damage.
- Place the frame on a clean, flat surface
- Connect frame tubes with bolts
- Tighten bolts securely, but not too tight
- Check frame alignment before moving on
Attaching Wheels And Tires
Next, attach the wheels to the frame. Make sure you use the right wheel for each side as marked.
Secure the tires firmly to the wheel hubs. Check that the wheels spin freely without wobbling.
- Identify front and rear wheels
- Slide wheels onto axles carefully
- Secure wheels with nuts or quick-release levers
- Spin wheels to confirm smooth rotation
Installing Handlebars And Controls
Attach the handlebars to the stem on the front frame. Align them straight with the front wheel.
Connect the brake levers and gear shifters to the handlebars. Make sure cables are routed neatly and do not get pinched.
- Place handlebars on stem and tighten clamp bolts
- Attach brake levers and gear shifters
- Route cables along the frame
- Check that controls move smoothly
Securing The Seat
Position the seat on the seat post. Adjust the height to a comfortable level before tightening.
Make sure the seat is firmly fixed. It should not move or tilt during use.
- Slide seat onto seat post
- Adjust seat height for comfort
- Tighten the seat clamp securely
- Check seat stability by applying pressure
Connecting Brakes And Gears
Connect brake cables to the brake calipers. Make sure the cables are tight but allow brake pads to move freely.
Attach gear cables to the derailleurs. Shift through all gears to test smooth operation before riding.
- Secure brake cables to brake calipers
- Adjust cable tension for proper braking
- Connect gear cables to front and rear derailleurs
- Test all gears to ensure smooth shifting

Credit: device.report
Adjusting For Comfort And Safety
Adjusting your adaptive trike correctly helps you ride safely and comfortably. Small changes can make a big difference.
Focus on the seat, handlebars, brakes, and gears. Each part needs to fit your body and riding style.
Aligning The Seat And Handlebars
Start by setting the seat height so your feet reach the pedals easily. Your knees should bend slightly when pedaling.
Adjust the handlebars to a comfortable reach. Your arms should be relaxed, not stretched or cramped.
- Set seat height for a slight knee bend
- Move seat forward or backward for pedal reach
- Adjust handlebar height to avoid shoulder strain
- Set handlebar distance for relaxed arm position
Brake Testing And Adjustments
Check the brakes before every ride. Make sure they stop the trike smoothly and quickly.
Adjust brake pads so they touch the wheel rim evenly. Tighten cables if brakes feel loose.
- Pull brake levers to test stopping power
- Adjust brake pads for full rim contact
- Tighten cables if brakes feel soft
- Replace worn brake pads promptly
Fine-tuning Gear Shifts
Shift through all gears while the trike is stationary. Check for smooth and easy changes.
Adjust the derailleur limits and cable tension if gears skip or hesitate.
- Shift from lowest to highest gear slowly
- Listen for any clicking or noise during shifts
- Adjust cable tension if shifting is slow
- Set derailleur limits to prevent chain drop
Maintenance Tips For Longevity
Keeping your adaptive trike in good shape extends its life. Regular care helps it work smoothly and safely.
Follow these simple maintenance tips to keep your trike running well for years.
Regular Cleaning
Clean your trike often to remove dirt and grime. Use a soft cloth and mild soap with water. Avoid strong chemicals that can damage parts.
Pay special attention to the chain, wheels, and frame. Dry the trike completely after washing to stop rust.
Lubrication Points
Lubricate key parts to keep them moving smoothly. Use bike-specific oil or grease for best results. Focus on these areas:
- Chain and sprockets
- Pedal bearings
- Wheel hubs
- Brake pivots
- Steering joints
Apply lubricant sparingly and wipe off any extra to avoid dust buildup.
Inspecting For Wear And Tear
| Part | Signs of Wear | Action |
|---|---|---|
| Tires | Cracks, bald spots, low pressure | Replace or inflate as needed |
| Brakes | Reduced stopping power, worn pads | Adjust or replace pads |
| Chain | Rust, stiff links, stretching | Clean and lubricate or replace |
| Frame | Cracks, dents, loose bolts | Tighten bolts, repair damage |
Check your trike before each ride to catch problems early. Fix issues promptly to avoid bigger damage.

Credit: amtryke.org
Troubleshooting Common Issues
Assembling an adaptive trike can come with some challenges. Fixing small problems early keeps your ride safe and smooth.
Below are common issues you may face and simple ways to solve them. Follow these tips to get your trike ready to ride.
Loose Components
Loose parts can cause noise or unsafe riding. Check all bolts, screws, and nuts after assembly.
Tighten any loose components with the right tools. Avoid over-tightening to prevent damage.
- Use a wrench or screwdriver to check bolts
- Inspect the seat, handlebars, and wheels
- Tighten parts gently but firmly
Brake Problems
Brakes are important for safety. If brakes feel weak or sticky, they need adjustment.
Check brake pads for wear and make sure cables are tight. Replace worn pads if needed.
- Test brakes before riding
- Adjust cable tension using barrel adjusters
- Replace brake pads that are too thin
Gear Malfunctions
If gears slip or won’t shift, check the derailleur and cables. Proper gear function makes riding easier.
Clean and lubricate the chain. Adjust the gear cables for smooth shifting.
- Look for bent derailleur parts
- Tighten or replace gear cables
- Keep the chain clean and oiled

Credit: www.youtube.com
Frequently Asked Questions
What Tools Are Needed To Assemble An Adaptive Trike?
You typically need basic hand tools like wrenches, screwdrivers, and Allen keys. Some models may require specialized tools included in the kit. Always check the manufacturer’s instructions before starting assembly to ensure you have the correct tools on hand.
How Long Does It Take To Assemble An Adaptive Trike?
Assembly usually takes between 1 to 3 hours, depending on your experience. Following the step-by-step guide carefully can speed up the process. Take your time to ensure all parts fit securely for safety and performance.
Can One Person Assemble An Adaptive Trike Alone?
Yes, one person can assemble it, but having a helper is beneficial. A second person can assist with handling large parts and aligning components. This makes the process safer and more efficient, especially for beginners.
How Do I Adjust The Seat On An Adaptive Trike?
Most adaptive trikes have adjustable seats for comfort and support. Loosen the seat clamps, slide the seat to the desired position, then tighten securely. Proper seat adjustment improves riding posture and control.
Conclusion
Assembling an adaptive trike is simpler than it seems. Follow the steps carefully. Always check the manual for specific instructions. Ensure all parts fit snugly. Secure each connection tightly. Safety checks are essential before riding. A well-assembled trike brings joy and freedom.
Remember, patience and practice make perfect. Enjoy the ride with confidence and ease. Encourage others to try assembling too. The experience is rewarding and fun. Your adaptive trike is ready to explore new paths. Happy riding!



