

Struggling with a misbehaving road bike derailleur can be frustrating, especially when every ride feels like a battle. But imagine gliding smoothly over the pavement, with each gear change as effortless as a gentle breeze.
This isn’t just a dream—it can be your reality. In this guide, we’ll show you exactly how to adjust your road bike derailleur with simple, clear steps. You’ll gain the confidence to tackle this task yourself, saving time and money on shop visits.
Plus, mastering this skill means more control over your rides, ensuring they’re always as enjoyable as possible. Ready to transform your biking experience? Let’s dive in and get your bike shifting like a pro!

Credit: alpkit.com
Tools Needed
Adjusting a road bike derailleur is simple with the right tools. A Phillips screwdriveris essential. It helps tighten and loosen screws. A hex key setis also needed. This tool adjusts bolts on the bike frame. A needle-nose plieris helpful too. It grips small parts easily. A bike standkeeps the bike stable. This makes adjustments safer and easier. Lubricantensures smooth movement of parts. It reduces wear and tear. Ensure you have a clean clothhandy. It wipes dirt off parts. Every tool has a specific role. Each contributes to a smoother ride.
Identifying Derailleur Issues
Derailleurs can face various issues over time. The most common problems include gear skippingand chain rubbing. Sometimes, the chain may not move smoothly between gears. This can cause noise and make riding difficult. Another problem is the derailleur not returning to its position. This can happen due to dirtor rust.
Look out for signs that indicate derailleur issues. If the bike makes clicking sounds, it might be a problem. Gears not shifting properly is another symptom. The chain may also fall off the gears. These signs mean it’s time for a check. Regular maintenance can help avoid these issues.
Preparing The Bike
Adjusting a road bike derailleur ensures smooth gear shifting. Begin by checking cable tension and alignment. Fine-tune limit screws to prevent chain slipping.
Positioning The Bike
Place the bike on a stable stand. This keeps it from falling. Ensure the bike is upright. This position helps you see the derailleur. If you don’t have a stand, lean the bike against a wall. Make sure it won’t slide. Check that the wheels can spin freely. This is important for adjustments. A clear space around the bike is helpful. It prevents any accidents or damage.Cleaning The Derailleur
Use a soft cloth to wipe the derailleur. Remove any dirt and grease. A clean derailleur works better. Dip the cloth in a small amount of soapy water. Gently scrub the derailleur surfaces. Be careful around the chain. Rinse with a clean cloth dampened in water. Dry it completely before moving on. Regular cleaning helps in smooth gear shifts. `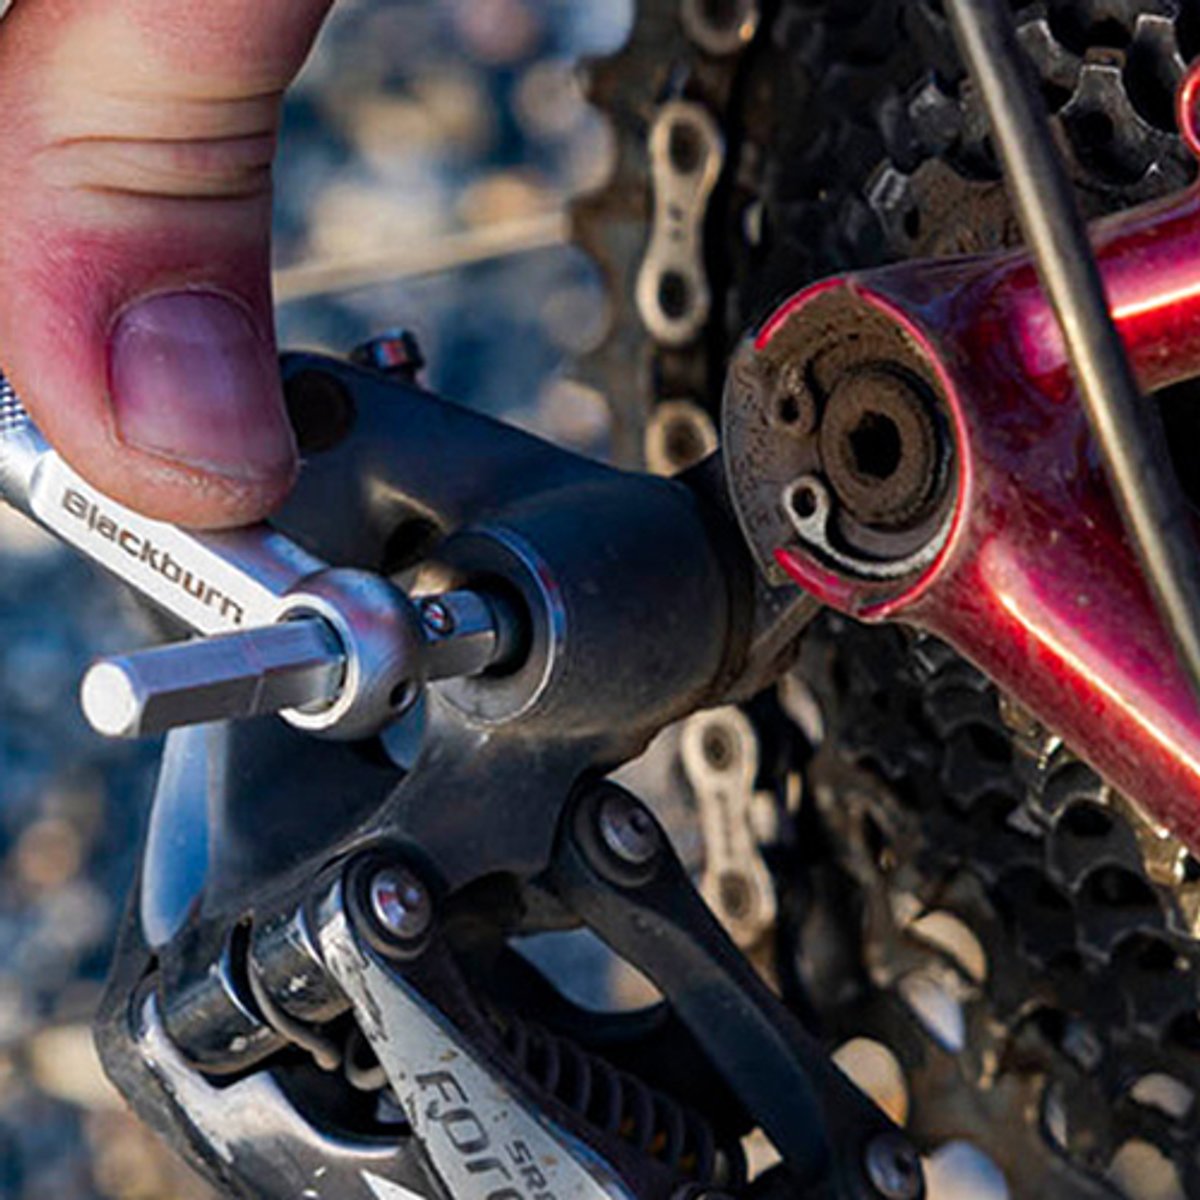
Credit: www.levelninesports.com
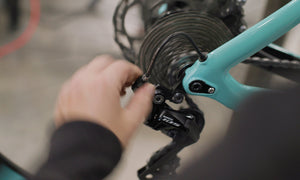
Adjusting The Rear Derailleur
Adjusting the rear derailleur ensures smooth gear shifts on a road bike. Begin by checking the cable tension and alignment. Fine-tune the limit screws to prevent chain misplacement, allowing for precise gear changes.
Setting Limit Screws
Limit screws stop the chain from falling off. Find the two screws marked H and L. The H screw controls the high gear. The L screw controls the low gear. Turn the H screw to move the derailleur away from the wheel. Turn the L screw to move it closer. Make small turns. Check the chain’s position. It should not fall off.
Indexing The Gears
Shift to the smallest gear. Turn the barrel adjuster on the derailleur. Turn it clockwise to tighten. Turn it counterclockwise to loosen. Shift through all gears. Listen for any noise. If gears skip, adjust the barrel more. Repeat until shifting is smooth.
Fine-tuning Adjustments
Ride your bike to test the gears. Listen for strange sounds. Adjust the barrel adjuster if needed. Make tiny turns. Stop when the noise is gone. Check all gears again. Make sure they shift easily. Keep your bike safe and ready.
Adjusting The Front Derailleur
Adjusting the front derailleur ensures smooth gear shifts on your road bike. Begin by setting the height and angle correctly. Then, fine-tune the limit screws and cable tension for optimal performance.
Limit Screw Adjustment
Limit screws control the derailleur’s movement. They prevent the chain from falling off. Find the screws marked ‘H’ and ‘L’. ‘H’ controls the outer limit. ‘L’ controls the inner limit. Turn the screws gently. Ensure the derailleur aligns with the chain.
Cable Tension Adjustment
Cable tension affects gear shifting. Check if the cable is tight. Loosen the barrel adjuster. Turn it counterclockwise to increase tension. Test the shifting. Adjust until gears change smoothly.
Aligning The Derailleur
Proper alignment is crucial for smooth shifting. Look at the derailleur from the side. It should be parallel to the chainrings. Use the mounting bolt to adjust. Ensure the cage does not touch the chain.
Testing Gear Shifts
Adjusting a road bike derailleur ensures smooth gear shifts. Begin by checking cable tension. Then, fine-tune the limit screws for precise alignment.
Checking Smoothness
Pedal slowly and shift gears one by one. Listen for any unusual noises. Watch if the chain jumps or skips. The chain should move smoothly between gears. If not, there might be a problem. Ensure the gear lever moves easily. This helps with smooth shifting.
Correcting Issues
Look for loose cables or bent parts. Tighten any loose screws. Adjust the derailleur screws carefully. They help guide the chain correctly. Ensure the derailleur hanger is straight. If bent, it affects performance. Make sure the chain is clean and oiled. This prevents rust and improves shifting.
Maintenance Tips
Adjusting a road bike derailleur ensures smooth gear changes. Begin by shifting to the smallest chainring and cog. Then, gently tighten the barrel adjuster to fine-tune cable tension. Check alignment and test by shifting through gears.
Regular Inspection
Check your derailleuroften for any signs of wear. Look for loose screws or bent parts. A quick check keeps your bike running smooth. Make sure the derailleur is aligned correctly. Misalignment can cause shifting problems. It’s easy to fix with a small tool.
Cleaning And Lubrication
Clean your derailleur with a damp cloth. Remove all dirt and grime. This helps prevent rust and wear. After cleaning, apply lubricant to the moving parts. Use a small amount, as too much can attract dirt. Lubrication keeps your derailleur running smoothly. It also makes shifting gears easier.
Credit: www.theproscloset.com
Frequently Asked Questions
How Do I Adjust The Rear Derailleur On A Bike?
Adjust the rear derailleur by loosening the cable, aligning the derailleur with the smallest sprocket, and tightening the cable. Use the barrel adjuster for fine-tuning. Test shifting through all gears, ensuring smooth transitions.
How To Know If A Derailleur Needs An Adjustment?
Check if gears shift smoothly and accurately. Listen for unusual noises while changing gears. Observe chain alignment and tension. Inspect for visible damage or wear. If shifts are delayed or inconsistent, the derailleur likely needs adjustment. Regular maintenance prevents major issues and ensures optimal performance.
What Do The H And L Screws Do On A Derailleur?
The H and L screws on a derailleur adjust the limit of the derailleur’s movement. The H screw controls the outer limit, preventing the chain from overshifting. The L screw sets the inner limit to avoid the chain falling off the smallest cog.
Proper adjustment ensures smooth and accurate gear shifts.
What Position Should My Derailleur Be?
Position your derailleur parallel to the chainrings for smooth shifting. Ensure it sits 1-3 mm above the largest chainring. Adjust limit screws to prevent chain drops. Fine-tune tension with the barrel adjuster for optimal performance. Check alignment regularly for best results.
Conclusion
Adjusting your road bike derailleur can seem tricky at first. With practice, you’ll improve. Remember to take your time. Each step is important. Follow the guide closely. Listen to your bike’s sounds. They can tell you a lot. A well-adjusted derailleur makes riding smoother.
You’ll enjoy your rides more. Save money on repairs too. Ride safely and confidently. Happy biking!


