
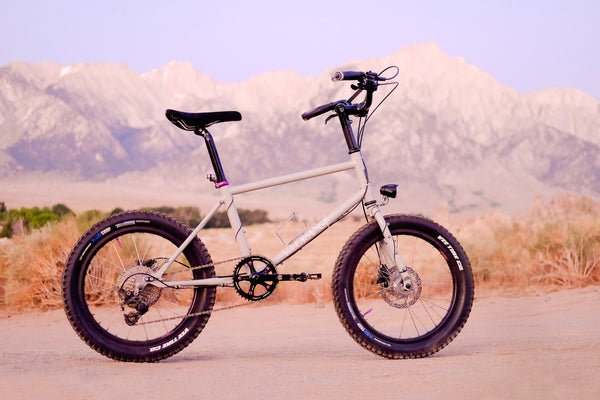
Are your Mini Velo bike brakes feeling a bit loose or not stopping as quickly as they should? Knowing how to adjust your brakes is key to riding safely and confidently.
Whether you’re new to Mini Velo bikes or just want to keep your ride in top shape, this guide will show you simple steps to fix your brakes quickly. By the time you finish reading, you’ll have the skills to make your brakes work perfectly, so you can enjoy every ride without worrying about your stopping power.
Ready to take control of your bike’s brakes? Let’s get started!
Credit: www.svencycles.co.uk
Mini Velo Brake Types
Mini Velo bikes use three main brake types. Each type works differently and needs a specific adjustment method.
- Caliper Brakes: These brakes clamp the wheel rim using two arms. They are common on road-style Mini Velos. Easy to adjust by tightening or loosening the brake cable and aligning the pads.
- V-Brakes: These brakes have two long arms that grip the rim. They offer strong stopping power. Adjustment involves setting the cable tension and brake pad position carefully.
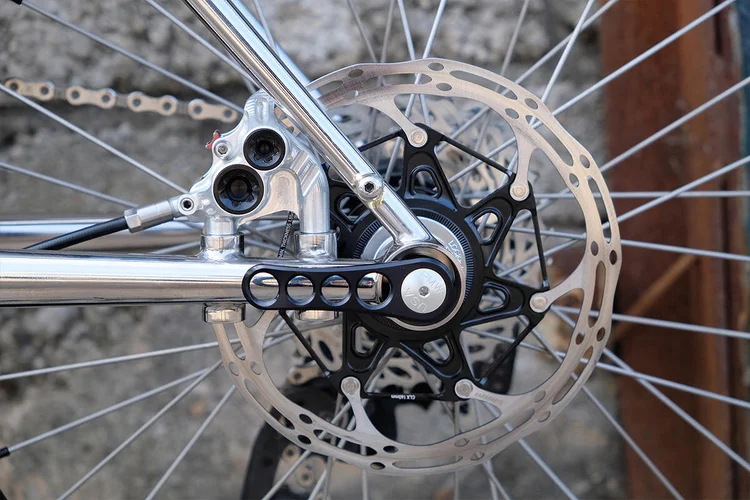
- Disc Brakes: Use a rotor attached to the wheel hub. The brake pads squeeze the rotor to stop. They work well in wet conditions. Adjustment requires aligning the caliper and setting pad clearance.

Credit: handsonbike.blogspot.com
Signs Of Brake Issues
Squeaking soundsoften mean brake pads are dirty or worn out. Dirt or small stones can get stuck and cause noise. Cleaning the pads or replacing them can fix this.
Reduced stopping powermeans the brakes do not slow the bike well. This can happen if the brake pads are too thin or the cables are loose. Checking and tightening cables or changing pads helps improve safety.
Brake lever feelmatters a lot. If the lever feels too loose or too tight, it can cause trouble. Loose levers may need cable tightening, while tight levers might mean the pads press too hard. Adjusting the lever gives better control.
Tools Needed
To adjust brakes on Mini Velo bikes, having the right tools is key. Allen wrencheshelp loosen or tighten bolts on brake parts. They come in different sizes, so keep a set handy.
Screwdriversare useful for adjusting the brake pads and tension screws. Both flathead and Phillips types can be needed depending on the bike model.
Cable cuttersmake sure brake cables are cleanly cut and fit well. Sharp cutters avoid frayed ends that might cause brake issues.
Adjusting Caliper Brakes
Brake pads must be centered evenlyon both sides of the wheel rim. Check the space between the pads and rim. Use a small screwdriveror your fingers to gently adjust the brake arms. Make sure the pads do not touch the tire or hang too far from the rim.
To tighten the brake cable, first loosen the boltholding the cable on the brake arm. Pull the cable tight with your hand, but do not over-tighten. Secure the bolt firmly to hold the cable in place. This keeps the brakes responsive and safe.
Test the brakes by spinning the wheel and squeezing the brake lever. The wheel should stop quicklywithout the lever touching the handlebar. If the brake feels loose or the wheel keeps spinning, adjust the cable tension or pad position again. Repeat these checks until the brake response is smooth and strong.
Adjusting V-brakes
Brake pads must touch the rim squarely for good stopping power. Check if the pads hit the rim evenly from top to bottom. Adjust the pads so they do not touch the tire or hang below the rim. Pads should be close but not rubbing when brakes are released.
Cable tension controls how tight your brakes feel. Squeeze the brake lever and see if the pads move quickly to the rim. Tighten the cable if the lever pulls too far or feels loose. Loosen the cable if the brakes are too tight or drag on the rim.
Brake arms must move evenly for balanced braking. Both arms should move the same distance when the lever is pulled. Adjust the spring tension screws on each arm to balance their movement. This keeps the brake pads centered and prevents one side from rubbing.
Adjusting Disc Brakes
Loosen the bolts on the brake caliper. Squeeze the brake lever gently. This centers the caliper on the rotor. Tighten the bolts while holding the lever. Ensure the rotor spins without rubbing. If it rubs, repeat the steps.
Check the gap between pads and rotor. Use an Allen key to adjust the screws. Turn screws to move pads closer or farther. Make sure both pads are equal distance. Test by spinning the wheel. The wheel should spin freely.
Use a bleed kit for this task. Attach the syringe to the brake lever. Open the bleed screw on the caliper. Push fluid from the syringe into the system. Watch for air bubbles in the fluid. Close the bleed screw when no bubbles appear.
Brake Maintenance Tips
Adjusting brakes on Mini Velo bikes improves safety and ride comfort. Tighten or loosen brake cables to ensure proper pad contact with the wheel. Regular checks keep brakes responsive and extend their life.
Regular Inspection
Check your brakes often. Look for loose parts or damage. Tighten any loose bolts. Make sure brake pads are in the right place. They should touch the wheel rim evenly. If you hear noise, check the alignment. Good brakes keep you safe.
Cleaning Brake Components
Keep brakes clean for better performance. Use a soft cloth to wipe away dirt. Avoid using oily rags. Clean the wheel rims too. Dirt can make brakes less effective. A clean brake works better and lasts longer.
Replacing Worn Pads
Worn pads need replacing. Check pad thickness regularly. If they are thin, change them. New pads stop the bike better. Follow the bike manual for instructions. Always use quality pads for safety.

Credit: handsonbike.blogspot.com
Safety Checks Before Riding
Check the brake levers by squeezing them gently. They should feel firm, not loose. The levers must stop the wheels quickly when pulled.
Spin the wheels to see if they turn freely. The brakes should stop the wheels from spinning when the lever is pulled. This shows the brakes work well.
- Practice stopping quickly in a safe place.
- Use the brakes evenly to avoid slipping.
- Feel how the bike slows down when brakes are applied.
Frequently Asked Questions
How Do I Know When Mini Velo Brakes Need Adjustment?
Check if brakes feel loose or don’t stop the bike well. Uneven brake pad wear or squeaking sounds also signal adjustment needs. Timely tweaks ensure safety and smooth rides.
What Tools Are Required To Adjust Mini Velo Brakes?
You typically need a hex wrench, screwdriver, and sometimes a brake cable puller. These tools help tighten, loosen, and align brake components precisely.
How To Align Brake Pads On Mini Velo Bikes?
Loosen the pad bolts, position pads parallel to the rim, then tighten bolts securely. Proper alignment prevents rim damage and ensures effective braking.
Can I Adjust Mini Velo Brakes Without Removing The Wheel?
Yes, most brake adjustments can be done with the wheel on. This allows easier fine-tuning of cable tension and pad positioning.
Conclusion
Adjusting brakes on your Mini Velo bike keeps rides safe and smooth. Check brake pads often and tighten cables as needed. Small tweaks improve stopping power and control. Take your time to test brakes after each change. Regular brake care helps avoid accidents and bike damage.
Enjoy riding with confidence and peace of mind. Simple steps make a big difference in bike safety. Keep practicing these tips for better bike handling every day.



