
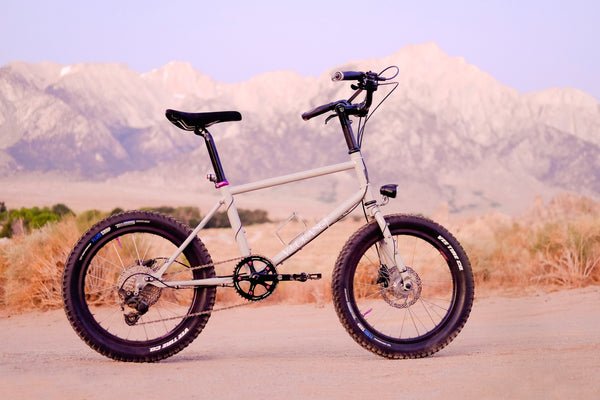
Are you ready to make your mini velo bike safer and more stylish? Adding lights to your bike is one of the smartest upgrades you can make.
Not only do lights help you see better when riding at night, but they also make sure others see you clearly. If you’ve ever wondered how to choose and install the right lights for your compact ride, you’re in the right place.
You’ll discover simple, step-by-step tips to brighten up your mini velo and enjoy every ride with confidence. Keep reading—your perfect glow is just a few easy steps away!
Choosing The Right Lights
Mini Velo bikes need compact and bright lightsfor safety. Choose between front and rear lightsdesigned for small frames. LED lights are common because they are energy-efficientand bright. Battery life matters. Longer battery life means less charging time and more riding.
Lights should have good water resistanceto handle rain or splashes. Look for lights with durable materialsto last longer on rough roads. A strong casing protects the light from damage. Lightweight designs keep the bike easy to handle.
| Type | Brightness (Lumens) | Battery Life | Water Resistance | Durability |
|---|---|---|---|---|
| LED Front Light | 100-300 | 4-8 hours | IPX4 or higher | High |
| LED Rear Light | 50-150 | 6-12 hours | IPX4 or higher | Medium |
| Rechargeable Light | Varies | 5-10 hours | IPX5 or higher | High |

Credit: www.youtube.com
Tools And Materials Needed
Essential tools include a screwdriver, wire cutters, and electrical tape. Materials needed are bike lights, batteries, and mounting brackets. These items help ensure a safe and secure light installation on your Mini Velo bike.
Essential Tools
- Screwdriver:Needed to tighten screws for light mounts.
- Allen keys:Help fix lights on frame bolts.
- Wire cutters:Cut and trim wires neatly.
- Electrical tape:Secure wires and prevent damage.
- Drill (optional):Make holes if needed for mounting.
- Measuring tape:Measure placement for balanced light setup.
Optional Accessories
- Reflectors:Extra safety for night rides.
- Battery pack holder:Keeps battery secure and easy to access.
- Zip ties:Organize wires neatly along the frame.
- Switch holder:Allows easy on/off control of lights.
Preparing Your Mini Velo
Start by cleaning your Mini Velo bike. Use a soft cloth and mild soap to remove dirt. Dry it well to prevent rust.
Next, inspect the bikecarefully. Check the frame, tires, and handlebars for damage. Make sure all parts are tight and safe.
Look for mounting pointsto attach the lights. Common spots include:
- Front fork
- Handlebars
- Seat post
- Rear rack or frame near the back wheel
Make sure these points are clean and free of paint flakes. This helps lights stick or clamp well.
Choose spots that do not block your movement or the bike’s parts. Good placement means better light and safety.

Credit: us.knog.com
Installing Front Lights
Front lights should be mounted on the handlebarsfor easy access. Choose a spot near the center to keep the light steady. Use a bracket or clampthat fits your handlebar size. Tighten it well to stop movement while riding.
Position the light so it points straight ahead. This gives the best visibilityto others on the road. Avoid placing it too high or low, which can reduce light spread. Make sure it does not block your view or controls.
- Place light near the handlebar center
- Secure with a proper bracket or clamp
- Point light straight ahead for clear visibility
- Avoid blocking your view or controls
- Check light stability before riding
Installing Rear Lights
Attach the rear light to the seat postusing the provided bracket or strap. Make sure the light faces directly backward for maximum visibility.
Check that the bracket fits tightly around the post. If it feels loose, use extra padding or rubber strips to improve grip.
- Place the light at a height visible to drivers and cyclists.
- Secure the strap or bracket firmly to prevent wobbling.
- Adjust the angle so the light shines straight back.
- Test the light after installation to confirm stability.
A stable rear light helps keep you safe on the road, especially at night.
Wiring And Power Options
Choose between battery-powered or dynamo lights for your Mini Velo bike. Wiring must be neat and secure to avoid damage or shorts. Use clips or tape to keep wires tight and out of the way.
Battery-powered Vs. Rechargeable
Battery-powered lights are simple and easy to use. They don’t need charging. Just replace the batteries when needed. Rechargeable lights save money in the long run. They require charging after use. Think about your riding habits. Choose the option that fits best. Both have pros and cons. Choose wisely for your needs.
Cable Management Tips
Keep cables tidy and secure. Use zip ties to bundle them. This prevents tangling. Ensure cables don’t dangle. They should not interfere with wheels. Check the length of cables. Cut or fold excess if necessary. Hide them along the bike frame. This makes the bike look neat and clean. Always check for loose cables. Secure them properly for safety.
Testing And Adjusting Lights
Test the lights by turning them on in a dark area to check brightness and angle. Adjust the position so the beam points straight ahead without blinding others. Make sure all connections are secure for consistent lighting during your rides.
Checking Light Angles
Ensure the bike lights point in the right direction. Lights should face straight ahead. Avoid pointing them too high. This prevents blinding others. Adjust the angle to cover the road well. Proper light angles help in clear visibility. It keeps you and others safe during rides.
Ensuring Proper Function
Turn on all lights to check if they work. Test each light separately. Replace any light that does not work. Batteries should be fully charged. This ensures lights stay on longer. Properly working lights make rides safer. Always carry spare batteries or lights. This helps in unexpected situations.
Enhancing Style With Lights
Choosing the right colorfor your mini velo bike lights can change its look a lot. Bright white or warm yellow lights offer clear visibility. Colored lights like blue, red, or green create fun effects and show off your style.
Lights that flash or change colors catch more attention. Soft glows add a cool, calm vibe. Pick colors that match your bike or your favorite shades.
Light placement affects both safety and style. Front and rear lights are must-haves for riding at night. Side lights make you more visible from all angles.
- Mount lights on the handlebars for a classic look.
- Attach small LED strips along the frame for a modern touch.
- Place wheel lights to create a glowing circle effect.
- Use clip-on lights for easy removal and charging.
Maintaining Your Lights
Keep your lights bright by cleaning them regularly. Dirt and dust can block the light. Use a soft cloth to wipe the lens gently. Avoid harsh chemicals that may damage the surface.
Check the batteries often. Replace old batteries to keep the lights shining strong. Rechargeable batteries need charging before they run out. A fully charged batterygives better visibility and lasts longer.
| Task | Tip |
|---|---|
| Cleaning | Use a soft cloth; avoid harsh cleaners |
| Battery Replacement | Change batteries when lights dim |
| Charging | Charge before battery dies completely |

Credit: www.youtube.com
Frequently Asked Questions
What Types Of Lights Work Best For Mini Velo Bikes?
LED lights are ideal for Mini Velo bikes. They are bright, energy-efficient, and lightweight. Rechargeable or battery-powered options offer versatility and easy installation. Choose front white lights and rear red lights to meet safety standards and improve visibility.
How Do I Mount Lights On Mini Velo Bikes?
Mount lights on the handlebars for the front and on the seat post or rear rack for the back. Use adjustable brackets or straps to secure them firmly. Ensure lights are angled correctly to illuminate the path and make you visible to others.
Can I Use Usb Rechargeable Lights On Mini Velo Bikes?
Yes, USB rechargeable lights are perfect for Mini Velo bikes. They provide long-lasting brightness and are eco-friendly. Simply recharge via USB ports at home or on the go. This eliminates frequent battery replacements and ensures consistent lighting for safe rides.
Are There Waterproof Lights Suitable For Mini Velo Bikes?
Waterproof lights are essential for all-weather Mini Velo riding. Look for lights with IPX4 rating or higher to resist rain and splashes. These lights maintain functionality in wet conditions, enhancing safety and durability throughout your rides.
Conclusion
Adding lights to your Mini Velo bike keeps you safe and seen. Choose lights that fit your bike well and are bright enough. Easy installation makes your ride better and more fun. Regularly check your lights to ensure they work properly.
Ride confidently at night or in low light. Stay visible, stay safe, and enjoy every ride. Simple steps bring big benefits to your cycling experience.



