
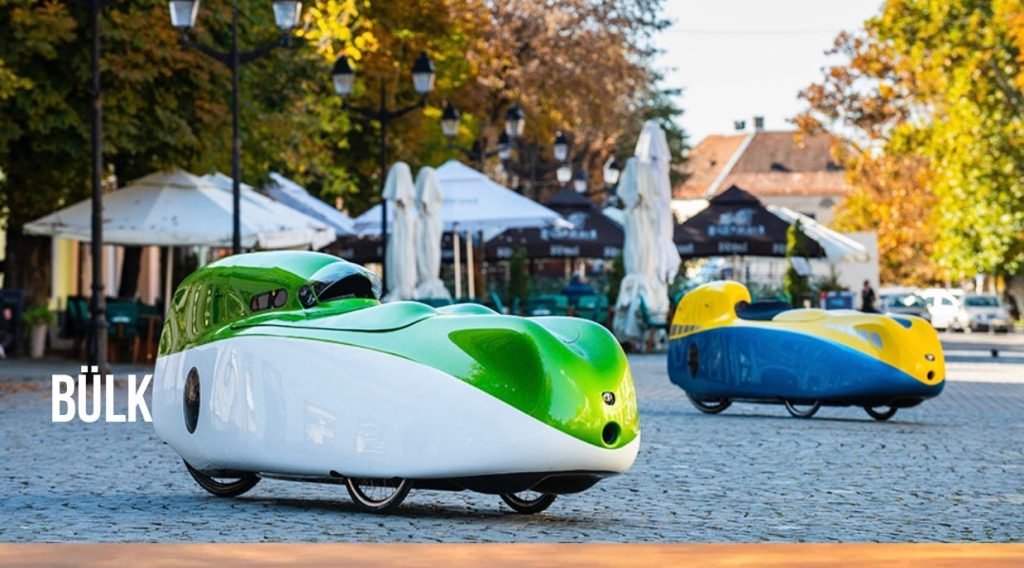
Have you ever wondered how long it really takes to build a velomobile? Whether you’re dreaming of creating your own sleek, pedal-powered vehicle or just curious about the process, understanding the time involved is key.
Knowing what to expect can help you plan better and stay motivated throughout the build. You’ll discover the typical timeline for building a velomobile, what factors can speed things up or slow them down, and tips to make your project smoother.
Keep reading to find out exactly how much time you’ll need to turn your vision into a rolling reality.

Credit: newatlas.com
Factors Affecting Build Time
Building a velomobile takes time and effort. Several factors can change how long the process takes. Knowing these factors helps plan the project better.
From design choices to skills and tools, each part plays a role in the total build time. Understanding these can make the work smoother.
Design Complexity
The design of the velomobile affects the build time a lot. Simple designs take less time, while complex ones need more work and detail.
- Basic shapes with fewer parts are faster to build.
- Advanced aerodynamics and features add time.
- Custom designs require extra planning and adjustments.
- Adding storage or special seats increases complexity.
Material Choices
Materials used in the velomobile also affect the time. Some materials are easier to work with than others.
| Material | Work Time | Notes |
| Aluminum | Medium | Needs welding and shaping |
| Fiberglass | Long | Requires layering and curing |
| Carbon Fiber | Longest | Delicate and needs precise work |
| Wood | Short | Easy to cut and join |
Skill Level
The builder’s experience changes how fast the project goes. Skilled builders work faster and solve problems easily.
- Beginner: May take longer and need more corrections.
- Intermediate: Can manage tasks well with some help.
- Expert: Builds quickly with fewer mistakes.
Available Tools
The right tools make building faster and easier. Lack of tools can slow the process or reduce quality.
| Tool | Effect on Build Time |
|---|---|
| Welding machine | Speeds up frame assembly |
| Fiberglass kit | Helps with quick layups and curing |
| Power saws | Faster cutting of materials |
| Basic hand tools | Slows down complex tasks |
Typical Build Phases
Building a velomobile takes time and careful work. Each phase focuses on different parts. Understanding these phases helps set good expectations.
The process includes planning, making the frame, shaping the body, adding mechanical parts, and installing electrical systems. Each step has its own challenges and time needs.
Planning And Design
This phase involves deciding the velomobile’s shape, size, and features. Designers create sketches and technical drawings. They also choose materials and check safety rules.
- Sketch the overall shape
- Choose frame and body materials
- Plan aerodynamics and comfort
- Calculate weight and strength
- Design mechanical and electrical layout
Frame Construction
The frame is the skeleton of the velomobile. Builders cut and weld metal tubes or assemble carbon parts. This phase needs precision to ensure strength and alignment.
Building the frame can take from a few days to weeks. The time depends on design complexity and material choice.
Bodywork And Aerodynamics
Shaping the body improves speed and weather protection. Builders use fiberglass, carbon fiber, or plastic. They mold and smooth the surfaces to cut wind resistance.
| Material | Time to Shape | Difficulty Level |
| Fiberglass | 2–4 weeks | Medium |
| Carbon Fiber | 3–5 weeks | High |
| Plastic Molding | 1–3 weeks | Low to Medium |
Mechanical Assembly
This phase adds wheels, brakes, chains, and gears. Builders install the drivetrain and steering parts. Careful adjustment ensures smooth riding and safety.
- Install wheels and tires
- Fit brakes and gear systems
- Set up steering mechanism
- Test mechanical parts for function
Electrical Systems
Some velomobiles have lights, displays, or electric assist. This phase adds wiring, batteries, and controls. Proper setup and testing avoid failures and hazards.
| Component | Purpose | Time to Install |
| Battery | Power supply | 1 day |
| Lights | Visibility | 1 day |
| Controller | Manage electric assist | 2 days |
| Display | Show speed and battery | 1 day |
Time Estimates For Each Phase
Building a velomobile takes several steps. Each phase needs time and care.
Knowing how long each part takes helps you plan better.
Planning And Design Duration
The planning and design phase often takes one to three weeks. You decide the shape, size, and features. This stage includes sketching and making detailed plans.
Frame Construction Time
Building the frame usually takes two to four weeks. It depends on the materials used and the complexity. Welding and fitting parts require patience and skill.
Bodywork Completion
Completing the bodywork can take three to six weeks. This includes shaping, sanding, and painting the shell. The process needs careful work to get a smooth finish.
Mechanical Setup Period
The mechanical setup takes about one to two weeks. This phase involves installing the drivetrain, brakes, and steering. Testing is important to ensure safety and function.
Electrical Installation Time
Installing electrical components usually lasts one week. This includes wiring lights, battery setup, and controls. Proper connections and checks are essential.
| Phase | Estimated Time |
| Planning and Design | 1 – 3 weeks |
| Frame Construction | 2 – 4 weeks |
| Bodywork Completion | 3 – 6 weeks |
| Mechanical Setup | 1 – 2 weeks |
| Electrical Installation | 1 week |
Diy Vs Professional Builds
Building a velomobile takes time and effort. You can choose to build it yourself or hire a professional. Each option has different benefits and challenges.
This article looks at the main differences between DIY and professional velomobile builds. We cover time, skills, and costs to help you decide.
Time Differences
DIY builds usually take longer than professional ones. It depends on your experience and tools. Professionals work faster and can finish in weeks.
- DIY builds can take several months to a year.
- Professional builds often finish in 4 to 8 weeks.
- Waiting for parts may add more time to both options.
Skill Requirements
Building a velomobile yourself needs many skills. You must know about mechanics, welding, and painting. Mistakes can cost time and money.
| Skill | DIY Build | Professional Build |
|---|---|---|
| Mechanical Knowledge | High | Provided by expert |
| Welding | Needed | Handled by pro |
| Painting and Finishing | Required | Included |
| Project Management | Required | Handled by team |
Cost Considerations
Costs vary between DIY and professional builds. DIY saves labor costs but may need more tools and materials. Professionals charge for skill and speed.
- DIY build costs include materials, tools, and supplies.
- Professional builds include labor and warranty fees.
- Unexpected expenses can happen in both cases.
- DIY may save money but take longer to finish.
Common Delays And Challenges
Building a velomobile takes time and patience. Many factors can slow down the process.
Knowing common delays helps you plan better and avoid surprises.
Sourcing Materials
Finding the right parts and materials can take longer than expected. Some items are rare or must be ordered from far away.
- Long delivery times for special parts
- High costs causing budget delays
- Quality issues requiring replacements
- Limited local suppliers
Technical Difficulties
Building a velomobile involves many skills. Problems with tools or parts can slow progress.
| Issue | Effect |
| Tool malfunction | Stop work until repair or replacement |
| Parts not fitting | Need adjustments or new parts |
| Wiring errors | Cause electrical failures |
Design Revisions
Changing the design is common during building. It can cause delays but improve the final product.
- Test current design parts
- Identify needed changes
- Update plans and drawings
- Redo parts or assemblies
- Retest and finalize
Weather And Workspace Issues
Bad weather or poor workspace conditions can stop work. Outdoor projects are very sensitive to weather.
Limited space or poor lighting also make building slower and harder.
Tips To Speed Up The Build
Building a velomobile can take a lot of time. With some good tips, you can finish faster. Planning and smart work help a lot.
This guide shares ways to speed up the process. Use these ideas to save time and effort.
Effective Planning
Start by making a clear plan. Know all the parts you need and steps to follow. This avoids delays and confusion during building.
- Create a list of materials before you begin.
- Set small goals for each day of work.
- Prepare your workspace to keep tools handy.
- Review instructions or guides carefully.
Using Prefabricated Parts
Prefabricated parts save time. They come ready to use and need less shaping or fixing. This cuts down your build hours.
| Part Type | Time Saved | Notes |
| Chassis Frames | 10+ hours | Ready-made frames fit well and are strong. |
| Wheels | 5 hours | Pre-built wheels need no assembly. |
| Body Panels | 8 hours | Prefab panels require little finishing work. |
Skill Development
Improving your skills helps you work faster and with fewer mistakes. Practice key tasks before starting the build.
- Watch tutorials on welding and assembly.
- Practice cutting and shaping materials.
- Learn how to use tools correctly.
- Ask experienced builders for advice.
Time Management
Manage your time well to avoid long breaks and wasted hours. A good schedule keeps you on track.
- Set specific hours for building each day.
- Break work into small, clear tasks.
- Take short breaks to stay fresh.
- Track progress to stay motivated.
Real-world Build Time Examples
Building a velomobile takes time and effort. The total time varies by the builder’s experience and resources.
We look at three common build types to see how long each usually takes.
Amateur Projects
Amateurs often work on velomobiles as a hobby. They usually build in evenings and weekends.
These projects can take from several months to over a year. Time depends on skill and tool access.
- Beginner builders spend 500 to 1000 hours
- Limited workshop tools can slow progress
- Learning new skills adds to build time
Professional Workshops
Professional workshops have skilled teams and proper tools. They build velomobiles faster than amateurs.
Average build time in a workshop ranges from 100 to 300 hours. The process is more efficient and planned.
- Experienced workers reduce errors and rework
- Use of jigs and machines speeds assembly
- Multiple builds may run in parallel
Kit Builds
Kit builds come with parts and instructions ready. Builders assemble components with less fabrication needed.
Kit builds often take between 100 and 400 hours. Time depends on builder skill and kit complexity.
- Simple kits take about 100-150 hours
- Complex kits can need 300-400 hours
- Clear instructions help reduce build time

Credit: www.velomobileworld.com

Credit: www.velomobileworld.com
Frequently Asked Questions
How Long Does It Take To Build A Velomobile?
Building a velomobile typically takes 100 to 300 hours. The time varies based on design complexity and builder experience. Kits reduce assembly time, while custom builds require more effort. Planning and sourcing parts also influence the overall duration.
What Factors Affect Velomobile Build Time?
Factors include design complexity, builder skill, and tool availability. Customizing components and sourcing rare parts increase build time. Experienced builders work faster, while beginners may need extra time. Kit-based builds are generally quicker than fully custom projects.
Can I Build A Velomobile Alone Or Need Help?
You can build a velomobile alone, but help speeds the process. Assistance is useful for heavy lifting and complex assembly steps. Collaborative builds improve safety and efficiency, especially for first-time builders or large projects.
Are Velomobile Kits Faster To Assemble?
Yes, velomobile kits are faster to assemble than building from scratch. Kits come with pre-cut parts and instructions, reducing preparation time. They still require mechanical skills but simplify the build process significantly.
Conclusion
Building a velomobile takes time and patience. Each step needs careful attention. From design to assembly, each phase is crucial. Skills improve with practice, making the process smoother. Start small and gradually take on bigger challenges. Learn from mistakes, and don’t rush the journey.
A personal touch makes your velomobile unique. Enjoy the process and the end result. With dedication, you’ll succeed. Remember, every build tells a story. Happy building!



