
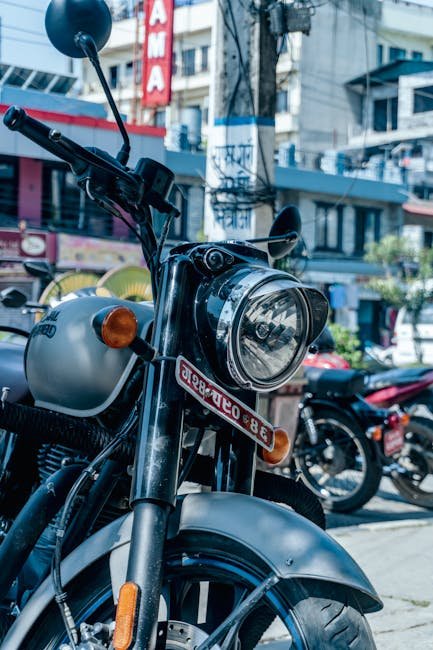
Ever wondered why your bike rides feel less smooth or why there’s a mysterious noise coming from your wheels? You might be dealing with worn-out wheel bearings.
Checking and maintaining your bike’s wheel bearings is crucial for ensuring a safe and enjoyable ride. Imagine gliding down the road with perfect ease, your bike responding effortlessly to every turn and bump. Sounds fantastic, right? By knowing how to check your bike wheel bearings, you can unlock that seamless riding experience and avoid potential mishaps.
In this guide, you’ll discover simple steps to diagnose and inspect your bike wheel bearings, empowering you to keep your bike in top shape. Let’s dive in and make sure your next ride is the best one yet!
Tools And Materials Needed
To check bike wheel bearings, gather these toolsand materials. First, you’ll need a wrench. It’s essential for loosening bolts. Next, a screwdriver will come in handy. It helps open covers. A pair of gloves is important. They keep your hands safe. You might need a flashlight. It helps see inside dark areas. Finally, having some grease is useful. It keeps bearings smooth and reduces friction.
These items ensure a safe inspection. They help you work efficiently. Make sure everything is close by. This saves time and effort. Checking bearings is easier with proper tools. Always wear gloves for protection.
Preparing Your Bike
Before starting, make sure the bike is on a stable surface. Use a bike stand or lean it securely against a wall. This keeps the bike from moving while you work. Gather all needed tools. You will need a wrench and a clean cloth. Check if the bike is clean. Dirt can hide problems with the bearings. Cleaning the bike helps you see everything clearly. Remove the wheel carefully. Be gentle to avoid damaging any parts. Keep all nuts and bolts in a safe place. This ensures nothing gets lost. Now, you are ready to inspect the wheel bearings.
Lifting The Bike
First, place your bike on a flat surface. Make sure it’s stable. Hold the handlebars tightly. This keeps the bike steady. Use a bike stand if you have one. It helps lift the bike safely. If you don’t have a stand, ask a friend for help. They can hold the bike for you.
Grab the bike’s seat and handlebars. Lift the bike gently. Keep your back straight. Bend your knees slightly. This protects your back from injuries. Raise the bike until the wheels are off the ground. Now, you can check the wheel bearings easily. Remember to be carefulwhile lifting.
Removing The Wheel
Start by securing the bike upright. Use a sturdy stand if possible. Make sure the bike is stable. Locate the quick-release lever or axle nuts. These are found near the wheel hub. Turn the quick-release lever to loosen it. If your bike has axle nuts, use a wrench. Keep all parts safe as you remove them. Slide the wheel out gently. Be careful not to damage brake pads. Now, the wheel is free from the bike frame. Place it on a flat surface.
Inspecting The Bearings
Inspecting bike wheel bearings ensures smooth rides. Spin the wheel gently, listening for unusual sounds. Feel for resistance or wobbling, indicating potential wear or damage.
Look at the bike wheels closely. Check for dirt or rust. Clean wheels help bearings last longer. Use a flashlight to see better. Hold the wheel and try to move it side to side. Wobbling means bad bearings. Wheels should be firm and steady. Fix it if you feel movement. Spin the wheel slowly. Listen for strange sounds. Grinding or clicking is bad. Quiet wheels mean good bearings. Replace if you hear noises. `Cleaning The Bearings
First, remove the wheel from the bike. Carefully take off the axle nuts or quick release. Gently pull the wheel off. Handle with care to avoid damage.
Next, use a clean cloth. Wipe away dirt and grease from the bearings. A soft brush can help with stubborn dirt. Make sure everything is clean.
After cleaning, inspect the bearings. Look for any damage or wear. Replace if needed. Re-lubricate the bearings with bike grease. This keeps them running smoothly.
- Use a clean cloth for wiping.
- Inspect for damage.
- Apply fresh grease.
Finally, reassemble the wheel. Secure the axle nuts or quick release. Ensure everything is tight and secure. Spin the wheel to check if it moves freely.
Lubricating The Bearings
First, gather all the necessary tools. You will need a wrench, grease, and a cloth. Use the wrench to remove the wheel. Be careful, don’t lose any parts. Clean the bearings with a cloth. Remove all dirt and old grease. Make sure the bearings are shiny and clean.
Apply a small amount of greaseto the bearings. Spread it evenly with your fingers. Avoid using too much grease. It can attract more dirt.
Once greased, reassemble the wheel carefully. Tighten all nuts and bolts. Ensure everything is secure and in place. Spin the wheel to check for smoothness. It should move without noise or resistance. If not, repeat the process.
Reassembling The Wheel
Put the bearings back into the wheel hub. Make sure they fit snugly. Use a small amount of grease on the bearings. This helps them move smoothly. Place the axle through the hub. Align it carefully. Tighten the nuts on each side of the axle. Use a wrench for this job. Check the wheel spins freely. If not, adjust the nuts slightly. Ensure the wheel is centered in the bike frame. It should not wobble.
Reattach the wheel to the bike. Secure it tightly. Test the brakes to ensure they work well. Spin the wheel again. Listen for any strange noises. Everything should be quiet and smooth. Ensure all parts are clean and secure. A well-assembled wheel makes the bike ride better.
Testing The Wheel
Spin the wheel slowly. Listen for strange noises. A smooth spin is good. Feel the wheel. It should move easily. If it’s hard, the bearings may be bad. Check the wobble. Hold the wheel and shake it. It should not wiggle much. Look for rust. Rust can harm the bearings.
Inspect the hub. Remove the wheel from the bike. Look inside the hub. Do you see dirt or grime? Clean it if needed. Dirt can damage bearings.
- Spin the wheel.
- Feel the smoothness.
- Check for wobble.
- Look for rust.
- Inspect the hub.
Common Issues And Fixes
Checking bike wheel bearings can prevent wear and tear. Listen for unusual noises when spinning the wheel. Feel for smooth movement by rotating the wheel slowly. If you notice resistance or grinding, bearings may need replacement. Regular checks ensure a safer ride.
Worn Bearings
Worn bearings make wheels hard to spin. They create noise and friction. Check bearings for visible wear. Replace them if they look old or damaged. Fresh bearings improve bike performance. They ensure smooth rides.
Loose Bearings
Loose bearings cause wobbling wheels. They can fall out and cause accidents. Tighten them properly using the right tools. Secure them to avoid damage. Regular checking keeps your ride safe and steady.
Damaged Seals
Damaged seals let dirt and water in. They affect bearing life and performance. Check seals for tears or cracks. Replace them to keep bearings clean. Good seals protect from wear and rust.
Frequently Asked Questions
How Do You Test If A Wheel Bearing Is Bad?
Listen for grinding or humming noises while driving. Check for wheel wobble by shaking the tire. Inspect for uneven tire wear. Test for excessive play by jacking up the vehicle and spinning the wheel. Look for ABS warning lights on the dashboard.
Can You Use Wd-40 On Bike Bearings?
Avoid using WD-40 on bike bearings. It can strip away necessary grease. Use a proper bike-specific lubricant instead. This ensures smooth operation and longevity. Regular maintenance with the right products protects your bike’s performance and extends its life.
How To Tell If Bike Crank Bearings Are Bad?
Listen for clicking, grinding, or creaking sounds while pedaling. Check for roughness or resistance when rotating the cranks. Inspect for looseness or movement in the crank arms. Examine for visible wear or damage on bearings. Regular maintenance helps in early detection of bearing issues.
How Do You Tell If It’s A Bad Wheel Bearing Or Ball Joint?
Listen for noise while driving; a bad wheel bearing often causes humming, while ball joints may cause clunking.
Conclusion
Checking bike wheel bearings keeps your ride smooth and safe. Regular maintenance prevents wear and increases your bike’s lifespan. Listening for unusual noises can alert you to issues early. Clean your bearings often to remove dirt and debris. Greasing them ensures they move freely without resistance.
Tightening loose parts can stop potential damage. Simple steps like these save time and money in the long run. Remember, well-maintained bearings provide a better biking experience. Stay attentive, and your bike will thank you. Enjoy a smoother ride every time!


