

Are your bike’s brakes feeling a bit loose or not as responsive as they used to be? You might be dealing with V-brakes that need a little adjustment.
Don’t worry; you don’t need to be a bike mechanic to fix them. With just a few simple steps, you can regain control and ensure your safety on the road. Imagine the freedom of riding your bike with confidence, knowing that your brakes will respond exactly when you need them to.
In this guide, you’ll discover how to adjust V-brakes effectively, so you can get back to enjoying smooth and safe rides. Stay with us, and learn how to make your biking experience better than ever.
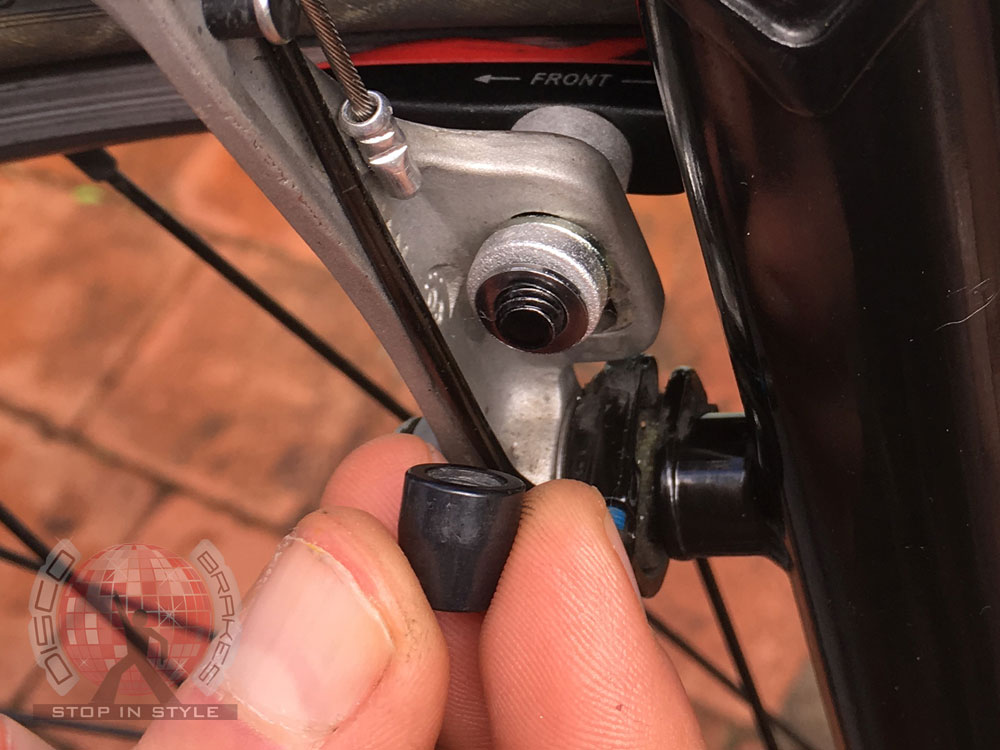
Credit: www.discobrakes.com
Tools Needed
Adjusting V-brakes is simple with the right tools. You need a Phillips screwdriverto loosen screws. A 5 mm Allen wrenchhelps in tightening bolts. Don’t forget a spannerfor the brake cable. A ruleris handy to measure the brake pad distance. Keep a clean clothto wipe dirt off parts. A lubricantkeeps the brake system smooth. Using the right tools ensures your brakes are effective.
- Phillips screwdriverfor screws
- 5 mm Allen wrenchfor bolts
- Spannerfor brake cables
- Rulerfor measuring
- Clean clothfor cleaning
- Lubricantfor smoothness
Preparing The Bike
Ensure your bike is steady. Use a bike stand if you have one. Check the brake pads. They should not be worn out. Replace if necessary. Make sure the wheels are secure. Tighten the quick-release levers. Check the cables for any fraying. They need to be smooth and intact. Adjust the brake lever. It should not be too loose or tight. Ensure the brake pads are aligned. They must touch the rim evenly. Spin the wheel. Observe if the brake pads rub. Adjust the brake cable tension if needed. Ensure the brakes work properly. Test by squeezing the brake lever. The bike should stop smoothly.
Inspecting Brake Pads
Inspecting brake pads ensures effective V-brake adjustment. Check for wear and alignment. Adjust the brake cable tension for optimal performance. Ensure pads meet the rim evenly, avoiding contact with the tire. Regular maintenance enhances safety and prolongs brake lifespan.
Checking Pad Wear
Look closely at the brake pads. They should not be too thin. Check for any uneven wear. Pads should wear evenly across the surface. If pads are worn out, they need replacement. Check for grooves on the pads. Grooves should be visible. If not, pads are worn.
Aligning Pads With Rim
Position the brake pads against the rim. Make sure pads touch the rim evenly. Avoid touching the tire with pads. Adjust the pad angle if needed. Loosen the bolt holding the pad. Move the pad to the correct position. Tighten the bolt securely. Ensure pads are parallel to the rim. Test the brakes after adjusting. Make sure they work smoothly.

Credit: www.ebay.com
Adjusting Brake Cable Tension
Adjusting brake cable tension is crucial for effective V-brake performance. Begin by loosening the brake caliper bolts, then squeeze the brake lever to position the pads close to the rim. Tighten the bolts and test the brakes, ensuring smooth operation and proper alignment.
Loosening Cable Clamp
Begin by locating the cable clamp. Use a wrench to loosen it. This allows the cable to move freely. Ensure the clamp is not too tight. It should be easy to adjust.
Setting Proper Tension
Pull the brake lever slightly. Adjust the cable so brakes touch the wheel. Make sure the tension feels right. Not too loose, not too tight. Check both sides for balance.
Securing Cable Clamp
Once tension is set, tighten the clamp. Use the wrench to secure it firmly. Double-check the brakes are working. Test by squeezing the brake lever. Ensure they stop the wheel smoothly.
Centering Brake Calipers
Start by checking if the brake pads are equal. Both sides should be the same distance from the rim. Spin the wheel slowly and watch the pads. If one pad is closer, the caliper is not centered. An uneven alignment can make the bike stop awkwardly. It can also cause uneven wear on the pads.
Loosen the mounting bolt just a little. This allows the caliper to move. Adjust the caliper until both pads are even. Tighten the bolt once alignment is perfect. Test the brakes by squeezing the lever. The wheel should stop smoothly. If not, adjust again until it does. Properly centered calipers ensure safer rides.

Credit: www.youtube.com
Testing Brake Performance
Fine-tuning V-brakes ensures optimal safety while riding. Begin by loosening the cable bolt and aligning the brake pads. Adjust the brake arms evenly for smooth and efficient stopping power.
Conducting Brake Pull Test
Grab the brake lever and pull it gently. Feel how tight it is when pulled. A tight lever means the brakes are adjusted well. If it’s loose, they need fixing. Check if the brake pads touch the wheel rim smoothly. They should not be too close or too far. Listen for any strange sounds. Squeaking or rubbing indicates a problem. The brake cable should move freely without sticking. If it doesn’t, it might need oiling or replacement.
Evaluating Stopping Power
Push the bike slowly while pulling the brake lever. The bike should stop quickly and safely. Test both brakes for balance. If one side pulls more, adjust it. Make sure the wheel doesn’t skid. This can mean too much pressure. Good brakes stop the bike without jerking. Always test on a safe surface. Safety first when testing brakes.
Troubleshooting Common Issues
Adjusting V-brakes can solve common braking issues. Begin by checking brake pads for wear and alignment. Next, use the barrel adjuster to fine-tune cable tension for optimal performance.
Squeaking Brakes
Squeaking brakes can annoy riders. Check the brake pads first. They might be dirty. Clean them with a damp cloth. Adjust the pads if needed. Ensure they touch the rim evenly. Sometimes, sanding the pads lightly helps. This can remove glaze and reduce noise.
Uneven Brake Pad Wear
Uneven brake pad wear affects braking. Look at the pads closely. If one wears faster, it needs adjustment. Align the pads properly. Ensure both sides touch the rim equally. Check the cable tension. Adjust it to balance the pressure. This helps the pads wear evenly.
Brake Lever Resistance
Stiff brake levers are hard to pull. Check the cable first. It might be rusty or kinked. Lubricate the cable to ease movement. Sometimes, the housing is bent. Straighten it if needed. Ensure the brake springs are adjusted well. This reduces resistance in the lever.
Maintenance Tips
Check the brakes every month. Look for loose parts or wear. Tighten any loose bolts. Make sure the brake pads are not thin. Replace them if needed. Always test the brakes after any adjustments. This keeps your bike safe.
Old brake pads can make stopping hard. Replace them with new ones. Ensure they fit tightly. Check the cables for any damage. Replace frayed cables immediately. This ensures smooth braking. Keep spare parts handy for quick fixes.
Dust can make brakes less effective. Clean them with a soft cloth. Use water and mild soap. Avoid harsh chemicals. Dry parts well after cleaning. This prevents rust. Regular cleaning keeps your brakes working great.
Frequently Asked Questions
How To Properly Adjust V Brakes?
To adjust V brakes, align brake pads with the rim. Tighten the cable bolt, ensuring proper tension. Center the brakes using the adjusting screw. Check for even pad contact. Test by squeezing the brake lever. Adjust further if needed for optimal performance.
How To Stop V Brakes From Rubbing?
Adjust the brake pads using the barrel adjuster. Align pads parallel to the rim. Loosen mounting bolts to reposition. Tighten evenly. Ensure the wheel is centered in the frame. Check for debris or dirt on pads and rims. Test the brakes for smooth operation and adjust as necessary.
Why Are My V Brakes Not Springing Back?
V brakes may not spring back due to cable tension issues, misaligned brake pads, or dirt buildup. Check for corrosion, clean components, and adjust tension. Lubricate pivot points to ensure smooth movement. Proper maintenance and regular checks help prevent problems and ensure optimal braking performance.
Which Way To Turn To Adjust Trailer Brakes?
Turn the adjustment wheel counterclockwise to tighten trailer brakes. Turn clockwise to loosen them. Ensure proper balance between braking force and wheel rotation. Regularly inspect and adjust for optimal performance and safety. Follow manufacturer instructions for specific adjustments.
Conclusion
Adjusting V-brakes can be simple with the right steps. First, gather your tools. Then, follow the guide carefully. Keep your bike stable for safety. Ensure the brake pads align with the rim. Adjust the cable tension for proper response. Check the brake lever for smooth operation.
Practice makes perfect. Regular maintenance helps brakes work effectively. Enjoy a safer and smoother ride. Share your experience with fellow cyclists. Remember, well-adjusted brakes enhance your biking experience. Stay safe and happy riding!


