
Are you tired of hearing that annoying screech every time you squeeze your road bike’s brakes? Or maybe you’ve noticed that your stopping power isn’t quite what it used to be?
Changing your road bike brake pads can be the solution, and it’s simpler than you might think. Imagine the joy and confidence you’ll feel knowing your bike can stop on a dime, allowing you to ride with peace of mind.
You’ll discover step-by-step instructions on how to swap out those worn brake pads with ease. Get ready to unleash a smoother, safer ride and keep your bike in top shape without needing a mechanic. Dive in, and empower yourself with this essential bike maintenance skill!

Credit: www.bikeradar.com
Tools And Materials Needed
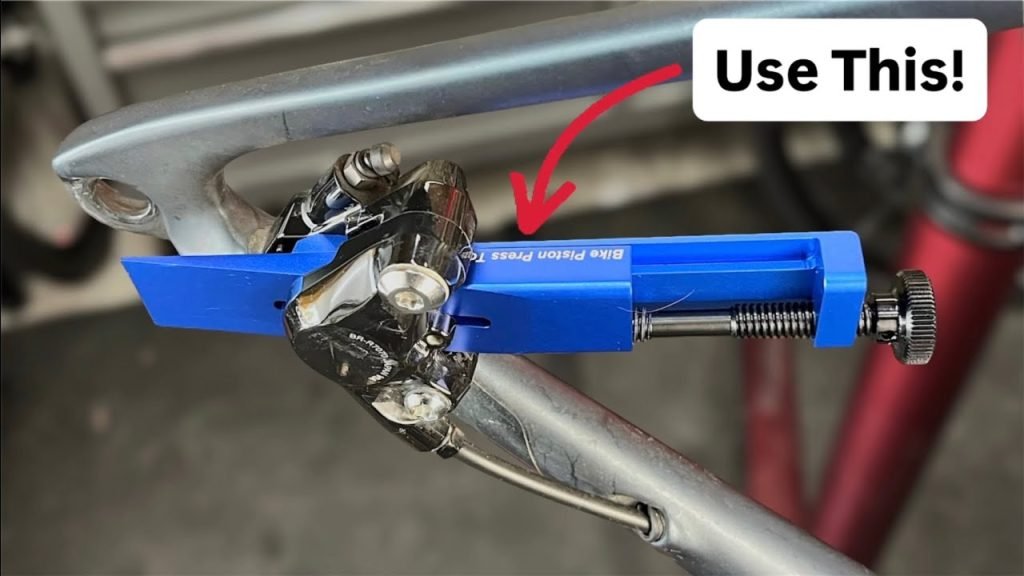
Changing brake pads requires specific tools. Allen wrenches are essential for removing the brake shoes. A new set of brake pads is needed for replacement. Make sure you have a clean cloth to wipe the area. Brake cleaner helps in removing dirt. It ensures smooth installation. A flat screwdriver can assist in prying off old pads. Gloves protect your hands during the process. They keep your hands clean and safe. Having spare screws is useful if any are lost. Lighting is crucial to see small parts. A bike stand aids in keeping the bike stable. A manual or guide can help if you’re unsure. Safety goggles protect your eyes from debris.

Credit: www.bikeradar.com
Preparing Your Bike
Changing road bike brake pads is essential for safe rides. First, remove the wheel and locate the brake pads. Slide out the old pads and insert new ones, ensuring they fit snugly. Reattach the wheel and test the brakes for proper function.
Regular maintenance ensures smooth and safe biking.
Safety Precautions
Wear a helmet and gloves to keep safe. Use clear space to work. Make sure your tools are ready. Check the bike for any damage. Secure your workspace. Keep kids and pets away.
Positioning The Bike
Place the bike on a stable surface. Use a bike stand if you have one. Ensure the bike won’t fall over. Keep the brakes within easy reach. Make sure the bike is firm and steady.
Removing Old Brake Pads
Loosen the bolts holding the brake pads in place. Carefully slide the old brake pads out of their slots. Inspect the caliper for any debris or dirt before inserting new pads.
Loosening The Brake Caliper
Use a wrench to loosen the brake caliper bolt. Turn the bolt counterclockwise. The caliper should slide easily. Make sure not to remove the bolt completely. Keep it attached to the frame. This prevents losing small parts. Check the caliper position. Ensure it is loose enough to slide.
Sliding Out The Pads
Gently slide the brake pads out. Use your fingers for better grip. Avoid using sharp tools. They can damage the pads. Look for a small retaining clip. Remove it carefully if necessary. Inspect the pads once they are out. Check for wear and tear. Replace them if they are too thin.
Installing New Brake Pads
Changing road bike brake pads ensures better stopping power and safety. First, release the brake caliper. Remove the old pads using an Allen wrench. Insert new pads carefully, aligning them with the rim. Tighten everything securely. Test the brakes by spinning the wheel and squeezing the lever.
Adjust as needed for smooth performance.
Aligning The New Pads
Make sure the pads are straight and not tilted. The pads should touch the rim, not the tire. Check that the front of the pad hits the rim first. This helps stop the bike smoothly. Tighten the bolts a little, so the pads stay in place. Spin the wheel to ensure the pads don’t rub. Adjust if needed. The pads should be centered on the rim’s braking surface.
Securing The Pads
Once aligned, tighten the bolts all the way. Use a wrench or Allen key. Make sure they are snug but not too tight. Check the pads for any movement. They should stay firm. Test by squeezing the brake lever. The pads should not move or shift. Repeat these steps for the other wheel. Always ensure your safety by double-checking everything.
Adjusting The Brake Caliper
Make sure the brake caliper is in the right position. It helps the brake pads stop the bike. Loosen the bolts on the caliper gently. Move the caliper until it is even on both sides. Keep the brake pads close to the wheel rim. But not touching. After adjusting, tighten the bolts carefully. The caliper must not move.
Checking Pad Alignment
Inspect the brake pads closely. They should touch the wheel rim evenly. Rotate the wheel to check this. The pads should not touch the tire. Adjust the pads if they are too high or low. Use the small screws on the caliper for this. Ensure the pads have enough rubber left. Worn pads should be replaced.
Testing Brake Functionality
Press the brake lever gently. The brake pads should grip the wheel rim firmly. The wheel must stop moving quickly. Release the brake lever. The wheel should spin freely now. Check both front and rear brakes. Make sure they work the same way. If the brakes feel loose, tighten the cables. Always test brakes before riding.
Maintenance Tips
Swap out worn brake pads to ensure safe rides. Loosen the caliper bolts, remove old pads, and insert new ones. Align pads correctly, then tighten bolts securely.
Regular Inspections
Inspect brake pads often to ensure safety. Check for wear and tear. Look for cracks or unusual shapes. Check alignment with the rim. Proper alignment is crucial for effective braking. Ensure pads touch the rim evenly. Avoid touching the tire. Adjust when necessary.
Cleaning Brake Pads
Clean brake pads regularly to maintain efficiency. Use a damp cloth for dirt removal. Avoid using harsh chemicals. Gentle soap and water work well. Clean both sides of the pads. Remove any stuck debris with a soft brush. Dirt can affect braking. Keep pads clean for smoother rides.

Credit: www.youtube.com
Frequently Asked Questions
Can You Change Bike Brake Pads Yourself?
Yes, you can change bike brake pads yourself. Ensure you have the right tools and follow a step-by-step guide. Check your bike’s manual for specific instructions. Regular maintenance improves safety and performance. Always test brakes after replacement to ensure proper function.
How Often Should I Change Road Bike Brake Pads?
Change road bike brake pads every 1,000 to 2,000 miles, depending on usage and riding conditions. Regularly inspect for wear and replace sooner if braking performance decreases. Check for uneven wear or noise, which may indicate replacement is needed. Proper maintenance ensures safety and optimal braking efficiency.
Can You Replace Bike Brake Pads Without Removing The Wheel?
Yes, you can replace bike brake pads without removing the wheel. Use a compatible tool to access the brake assembly. Carefully remove the old pads and insert new ones, ensuring they fit snugly. Check alignment and test brakes for proper function after replacement.
What Is The Rule Of Thumb When Replacing Brake Pads?
Replace brake pads every 20,000 to 50,000 miles. Check for wear indicators like squeaking noises or reduced braking efficiency. Inspect rotors for grooves or damage. Ensure both pads and rotors are compatible with your vehicle’s specifications. Consult your mechanic for personalized advice.
Regular maintenance ensures safety and optimal performance.
Conclusion
Changing road bike brake pads is a simple yet crucial task. Proper maintenance ensures safety and enhances bike performance. Start by gathering necessary tools and pads. Carefully remove old pads. Install new pads with attention to alignment. Test brakes thoroughly after installation.
Regular checks prevent unexpected issues on rides. Remember, safety first. Keep brakes in top condition. Clean components for better longevity. Enjoy smoother rides and peace of mind. A well-maintained bike means more fun and fewer worries. Follow these steps to keep your bike ready for any adventure.
Happy cycling!


