
Are you tired of that spongy feeling when you squeeze your bike’s brakes? Or perhaps you’ve noticed that your stopping power isn’t quite what it used to be?
If so, you’re likely dealing with air bubbles trapped in your hydraulic disc brakes. These tiny pockets of air can cause big problems, but the good news is, you can easily fix them yourself. Learning how to bleed your hydraulic disc brakes not only restores their performance but also boosts your confidence in bike maintenance.
Imagine the freedom of knowing your bike is in top shape, ready to conquer any trail or road. Stay with us, and you’ll discover a step-by-step guide that will transform your ride experience. Let’s get your brakes back to their full potential, ensuring every ride is smooth, safe, and exhilarating.
Tools And Materials
Having the right tools is crucial for bleeding hydraulic brakes. You’ll need a bleed kit, which usually includes syringes and hoses. Make sure you have a wrenchto loosen the brake caliper. Use brake fluidthat’s compatible with your bike. A clean ragis important to wipe spills. It’s good to have a drip trayto catch any excess fluid.
Safety is essential, so wear glovesto protect your hands. Keep a bucketnearby for waste fluid. If working outside, consider using a bike standfor stability. You might need a torque wrenchto ensure proper tightness. Check your bike’s manual for specific instructions. Gather all items before starting for a smooth process.
Credit: www.bikeradar.com
Preparing The Work Area
Clear the work area by removing clutter and ensuring proper lighting. Gather necessary tools like wrenches and hydraulic fluid. Use a clean cloth to protect surfaces from spills.
Safety Precautions
Wear gloves to protect your hands from chemicals. Use goggles to keep eyes safe from splashes. Ensure the area is well-ventilated. Keep brake fluid away from skin and eyes. Have a clean rag ready for spills. Dispose of brake fluid properly. Avoid smoking or open flames near brake fluid.
Setting Up The Bike
Place the bike on a stable stand. Check that the bike is secure and won’t tip over. Remove any accessories that might get in the way. Position the bike so you can reach the brakes easily. Keep tools within easy reach. Make sure the bike is clean before starting. Clear the area of clutter.
Removing The Wheels
Removing the wheels ensures easy access to the brake system. It provides a clear view and ample space to work. This step is crucial for a smooth bleeding process.
Front Wheel
Loosen the quick-release leveror axle nutson the front wheel. Hold the bike steady to prevent it from tipping over. Carefully lift the front wheeloff the fork. Place the wheel aside in a safe spot. Ensure the brake pads do not touch anything.
Rear Wheel
Shift the gears to the smallest cogon the rear. Loosen the quick-release leveror axle nuts. Gently slide the rear wheelout of the frame. Ensure the chain is clear of the cassette. Place the wheel in a safe area. Avoid contact with brake pads.

Credit: road.cc
Accessing The Brake Calipers
First, find the brake calipers on your bike. These are usually near the wheel. They are small and metal. They hold the brake pads. Make sure your bike is stable. Use a stand if you have one. This will keep it from falling.
Look closely at the calipers. Check if they are straight. They should line up with the brake rotor. If not, you may need to adjust them. This helps in getting a proper brake function.
Find the bolts on the brake calipers. You will need a tool, like an Allen wrench. Turn the bolts to the left to loosen them. Don’t remove them completely. Just make them loose enough to move the calipers. This will help you in adjusting them later.
Be careful not to strip the bolts. Use the right size tool. Once loose, you can work on the brake pads easily. This is important for bleeding the brakes.
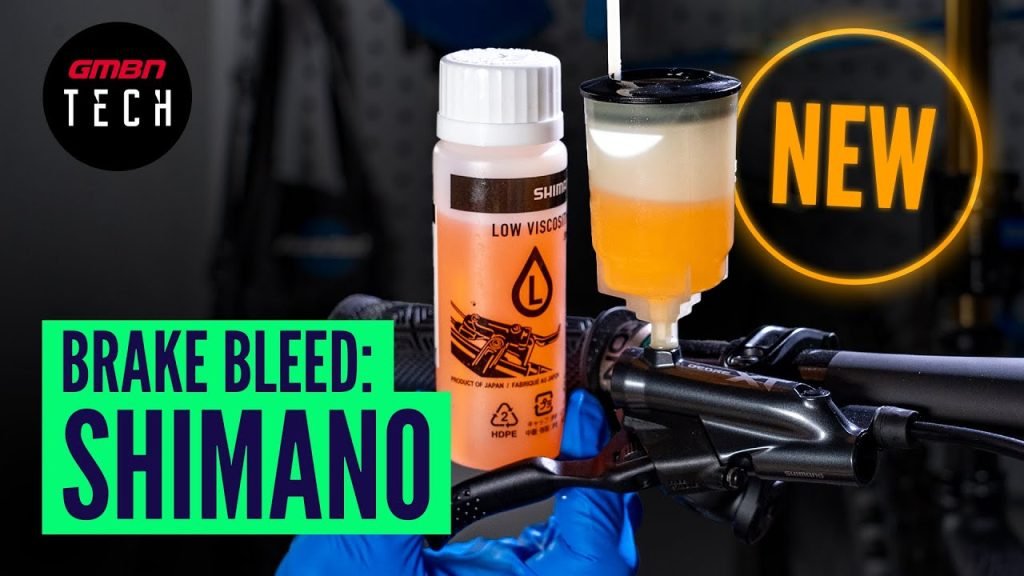
Bleeding Procedure
First, gather your tools. You need a bleed kit and a wrench. Find the bleed port on the brake. Attach the bleed hose to the port. Make sure it’s tight. This stops leaks. Connect the other end to the bleed bottle. The bottle collects old fluid. Secure the bottle so it doesn’t spill. Now, you are ready to start bleeding.
Open the bleed port slowly. Pump the brake lever a few times. Watch for air bubbles in the hose. Air makes brakes soft. Keep pumping until no more bubbles come out. Close the bleed port tightly. Check the lever. It should feel firm. If not, repeat the process. Always clean up any spilled fluid. It can damage your bike.
Checking Fluid Levels
Checking fluid levels ensures your hydraulic disc brakes function smoothly. Regularly inspect and maintain fluid levels for optimal braking performance.
Inspecting Reservoir
Ensure the reservoir is clean. Dirt can affect brake performance. Look for the fluid level. It should be between the minimum and maximum marks. If the level is too low, brakes may not work properly. Check for any leaks around the reservoir. Leaks can cause fluid loss and brake failure.
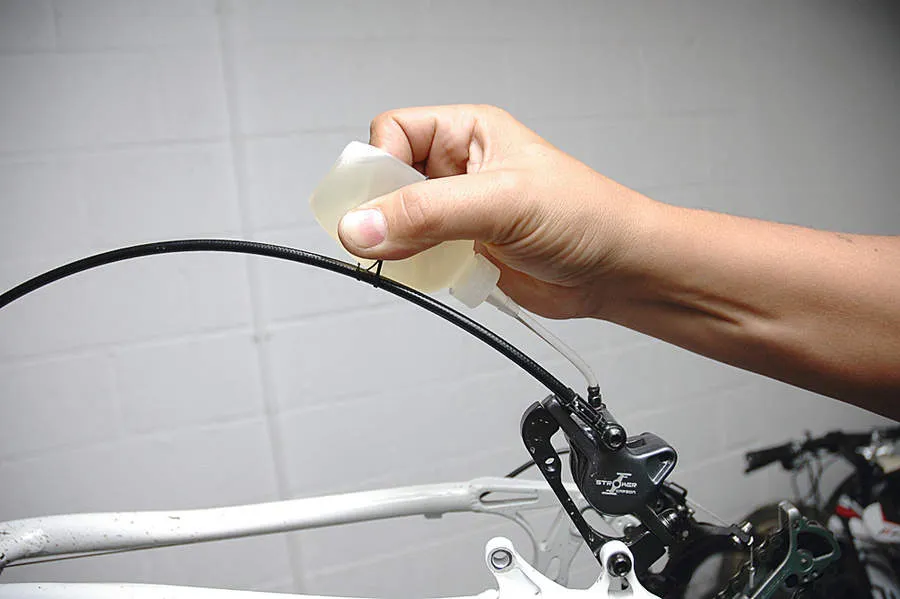
Refilling With Brake Fluid
Choose the correct brake fluid type. Use a funnel to avoid spills. Pour fluid slowly into the reservoir. Stop when it reaches the maximum mark. Overfilling can cause problems. Wipe off any spilled fluid. Make sure the cap is secure. A loose cap can lead to leaks.
Reassembling Components
Reassembling components involves carefully fitting parts back together after bleeding hydraulic disc brakes. Ensure each piece is clean and correctly aligned to maintain optimal brake performance.
Securing Calipers
Make sure the calipers are in the right spot. Use a wrench to tighten them. Don’t make it too tight. It should be snug but not over-tightened. Check the brake pads too. They should be aligned with the rotor. If not, adjust them carefully. Misaligned pads can cause problems. Safety comes first!
Reinstalling Wheels
Lift the wheel back onto the bike. Make sure the axle fits right. Tighten the nuts with your hands first. Use a wrench for final tightening. Spin the wheel to check alignment. It should spin freely without rubbing. Test the brakes now. They should grip the wheel well. If not, recheck everything. Safety is the key.
Testing Brake Functionality
Bleeding hydraulic disc brakes ensures optimal performance and safety. Begin by removing air bubbles from the brake lines. Secure the bike and attach a bleed kit to the brake caliper.
Initial Brake Test
Ensure the bike is on a stable surface. Gently squeeze the brake lever. Check if the brake pads move smoothly. Listen for any strange noises. Make sure the wheel stops quickly. If not, there may be air in the lines. This can affect brake performance. Repeat the test a few times. Feel for consistent brake pressure. This ensures the brakes are working right.
Fine-tuning Adjustments
Adjust brake lever reach if needed. Turn the small dial near the lever. This sets the lever distance from the handlebar. Ensure it’s comfortable for your hand. Check the brake pad alignment. Pads should touch the disc evenly. Use an Allen key to adjust the caliper position. Tighten any loose bolts. Test the brakes again after adjustments. They should feel firm and smooth.
Maintenance Tips
Bleeding hydraulic disc brakes ensures smooth operation and safety. Begin by gathering necessary tools like a wrench and brake fluid. Carefully remove air bubbles from the brake lines to maintain optimal performance.
Regular Checks
Regular checks keep your brakes working well. Look for loose bolts. Tighten them if needed. Check the brake pads. Pads should be thick. Replace them if they are thin. Inspect the brake fluid level. Fluid should be full. Add more if it’s low. This helps the brakes work smoothly.
Signs Of Wear
Worn brakes feel different. Brakes may squeal. This means they need attention. If the brakes feel soft, they may need bleeding. Look for leaks around the brakes. Leaks show there is a problem. If stopping takes longer, check your brakes. Fixing these issues keeps you safe.

Credit: www.bikeradar.com
Frequently Asked Questions
How Do You Bleed Air Out Of A Hydraulic Braking System?
To bleed air from a hydraulic braking system, attach a hose to the bleeder valve. Open the valve while pressing the brake pedal. Close it when fluid flows without bubbles. Repeat until all air is removed. Ensure brake fluid levels are topped up throughout the process for safety.
How Much To Bleed Hydraulic Disc Brakes?
Bleeding hydraulic disc brakes costs around $20 to $50 at most bike shops. DIY kits range from $15 to $40. Prices vary based on location and brand. Regular maintenance ensures optimal performance and safety. Always consult a professional for precise costs and reliable service.
How Do You Bleed Hydraulic Brakes?
To bleed hydraulic brakes, attach a hose to the bleed valve. Open the valve, pump the brake lever, and close it. Repeat until air bubbles stop appearing. Ensure brake fluid level is maintained. This process removes air, ensuring optimal brake performance.
Always follow the manufacturer’s guidelines for specific instructions.
How To Get Air Out Of Disc Brakes?
Remove air from disc brakes by bleeding the brake system. Use a bleeder kit and follow instructions carefully. Start with the brake farthest from the master cylinder. Ensure no air bubbles remain in the brake lines. Regularly check fluid levels and top up as needed.
Conclusion
Bleeding hydraulic disc brakes is essential for smooth cycling. Clear air bubbles ensure brake efficiency. Regular maintenance saves you from unexpected brake failures. Always use proper tools and safety gear during the process. Take your time and follow each step carefully.
A well-maintained brake system boosts your confidence on the road. Troubleshooting common issues keeps your brakes reliable. Remember, practice makes perfect. With care, your brakes will perform well. Enjoy safe rides with your well-bled brakes. Keep learning and improving your cycling skills.
Happy and safe cycling!


