
Are you tired of mud splattering all over your car or truck’s fenders every time you hit the road? Mud flaps might just be the solution you’re looking for.
These handy accessories not only keep your vehicle clean but also protect it from road debris and potential damage. But how do you attach mud flaps to your fenders without making a mess or causing damage? You’re in the right place to find out.
In this guide, we’ll walk you through the simple steps to securely attach mud flaps to your fenders, ensuring your vehicle stays pristine and protected. Whether you’re a seasoned DIYer or a beginner looking to save a trip to the mechanic, this article is tailored for you. Get ready to transform your driving experience and give your vehicle the protection it deserves. Keep reading to discover how easy it is to attach mud flaps and keep your ride looking sharp.
Credit: www.4runner6g.com
Essential Tools
To attach mud flaps to fenders, gather the right tools. A screwdriver is necessary for this task. You will also need a drill to make holes. A measuring tape helps in getting the correct position. Clamps keep the mud flap steady while working. Marker or chalk helps in marking spots to drill. Safety goggles protect your eyes from debris. Ensure you have all these tools ready before you start.
Selecting The Right Mud Flaps
Choosing the right mud flaps is important for your vehicle. They protect against dirt, stones, and mud. Make sure they fit your vehicle’s fenders well. Flaps come in different sizes. Check the size of your fenders first. Some flaps are made from rubber. Others use plastic or metal. Rubber is flexible and durable. Plastic is lightweight and often cheaper. Metal offers strong protection but can be heavy. Consider the weather in your area. Rainy places might need stronger flaps. Look for flaps with easy installation. Some need only a few screws. Others might require drilling. Check the product instructions. This helps ensure you get the right fit. Properly fitting mud flaps last longer and protect better.
Preparing The Fenders
Attaching mud flaps to fenders requires basic tools like a drill and screws. Ensure the fender is clean and dry. Position the mud flap, align it properly, and secure it with screws.
Cleaning The Surface
Mud can stick to dirty fenders. Clean the surface first. Use a clean cloth and water. Scrub off dirt and grime. Let the surface dry completely. A clean surface ensures better attachment. This step is crucial.
Inspecting For Damage
Check fenders for any dents or cracks. Look closely at the edges. Damaged fenders might not hold mud flaps well. If you find damage, consider repairing first. Ensure fenders are strong and intact. This ensures safety and durability.
Credit: www.siennachat.com
Positioning The Mud Flaps
Position mud flaps by aligning them with the fender’s edge. Secure them using screws or bolts for stability. Ensure they cover the tire’s width to block debris effectively.
Aligning For Optimal Coverage
Place the mud flaps against the fender. Make sure they cover the wheel. This keeps dirt and water away. Align the top edge with the fender. Check if it looks straight and even. Mark the spots for screws or clips. Double-check the alignment before drilling holes. Adjust if needed to cover the tire fully. Proper alignment gives the best protection.
Ensuring Proper Clearance
Check the mud flap’s distance from the ground. It should not touch the road. Leave enough space for safe driving. Make sure there’s room for suspension movement. The flap should not hit the tire or fender. Clearance ensures the mud flap works well. It also prevents any damage. Adjust the position if needed. Double-check everything before securing.
Securing The Mud Flaps
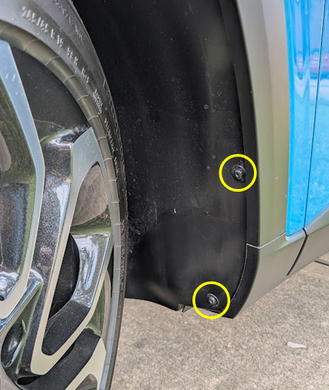
Screws and bolts are great for keeping mud flaps in place. Use a drillto make small holes in the fender. This is where the screws will go. Make sure the holes are the right size. Place the mud flap against the fender. Align it with the holes you drilled. Insert screws through the flap into the holes. Use a wrench to tighten the bolts. Check to ensure they are snug but not too tight. This keeps the mud flap from moving around.
Not everyone wants to use screws and bolts. Clampsare another option. These are easy to attach and remove. Just clip them onto the fender and mud flap. They hold the flap securely without drilling holes. Adhesive stripsare also useful. Stick them to the fender and flap. They offer a quick way to attach mud flaps. Both methods are simple and don’t need tools.
Credit: www.fjcruiserforums.com
Checking Stability
Checking stability of mud flaps ensures proper attachment to fenders. Secure them tightly using bolts or clips. This prevents shaking and potential damage during driving.
Testing For Movement
Gently push the mud flapto check for any wobble. It should stay firm against the fender. If the flap moves, it might need adjustments. Try to move it from different angles. Ensure it doesn’t shake or sway.
Adjusting As Needed
If the mud flap is loose, tighten the screws. Make sure they are snug but not overly tight. Use a wrench or screwdriver for this task. Check alignment once more after adjustments. Ensure the flap is straight and even. Confirm that the edges sit flush with the fender. This keeps the flap secure and stable.
Maintenance Tips
Attaching mud flaps to fenders helps protect your vehicle from dirt and debris. Begin by gathering necessary tools like screws and a drill. Align the mud flap with the fender, ensuring it fits snugly. Secure it with screws, checking for stability.
This simple task enhances your vehicle’s protection.
Regular Inspection
Check mud flaps often. Look for any cracks or loose screws. Tighten screws if needed. Replace any damaged parts. Make sure flaps are not hanging or touching the ground. This keeps them working well.
Cleaning And Care
Wash mud flaps with soap and water. Scrub gently to remove dirt. Rinse with clean water. Dry with a soft cloth. Avoid harsh chemicals. These can damage the material. Clean regularly to keep flaps in good condition.
Frequently Asked Questions
How Do You Attach Mud Flaps?
Attach mud flaps by aligning them with the wheel arch. Secure with screws or clips provided. Ensure they are tight and evenly positioned. Use a drill for a perfect fit. Check that they don’t interfere with tire movement.
How To Put On Fender Flares Without Drilling?
Use adhesive tape or automotive-grade double-sided tape to attach fender flares without drilling. Clean and dry the installation area thoroughly. Align the flares carefully and press firmly for secure attachment. Ensure the tape is weather-resistant for durability.
Do You Need Dot Tape On Mud Flaps?
Dot tape is not required on mud flaps. It is used on large commercial vehicles for visibility.
How To Get Fender Flares To Stick?
Clean the surface and fender flares thoroughly. Apply adhesive promoter, then securely attach using double-sided automotive tape. Ensure firm pressure for a lasting bond. Allow adhesive to cure as per instructions for optimal adhesion.
Conclusion
Attaching mud flaps to fenders is simple and rewarding. Protects your vehicle from dirt and debris. Follow these steps carefully for best results. Use correct tools for a secure fit. Ensure flaps align properly with fenders. This enhances both safety and style.
Mud flaps reduce cleaning time. They also prevent scratches and wear. Enjoy a cleaner and safer ride. A practical upgrade for any vehicle. Keep your car in better shape. A small effort goes a long way. Now, drive confidently with your new mud flaps.


