
Have you ever found yourself caught in the dark while cycling, wishing you had those trusty bike lights installed? Whether you’re commuting home after a long day or enjoying a late-night ride, bike lights are essential for your safety and visibility.
Imagine cruising confidently, knowing you can see and be seen. This guide will walk you through the simple steps to install bike lights, ensuring you never miss a moment of your ride due to dim or non-existent lighting. Your journey to safer cycling starts here, so read on to discover how you can light up your ride effortlessly!

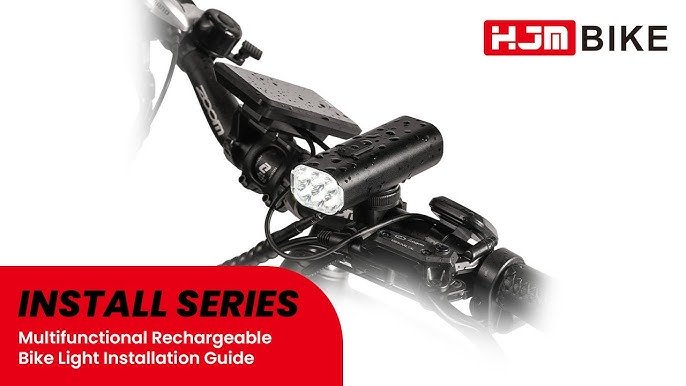
Credit: praskylife.com
Choosing The Right Bike Lights
There are different types of bike lights. Front lights help you see the road. Rear lights make sure cars see you. Helmet lights move where your head turns. Wheel lights make your bike look cool at night.
Brightness is important for visibility. More lumens mean brighter lights. Beam pattern helps focus light on the road or spread it out. Size and weight affect how easy they are to carry. Water resistance keeps them safe in rain.
Bike lights use different power sources. Batteries are common and easy to replace. USB rechargeable lights are handy and eco-friendly. Dynamo-powered lights get power from pedaling. Each option has its pros and cons. Choose what suits your needs best.

Credit: www.youtube.com
Gathering Necessary Tools
First, gather these essential toolsfor installing bike lights. These include a screwdriver, adjustable wrench, and bike light kit. A rubber malletcan be helpful too. Check if you have the right size screwdriver. This makes the job easier and quicker.
Some tools can make the installation process smoother. Consider having a flashlightfor better visibility. A bike standhelps keep the bike steady. A tool beltcan hold items while you work. These tools are not required but can help a lot.
Preparing Your Bike
Start by wiping the bike framewith a clean cloth. Remove any dirt and grease. This helps the light mount securely. Use a mild soap if needed. Make sure the area is dry before mounting. A clean surface ensures better grip.
Check the frame for any cracks or damage. Focus on where the light will be mounted. A solid frameis important for safety. Look for rust or loose parts. Tighten any screws if necessary. Ensure everything is in good condition.
Mounting Front Lights
Mounting front lights on your bike ensures safety during night rides. Choose a sturdy spot on the handlebars. Secure the light tightly to prevent any movement.
Positioning The Front Light
Place the light on the bike’s handlebar. The light should face forward. Make sure it is not tilted. A straight light helps you see better. Avoid blocking the light. Keep your hands clear of it. Ensure the light shines ahead.
Securing The Light Mount
Use the provided straps or clamps. Wrap them tightly around the handlebar. Double-check the tightness. A loose light can fall off. Test the light after securing it. Wiggle it gently. It should not move or twist. This ensures a safe ride.
Attaching Rear Lights
Place the rear light on the seat post. This is the best spot. It should be high and visible. Make sure the light faces backward. This helps cars see you from far away. Keep the light away from any bags or jackets. These can block the light.
Use a strong bracket or clip for the light. It should hold tight. Shake the bike gently to test it. The light should stay in place. Check if the battery is secure. It should not fall out. Tighten any loose screws or straps. This keeps the light from falling during rides.
Testing And Adjusting
Test bike lights after installation to ensure proper alignment and brightness. Adjust angles for optimal road visibility and safety.
Checking Light Functionality
Turn on the bike lights. Make sure they shine bright. Check all modes: steady and flashing. Ensure the lights are not flickering. Replace batteries if they are weak. Good batteries make lights brighter. Test both front and rear lights. Ensure they work properly. A quick test ensures safety on roads.
Adjusting Light Angles
Position the lights at the right angle. They should point forward. Avoid pointing them too high or low. Proper alignment helps in seeing and being seen. Adjust the lights to cover more road area. Ensure they do not blind other riders. Safety first on every ride. Test the angle in a dark room. Small adjustments make a big difference.
Safety Tips
Riding at night can be fun but is risky. Always use bright bike lights. They help others see you. Wear reflective clothing to glow in the dark. Stick to well-lit roads for better visibility. Keep your speed low for quick stops. Be alert to road conditions. Watch for cars and pedestrians. Use hand signals to show your direction. This keeps you safe and visible. Remember, safety is the priority.
Check your bike lights regularly for safety. Ensure batteries are fully charged. Replace them if they are weak. Clean the lights to remove dirt. This makes them shine brighter. Inspect wires for any damage. Tighten all screws holding the lights. A loose light can be dangerous. Make a habit of checking your bike lights weekly. This ensures they work well when needed.

Credit: www.reddit.com
Frequently Asked Questions
How To Attach Bike Lights To Bike?
Secure bike lights using mounting brackets on handlebars or seat posts. Ensure lights face forward and backward. Tighten screws or straps firmly to prevent movement. Check visibility from a distance for safety. Adjust angles as needed for optimal illumination. Regularly inspect attachments for wear or damage.
What Is The Rule For Bike Lights?
Bicycles must have white front lights and red rear lights when riding after dark. Lights should be visible from a distance. Reflectors on pedals and wheels enhance safety. Always ensure your lights are functioning correctly and are securely attached. This increases visibility and reduces the risk of accidents.
How To Connect Led Lights To A Bike?
Attach LED lights to your bike frame or handlebars. Connect the wires to a power source. Use a switch for easy control. Ensure waterproofing for safety. Secure the connections tightly to prevent detachment.
Where Is The Best Place To Mount A Bike Light?
Mount a bike light on the handlebars for optimal visibility. Ensure it’s positioned centrally and securely. Rear lights should be attached to the seat post or rear rack. Proper alignment increases safety and enhances illumination. Regularly check the mounting to prevent shifting during rides.
Conclusion
Installing bike lights is simple and boosts your safety. Follow these steps to ensure proper installation. Check your lights regularly for brightness. Replace batteries or recharge often. Remember, visibility is key when cycling. A well-lit bike helps you stay safe on the road.
Enjoy your rides at night with confidence. Make sure your lights are secure. Loose lights can fall during rides. Keep tools handy for quick adjustments. Use both front and rear lights. This increases your visibility to others. Ride safe, and let your lights guide you.
Happy cycling!


