
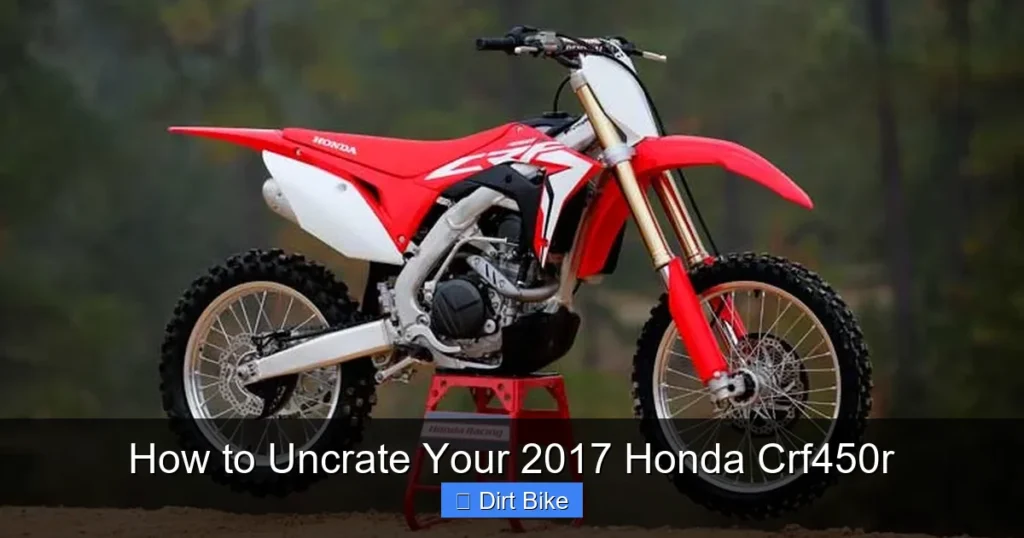
Uncrating your 2017 Honda CRF450R doesn’t have to be stressful. This guide walks you through every step—from removing packaging to pre-ride checks—so you can get on the track or trail with confidence. Follow these expert tips to ensure a safe, smooth setup.
Key Takeaways
- Prepare your workspace: Choose a flat, open area with enough room to safely remove the crate and access all sides of the bike.
- Use the right tools: Have a socket wrench, Allen keys, pliers, and a rubber mallet ready to avoid damaging components during assembly.
- Remove packaging carefully: Cut straps and foam slowly to prevent injury and avoid scratching the frame or plastics.
- Install key components first: Focus on the front wheel, handlebars, and footpegs before moving to electrical connections.
- Check fluids and tire pressure: Verify oil, coolant, and tire pressure before starting the engine to prevent damage.
- Perform a pre-ride inspection: Test brakes, throttle, and controls to ensure everything functions properly before your first ride.
- Keep documentation handy: Have your owner’s manual and warranty info nearby for reference during setup and future maintenance.
How to Uncrate Your 2017 Honda CRF450R
Congratulations on your new 2017 Honda CRF450R! This high-performance dirt bike is built for speed, agility, and off-road dominance. But before you hit the trails or track, you’ll need to properly uncrate and assemble it. While it might seem intimidating at first, uncrating your CRF450R is a straightforward process—if you follow the right steps.
In this guide, we’ll walk you through every phase of uncrating your 2017 Honda CRF450R, from preparing your workspace to performing a final safety check. Whether you’re a seasoned rider or a first-time buyer, these instructions will help you get your bike ready safely and efficiently. We’ll also share practical tips, highlight common mistakes to avoid, and answer frequently asked questions so you can start riding with confidence.
Let’s get started!
Step 1: Prepare Your Workspace
Before you even touch the crate, make sure you have the right environment for uncrating. Choose a flat, level surface like a garage floor, driveway, or paved yard. You’ll need at least 10 feet of clearance in all directions to safely maneuver the bike out of the crate.
Clear away any debris, tools, or obstacles that could trip you or scratch the bike. If possible, lay down a soft tarp or cardboard to protect the frame and plastics during the process. Good lighting is also essential—natural daylight or bright work lights will help you see small parts and fasteners.
Gather Your Tools
You don’t need a full mechanic’s toolbox, but having the right tools on hand will save time and frustration. Here’s what you’ll need:
- Socket wrench set (metric)
- Allen (hex) key set
- Adjustable wrench or pliers
- Rubber mallet (for gentle tapping)
- Wire cutters or heavy-duty scissors
- Work gloves (to protect your hands)
- Owner’s manual (for reference)
Having these tools ready before you start will keep the process smooth and prevent unnecessary delays.
Step 2: Inspect the Crate and Remove Outer Packaging
Your 2017 Honda CRF450R arrives in a sturdy wooden or heavy-duty cardboard crate. Start by inspecting the exterior for any visible damage—dents, cracks, or punctures could indicate internal damage.
Remove Straps and Staples
Most crates are secured with metal or plastic straps and staples. Use wire cutters or pliers to carefully cut the straps. Be cautious—straps can snap back when cut. Remove any staples holding the crate panels together.
Open the Crate Panels
Once the straps are off, gently pry open the side and top panels. Some crates have removable sides; others may require you to lift the entire top. Work slowly to avoid damaging the bike or surrounding components.
Inside, you’ll find the bike secured with foam blocks, zip ties, and protective padding. Take photos or notes of how everything is positioned—this can help if you need to repack the bike later.
Step 3: Remove the Bike from the Crate
This is the most critical step. The CRF450R is heavy (around 230 lbs), so you’ll need help or a motorcycle lift.
Use a Motorcycle Lift or Get Assistance
If you have a motorcycle lift or stand, position it under the bike’s frame. If not, ask a friend to help you lift the bike out. Never attempt to lift it alone—improper lifting can cause injury or drop the bike.
Lift and Slide the Bike Out
With assistance, gently lift the bike from the crate. Slide it out slowly, keeping it level. Avoid dragging it across the ground, as this can scratch the frame or damage the suspension.
Once the bike is out, place it on a stand or have someone hold it upright while you remove the remaining packaging.
Step 4: Remove Protective Packaging and Foam
The bike is wrapped in plastic, foam, and zip ties to prevent damage during shipping. Carefully remove all protective materials.
Cut Zip Ties and Remove Foam Blocks
Use wire cutters to snip zip ties securing the front wheel, handlebars, and other components. Remove foam blocks from under the frame and around the suspension.
Unwrap Plastics and Frame
Peel away plastic wrap from the fuel tank, fenders, and body panels. Check for any adhesive residue—use a mild cleaner if needed, but avoid harsh chemicals that could damage the finish.
Step 5: Install the Front Wheel
The front wheel is typically detached for shipping. Reinstalling it is essential before riding.
Position the Wheel
Slide the front wheel into the fork legs. Make sure the axle aligns with the fork dropouts.
Insert the Axle and Tighten
Insert the front axle through the wheel hub and fork. Slide the axle cap and washer into place. Tighten the axle nut to the torque specification in your owner’s manual (usually around 35–40 ft-lbs). Use a torque wrench for accuracy.
Reattach the Brake Caliper
If the brake caliper was removed, reattach it to the fork leg and secure it with the mounting bolts. Ensure the brake rotor spins freely without rubbing.
Step 6: Install the Handlebars
The handlebars are usually folded down or detached. Reinstall them to restore steering control.
Align the Handlebars
Position the handlebars in the triple clamp. Make sure they’re centered and aligned with the front wheel.
Tighten the Clamp Bolts
Use an Allen key to tighten the upper and lower clamp bolts evenly. Cross-tighten in stages to avoid warping the clamps. Refer to your manual for the correct torque.
Step 7: Install the Footpegs and Controls
Footpegs are often removed to save space. Reattach them using the provided bolts and washers.
Secure the Footpegs
Insert the footpeg pins into the frame mounts and tighten the bolts. Ensure they pivot smoothly but don’t wobble.
Check Levers and Cables
Reconnect the clutch and front brake levers if they were detached. Ensure cables are routed correctly and not pinched.
Step 8: Check Fluids and Tire Pressure
Before starting the engine, verify that all fluids are at the correct levels.
Engine Oil
Check the oil level using the dipstick or sight glass. The 2017 CRF450R uses 10W-40 motorcycle oil. Top off if needed.
Coolant
Inspect the coolant reservoir. The level should be between the “MIN” and “MAX” marks. Add Honda-approved coolant if low.
Tire Pressure
Check both tires with a pressure gauge. The recommended pressure is usually 12–15 psi for off-road use. Adjust as needed.
Step 9: Perform a Pre-Ride Inspection
Never skip this step. A thorough inspection ensures your safety and prevents mechanical issues.
Test the Controls
Turn the ignition on (without starting). Check that the headlight, taillight, and instrument panel work. Test the throttle, clutch, and brakes.
Inspect for Loose Parts
Double-check all bolts, nuts, and fasteners. Pay special attention to the axle, handlebars, and footpegs.
Spin the Wheels
Lift the bike and spin both wheels. Listen for grinding or rubbing sounds. Ensure the chain moves smoothly.
Troubleshooting Common Issues
Even with careful uncrating, you might run into a few hiccups. Here’s how to handle them:
Bike Won’t Start
Check the fuel valve (make sure it’s on), ensure the kill switch is in the “run” position, and verify the battery connection. If it still won’t start, consult your manual or a dealer.
Loose or Misaligned Handlebars
Loosen the clamp bolts, realign the bars with the front wheel, and retighten evenly.
Brake Rubbing
If the brake rotor rubs against the caliper, loosen the caliper bolts, squeeze the brake lever, and retighten while holding the lever. This centers the caliper.
Conclusion
Uncrating your 2017 Honda CRF450R is a rewarding process that sets the stage for countless adventures. By following this guide, you’ve ensured your bike is assembled correctly, safely, and ready for action. Remember to keep your owner’s manual handy for future maintenance and always perform a pre-ride check before every outing.
Take your time, stay safe, and enjoy the ride. Your CRF450R is built to perform—now it’s time to unleash its potential.



