
Is your road bike chain starting to show signs of wear and tear? Are you hearing strange noises or experiencing a less smooth ride?
You’re not alone. A well-maintained chain is the heart of a great cycling experience, ensuring smooth shifts and efficient power transfer. In this Road Bike Chain Replacement Guide, you’ll discover how to keep your bike running like new. Imagine gliding effortlessly over roads, feeling the wind in your hair, and knowing your bike is in perfect condition.
This guide will walk you through the steps to replace your chain with ease. So, are you ready to enhance your biking adventures and say goodbye to chain-related troubles? Dive in and let’s get your bike back to peak performance!

Credit: alpkit.com
Choosing The Right Chain
Ensure the chain fits your bike’s speedand gear system. Check the number of gears. Some chains work only with certain speed counts. Measure the chain length. A too-short chain won’t fit. A too-long chain may slip.
Chains come in different materials. Steel chainsare strong and durable. Aluminum chainsare lightweight but less sturdy. Titanium chainsare light and strong but cost more. Choose based on your need and budget.
- Shimano– Known for reliability and quality.
- SRAM– Offers chains for all price ranges.
- KMC– Popular for durability and performance.
Tools Needed For Replacement
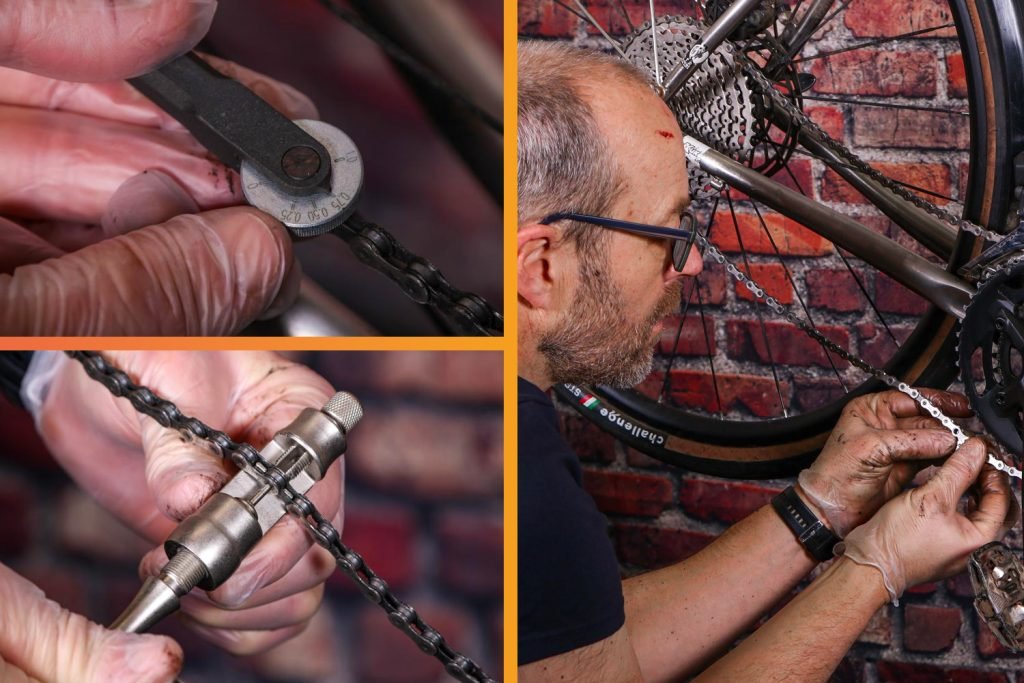
Replacing a road bike chain requires a few essential tools. A chain breaker tool helps remove the old chain. A chain wear indicator checks the chain’s condition. Additionally, a master link plier is useful for connecting the new chain. These tools ensure a smooth and efficient chain replacement process.
Essential Tools
A few tools are must-have for replacing a bike chain. First, a chain breaker tool is vital. This tool helps remove the old chain easily. Next, a new chain that fits your bike’s type and size. A chain checker tool is also handy. It checks if your current chain is worn out. Lastly, a pair of gloves can protect your hands.
Optional Tools
Some tools make the job easier but aren’t necessary. A chain wear indicator can help measure the chain’s wear. Chain pliers can aid in opening and closing links. A bike stand can lift your bike, making work comfortable. Lubricant can make the new chain run smoothly. These tools are useful but not essential.
Preparing Your Bike
Use a soft brush to remove dirt from the chain. Wipe the chain with a clean cloth. A clean chain helps it last longer. Check the gears for any dirt or debris. Use a brush to clean them well. Don’t use water directly on the chain. It can cause rust. Apply a few drops of chain oil after cleaning. This keeps it moving smoothly.
Look at the bike’s gears and brakes. Make sure they work well. Check the pedals and wheels. Ensure they’re tight and not wobbly. Look at the bike frame for any damage. Examine the tires for any cuts or wear. Check the brake pads for wear. Replace them if needed. A safe bike is important for a smooth ride.
Removing The Old Chain
Use a chain breaker tool. Place the tool on a chain link. Turn the handle to push the pin out. Remove the chain carefully. The chain should come apart easily. Wear gloves to protect your hands.
Old chains can be sharp. Handle them with care. Dispose of the chain responsibly. Recycle it if possible. Some bike shops accept old chains. Check with local recycling centers. Keep the chain away from children.
Installing The New Chain
Installing the New Chain Ensure the chain is the correct length for your road bike. Thread it through the derailleur and cassette smoothly. Securely connect the chain ends with a quick link or pin.
Sizing The Chain
First, measure the old chain. Count the links carefully. Compare it to the new chain. Make sure the new chain matches the old one. If it’s too long, remove extra links. Use a chain tool for this task. Ensure the chain is the right size. Check twice to avoid mistakes.
Connecting The Chain
Align the chain on the bike gears. Use a master link to connect ends. Push the link into place securely. Make sure it’s tight but not too tight. Test the chain by pedaling backward. It should move smoothly. Adjust if you hear noise. Listen for clicks or grinding sounds. If needed, reconnect for better fit.

Credit: www.wikihow.com
Adjusting The Chain Tension
Ensure the chain is snug but not too tight. Adjusting the tension helps prevent slipping and ensures smooth riding. Proper tension extends the chain’s life and enhances performance.
Checking Tension
Ensure the chain is not too tight or too loose. A loose chain can slip off. A tight chain causes extra wear. Gently pull the chain midway between gears. There should be about half an inch of play. If it feels tight, adjust it. If too loose, tighten it a bit. Proper tension ensures smooth rides.
Adjusting Derailleur
The derailleur controls the chain’s position. Turn the barrel adjuster clockwise to tighten. Turn it counterclockwise to loosen. Make small turns and test the chain. Check if the chain shifts smoothly between gears. Repeat as needed until smooth shifting is achieved. Proper adjustment keeps the chain on track.
Testing And Fine-tuning
Testing and fine-tuning the new road bike chain ensures smooth gear transitions. Adjust the derailleur to align perfectly with the chain. Regular checks prevent wear and improve performance on every ride.
Test Ride Procedures
Start with a short ride. Check if the chain moves smoothly. Listen for any strange noises. If the chain skips, adjustments are needed. Test different speeds and gears. Make sure everything feels right. Safety is important. Wear a helmet and check brakes too. A smooth ride means success. Keep an eye out for any issues.
Fine-tuning Shifting
Adjust the gears carefully. Use the shift levers gently. Make sure the chain shifts smoothly. If it doesn’t, tweak the derailleur. Turn the barrel adjuster slightly. Test again to see if it works. Repeat if necessary. Fine-tuning makes the ride better. Happy riding is the goal.
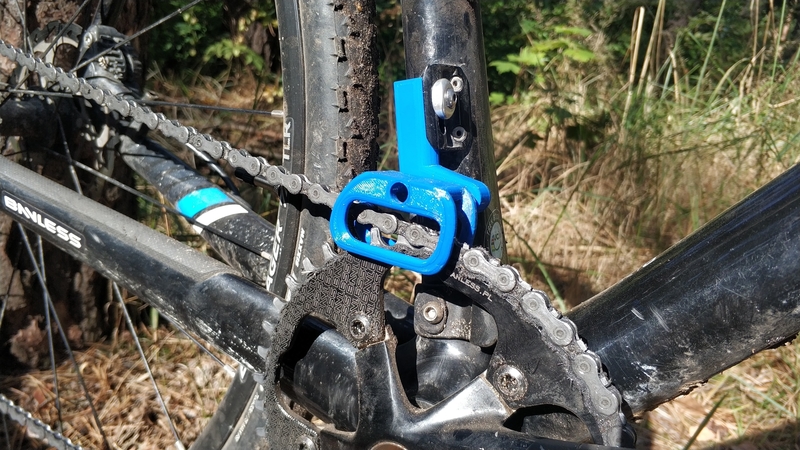
Credit: pinshape.com
Maintaining Your New Chain
Proper chain maintenance extends the life of your road bike. Regular cleaning prevents dirt buildup and ensures smooth rides. Lubricate the chain frequently for optimal performance.
Regular Cleaning
Clean your bike chain often to keep it shiny. Use a soft cloth to wipe off dirt and dust. A clean chain helps your bike move smoothly. Make sure to check for any rust or wear. A dirty chain can slow you down. Keep it clean for a better ride. Regular cleaning makes your chain last longer.
Lubrication Tips
Lubricate the chain to prevent rust. Use special bike oil or lubricant. Apply oil to each link evenly. Wipe off extra oil with a cloth. Too much oil attracts dirt. A well-lubricated chain runs quietly. Don’t forget to lubricate after cleaning. Proper lubrication keeps your bike chain strong and healthy.
Frequently Asked Questions
How Do I Know What Chain To Buy For My Road Bike?
Choose a chain compatible with your bike’s drivetrain speed. Check manufacturer recommendations for your bike model. Ensure proper chain length and width. Consider brands like Shimano, SRAM, or Campagnolo. Consult local bike shop experts for tailored advice.
How Often Should You Change The Chain On A Road Bike?
Change your road bike chain every 2,000 to 3,000 miles. Regular maintenance extends chain life. Check for wear using a chain checker tool. Replace promptly to avoid damage to other bike components. Proper care ensures smooth rides and optimal performance.
How Do I Know If I Have A 1.8 Or 3/32 Chain?
Measure the chain’s width between links using a caliper. A 1. 8mm chain is thinner than a 3/32 inch chain. Check your bike’s specifications or consult your manual for compatibility.
Can You Replace A Bike Chain Without A Tool?
Replacing a bike chain without a tool is challenging. You might use a rock or a hard surface to break the chain. Consider investing in a chain tool for ease and safety. DIY methods risk damaging the chain or bike.
Always prioritize proper tools for maintenance tasks.
Conclusion
Replacing your road bike chain keeps your ride smooth and efficient. Regular checks prevent unexpected breakdowns. A well-maintained chain also ensures safety on the road. Remember, tools needed are simple and affordable. Anyone can learn this skill with practice. Following the steps in this guide makes the process easy.
Don’t wait for issues to arise. Proactively managing your bike’s chain extends its life. Plus, it enhances your biking experience. Enjoy a seamless ride with a properly functioning chain. Keep exploring, keep pedaling. Your bike deserves the best care. Happy cycling!


