
Are you ready to take your cycling experience to the next level? Switching to clipless pedals can revolutionize the way you ride, offering more efficiency, control, and power.
But the thought of setting them up might feel intimidating. Don’t worry—you’re not alone. Many cyclists hesitate to make the switch, fearing complex setups or awkward falls. However, with the right guidance, you can master this transition smoothly. Imagine gliding down the road with confidence, knowing your feet are securely attached yet ready to release when needed.
In this guide, you’ll discover simple steps to set up clipless pedals, ensuring a seamless and safe ride. Keep reading to unlock the secrets to a more enjoyable cycling experience and transform the way you pedal forever.
Choosing The Right Clipless Pedals
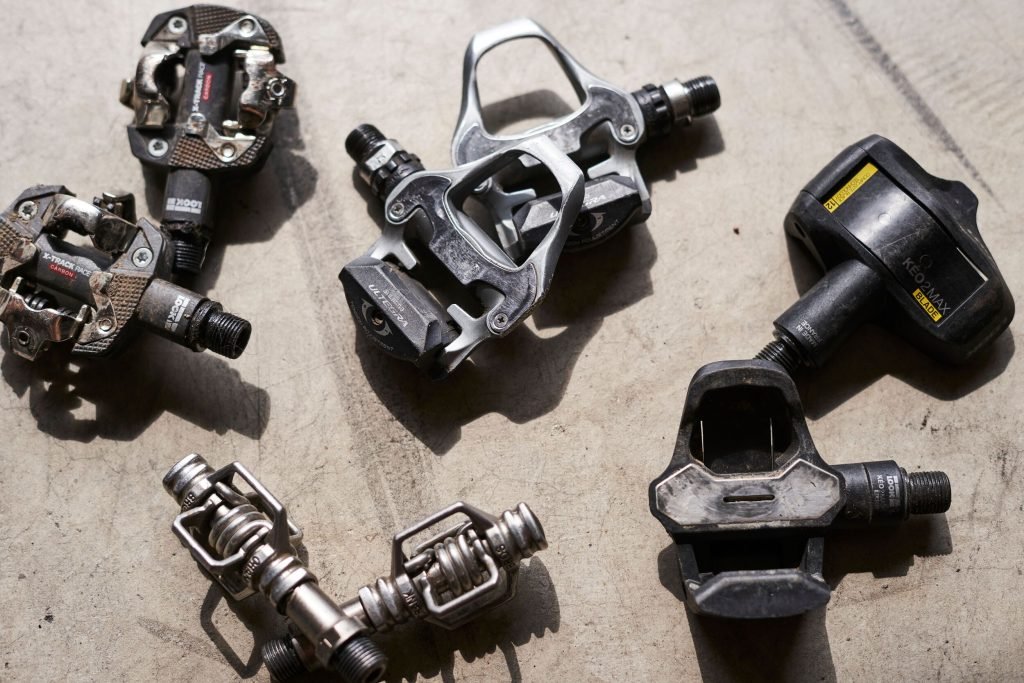
Clipless pedals come in various types. Road pedalsare sleek and lightweight. Mountain bike pedalsare rugged and durable. Hybrid pedalsoffer versatility for casual riders. Each type suits different needs.
Different cycling styles need different pedals. Road cyclistsprefer light pedals for speed. Mountain bikersneed sturdy pedals for rough terrains. Touring cyclistschoose comfortable pedals for long rides. Understanding your cycling style is crucial.

Credit: www.bicycling.com
Selecting Compatible Cycling Shoes
Choosing the right cycling shoes is crucial. Look for a stiff sole. This helps in better power transfer. Ensure shoes have good ventilation to keep your feet cool. Adjustable straps or buckles are important. They offer a secure fit. Lightweight materials make cycling easier. Check for durable construction for long-lasting use. Consider shoes with reflective elements for safety.
Cycling shoes must match your pedal system. SPD and Look are common types. Check if shoes fit these systems. Some shoes support both. Cleat holes should align with your pedals. Look for three or two-hole patterns. Interchangeable cleats offer flexibility. Ensure shoes come with a cleat installation guide. Proper fit prevents foot pain. Always test compatibility before buying.
Installing Clipless Pedals
Installing clipless pedals involves aligning the pedal with the crank arm and tightening it securely. Ensure the cleats on your cycling shoes match the pedal system for a perfect fit. Adjust the tension settings for comfort and safety during rides.
Tools Needed For Installation
Before starting, gather all necessary tools. You’ll need a pedal wrench. Also, a hex key is required. Check your bike for the right size. A bit of bike grease is helpful too. Grease helps prevent rust. It makes pedals easier to remove later. Keep a clean cloth handy. This is for wiping any excess grease. Safety is important. Consider wearing gloves to protect your hands.
Step-by-step Installation Guide
First, remove old pedals. Turn the wrench counterclockwise on the right side. On the left side, turn clockwise. Clean the threads with a cloth. Apply a small amount of grease. Now, attach the new pedals. Turn the right pedal clockwise. For the left pedal, turn it counterclockwise. Tighten the pedals securely. Use the wrench for this step. Finally, double-check your work. Ensure pedals are tight and secure.

Credit: www.oneupcomponents.com
Adjusting Pedal Tension
Adjusting pedal tension is crucial for clipless pedals. Begin by loosening or tightening the tension screws. This ensures a secure yet comfortable fit for your cycling shoes.
Importance Of Tension Settings
Tension settingson clipless pedals matter a lot. They affect how easily you clip in and out. This is important for safety and comfort. Beginners should use lower tension. It makes clipping out easier. Experienced riders might prefer higher tension. It keeps their feet secure on bumpy rides. Finding the right tension helps prevent falls. It also makes riding more fun and safe.
How To Adjust Tension Levels
- Locate the tension screw on your pedal.
- Use a small tool, like an Allen key.
- Turn the screw to change tension.
- Clockwise increases tension. Counterclockwise decreases it.
- Adjust slowly, checking after each turn.
- Test your pedal by clipping in and out.
- Repeat until you find the perfect tension.
Positioning Cleats On Cycling Shoes
Place the cleat under the ball of your foot. This spot helps with pedaling power. Adjust the angle to match your foot’s natural position. Check if your heel moves in or out. Make small adjustments to find the right angle. Test the position by pedaling a short distance. Feel if it’s comfortable and stable. Repeat until it feels just right.
Good cleat position stops foot pain. It also helps you pedal better. Make sure both feet are balanced. Your knees should move straight up and down. This helps avoid knee pain. Adjust cleats if you feel discomfort. Keep testing until pedaling feels smooth and easy. Comfort leads to better cycling performance.
Practicing With Clipless Pedals
Setting up clipless pedals can enhance your cycling experience. Begin by adjusting the cleats on your shoes. Align them correctly with the pedals for efficient pedaling. Make sure the tension is set to a comfortable level for easy release. Practice clipping in and out before hitting the road.
Tips For First-time Users
- Start by practicing on a soft surface like grass.
- Keep one foot unclipped for balance at first.
- Learn to clip in and out while holding onto something stable.
- Wear comfortable shoes that suit your clipless pedals.
Improving Pedal Engagement And Release
Regular practice helps improve your pedal engagement. Focus on the heel motionneeded to clip out. This helps when you need to stop quickly. Adjust the pedal tension for easier release. A lighter tension makes it simpler to unclip. Practice smooth, controlled movementswith your feet. This helps you clip in and out more naturally. Remember to remain calm while practicing. Staying relaxed improves your reaction time.
Safety Considerations
Ensuring proper shoe and pedal alignment minimizes the risk of knee strain. Regularly check the tension settings to avoid accidental release. Wearing protective gear can further enhance safety while riding with clipless pedals.
Avoiding Common Mistakes
Clipless pedals help riders pedal efficiently. But, they need proper setup. Always check the pedal tension. Ensure it’s not too tight. Adjust it to your comfort level. Wear shoes with compatible cleats. Make sure cleats are secure. Loose cleats can cause accidents. Regularly inspect cleats for wear. Replace worn cleats promptly. Practice clipping in and out. Do this in a safe area.
Emergency Release Techniques
Learn quick release techniques. They help in emergencies. Twist your heel outward to release. Practice often for safety. Stay calm during unexpected stops. Avoid panic when stuck. Focus on releasing your foot. Use your heel’s outward motion. This ensures quick detachment. Keep practicing for confidence. It builds muscle memory. Your safety depends on it.

Credit: www.biketart.com
Maintenance And Care
Setting up clipless pedals requires attention to detail for a smooth ride. Begin by attaching pedals securely to the crank arms. Adjust cleats on cycling shoes for comfort and proper alignment. Regularly check pedal tension to ensure easy release during rides.
Regular Pedal And Cleat Check-ups
Check your pedals and cleats often. Look for any signs of wear. Loose parts can make cycling unsafe. Tighten screws if they are loose. Check cleat alignment on your shoes. Misaligned cleats can cause discomfort. Keep your tools handy for quick fixes.
Cleaning And Lubrication Tips
Keep pedals clean for smooth rides. Use a damp cloth to wipe off dirt. Avoid using strong chemicals. They can damage your pedals. After cleaning, apply a light oil. This helps to keep them moving smoothly. Do not over-lubricate. Too much oil attracts dust.
Frequently Asked Questions
How To Adjust Clipless Pedals?
Adjust clipless pedals by loosening or tightening the tension screw. Ensure the pedal releases easily but securely. Test by clipping in and out to find the right balance. Regularly check for wear and make necessary adjustments to maintain performance. Follow manufacturer guidelines for specific pedal models.
What Is The Correct Position Of Spd Cleats?
Position SPD cleats under the ball of your foot. Align them straight or slightly angled for comfort. Adjust fore and aft to ensure natural pedaling motion. Properly positioned cleats improve efficiency and reduce strain. Test adjustments for optimal alignment and feel.
How To Start With Clipless Pedals?
Begin by practicing in a safe, open area. Adjust the pedal tension for easy clipping in and out. Practice clipping in with one foot, then both. Gradually increase your riding time using clipless pedals. Remember to anticipate stops by unclipping in advance.
How To Install Clipless Pedals?
To install clipless pedals, first apply grease to the pedal threads. Attach pedals to the crank arms, turning clockwise for the right pedal and counter-clockwise for the left. Tighten securely with a pedal wrench. Adjust the cleats on your cycling shoes for a proper fit.
Test for smooth engagement and release.
Conclusion
Clipless pedals enhance your cycling experience. Setting them up correctly is key. Ensure your pedals match your cycling shoes perfectly. Adjust pedal tension for easy release. Practice clipping in and out. This boosts your confidence. Always check your setup before each ride.
Proper alignment prevents knee discomfort. Maintain your pedals regularly for smooth rides. Clipless pedals offer improved control and efficiency. Start with short rides to get comfortable. Gradually increase distance as you gain confidence. Enjoy your cycling journey with clipless pedals.
Keep pedaling forward with precision and ease.


