
Replacing the brake pads on your road bike might seem like a daunting task, but it’s simpler than you think. Imagine riding confidently down a steep hill, knowing that your brakes will respond instantly and keep you safe.
That peace of mind starts with understanding how to maintain your bike properly, and brake pads are a crucial part of the equation. Whether you’re a seasoned cyclist or new to the world of biking, learning how to replace your brake pads can save you time and money, and ensure every ride is as smooth and safe as possible.
With just a few tools and our step-by-step guide, you’ll be back on the road in no time, ready to enjoy each ride to the fullest. Ready to dive in and keep your bike in peak condition? Let’s get started!
Gathering Necessary Tools
Get a few tools ready before starting. You’ll need a hex key. This helps to loosen bolts. A flathead screwdriverwill be useful too. It helps remove old pads easily. A clean ragis necessary. Use it to wipe dirt away. You will also need new brake pads. Make sure they fit your bike.
Choose a quiet place. Make sure it is safe and clean. Have a flat surfacefor tools and parts. Keep your bike steady. Use a bike standif possible. This makes work easier. Keep all tools within reach. This helps you work faster.

Credit: www.youtube.com
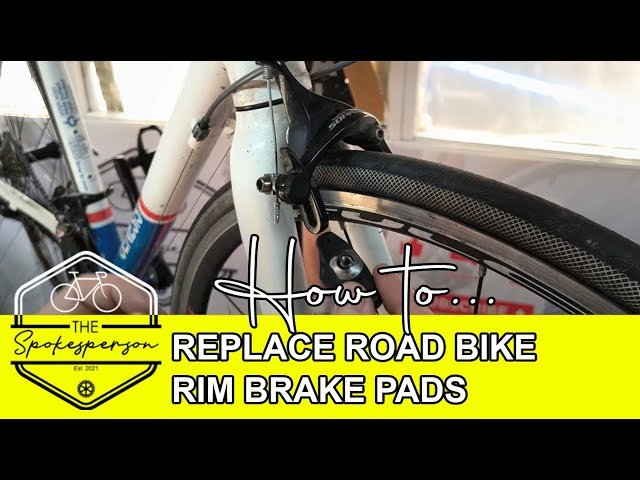
Removing The Wheel
Removing the wheel makes replacing road bike brake pads easier. Loosen the quick-release lever or unscrew the axle nuts. Gently lift the bike frame to detach the wheel, ensuring a smooth process for pad replacement.
Positioning The Bike
Ensure the bike is on a flat surface. This helps with balance. Use a bike standif you have one. It keeps the bike steady. Make sure the bike is securebefore starting. Check the tires. They should not touch the ground.
Detaching The Quick Release
Locate the quick release leveron the wheel. Pull the lever open. This loosens the wheel. Turn the adjusting nuton the opposite side. This helps remove the wheel. Be careful to hold the wheel. It may fall after loosening. Check for any blockagesbefore pulling out the wheel. Ensure you do not lose small parts.
Inspecting Brake Pads
Look at the brake pads closely. Check for any groovesor cracks. These are signs of wear and tear. If the pads are very thin, they need replacing. The brake pads should not be less than 1/4 inch thick.
- Brakes make a squealingnoise.
- Bike takes longer to stop.
- Pads look smoothand shiny.
| Feature | Old Pads | New Pads |
|---|---|---|
| Thickness | Thin | Thick |
| Surface | Shiny | Textured |
| Color | Faded | Bright |

Credit: www.youtube.com
Removing Old Brake Pads
Start by loosening the screws holding the brake pads. Carefully slide them out, ensuring not to damage the brake system.
Unfastening The Retaining Bolt
Find the retaining bolton the brake pad. Use a wrench to turn the bolt. Turn it counterclockwise to loosen it. Make sure the bolt is completely loose. Be careful not to lose it. Keep the bolt in a safe place. This will help in fixing later.
Sliding Out The Old Pads
Gently pull the old brake padsout. Use your fingers to grip the pads. Slide them away from the bike. Ensure no parts are stuck. Check the pads for wear. If worn, discard them safely. This step clears the way for new pads. Ensure the area is clean before continuing.
Installing New Brake Pads
Aligning the Pads Correctlyis very important. Make sure the pads touch the rim. They should not touch the tire. This keeps the bike safe. Check both sides. They must be even. If one side is closer, fix it. Use the brake lever to test. Make sure it stops the wheel.
Securing the Retaining Boltkeeps the pads firm. Tighten the bolt carefully. Use the right tool. Check if the pads move. They should stay in place. A loose bolt can be dangerous. Double-check the tightness. Make sure everything is secure. This ensures a safe ride.

Credit: www.tiktok.com
Reattaching The Wheel
Reattach the wheel securely after replacing road bike brake pads. Ensure the axle is properly aligned and tightened. Double-check wheel spins freely without rubbing on the frame or brakes.
Positioning The Wheel
Align the wheel with the bike frame. Ensure the axle sits in the dropouts. Check if the tire is centered. Adjust if it touches the brake pads. Spin the wheel to make sure it moves freely. Look for any wobbling or rubbing.
Securing The Quick Release
Close the quick release lever. Make sure it’s tight but not too hard. The lever should face up or back. This helps avoid accidental openings. Test the wheel by giving it a spin. It should stay in place and not wobble. Check the brakes. Ensure they engage and release properly. Adjust if needed.
Testing Brake Functionality
Check if the brake pads touch the rim evenly. Uneven contact can cause poor braking. Spin the wheel and watch the brake pads. Ensure they don’t touch the tire. Adjust the pad if necessary. Use an Allen key for adjustments. This tool helps fix alignment issues. Proper alignment ensures safe rides.
Ensure the brake pads have a firm grip. Squeeze the brake lever gently. The pads should grip the rim tightly. Loose grip means the pads need adjustment. Check the pad wear regularly. Worn pads reduce braking power. Replace them if they are thin. Good grip ensures quick stopping. This keeps you safe on the road.
Maintenance Tips
Replacing road bike brake pads is essential for safe riding. First, remove the wheel and locate the pad holders. Slide out the old pads and insert new ones, ensuring proper alignment.
Regular Inspections
Inspect brake pads regularly for wear. Check if they look thin or uneven. Make sure they are not too smooth or have cracks. Replace them if needed. Listen for squeaky sounds while braking. It might mean pads need checking. Look for dirt or debris stuck in pads.
Cleaning Brake Pads
Cleaning brake pads is simple. Use a clean cloth to wipe them. Remove dirt and dust gently. Avoid using water as it might harm the pads. If pads are sticky, clean them with alcohol. Alcohol helps remove stubborn grime. Keep pads dry for best performance.
Frequently Asked Questions
Can I Replace Bike Brake Pads Myself?
Yes, you can replace bike brake pads yourself. Ensure you have the correct tools and follow the manufacturer’s instructions. It’s a straightforward process that enhances bike performance and safety. Regular checks and maintenance are crucial for optimal braking efficiency.
How Often Should I Change The Brake Pads On My Road Bike?
Change brake pads every 1,000 to 1,500 miles or when worn down. Check for wear regularly. Riding conditions and frequency affect lifespan. Listen for squeaking noises or decreased braking performance. Proper maintenance ensures safety and efficiency.
Can You Replace Bike Brake Pads Without Removing The Wheel?
Yes, you can replace bike brake pads without removing the wheel. Simply loosen the pad’s retaining bolt, slide the old pad out, and insert the new one. Ensure proper alignment before tightening. Regular maintenance ensures optimal performance. Follow the manufacturer’s instructions for best results.
Always check compatibility with your bike’s braking system.
What Is The Rule Of Thumb When Replacing Brake Pads?
Replace brake pads every 20,000 to 70,000 miles, depending on driving habits and vehicle type. Regularly inspect for wear or noise. Always check the manufacturer’s recommendations for specific guidelines. Use quality parts for better performance and safety. Proper installation ensures optimal braking efficiency.
Conclusion
Replacing road bike brake pads is a simple task. It ensures safety and efficiency on the road. Gather the right tools first. Follow each step carefully. Check your brakes regularly for wear. This prevents unexpected issues while riding. Practice makes the process quicker.
Soon, you’ll handle it with ease. Remember to test brakes after replacing pads. Safety first, always. Regular maintenance extends bike life. Enjoy smooth and safe rides. Your bike will thank you. Share these tips with fellow cyclists. Happy and safe biking to all!


