
Your mountain bike is your ticket to adventure and freedom, taking you through rugged trails and breathtaking landscapes. But what happens when your brakes don’t work as they should?
Your thrilling rides can quickly turn into a safety hazard. Adjusting mountain bike brakes might sound intimidating, but it’s simpler than you think and absolutely vital for your safety. Imagine the confidence you’ll feel knowing your bike is in top condition, ready to tackle any terrain.
In this guide, you’ll discover the easy steps to ensure your brakes are responsive and reliable. Keep reading, because mastering this skill will not only enhance your riding experience but also give you peace of mind on every trip.

Credit: www.bikeradar.com
Tools Needed
- Allen wrench: Essential for adjusting brake components.
- Phillips screwdriver: Useful for fine-tuning brake settings.
- Cable cutters: Required for trimming brake cables.
- Lubricant: Keeps brake components moving smoothly.
- Rag or cloth: Helps clean brake parts and remove dirt.
Every tool has a purpose. Allen wrench is for bolts. Phillips screwdriver adjusts tension. Cable cutters trim excess cable. Lubricant ensures smooth movement. Use a rag to clean everything. These tools make brake adjustment easy.

Credit: www.youtube.com
Types Of Mountain Bike Brakes
Adjusting mountain bike brakes involves understanding different types like disc brakes and rim brakes. Each type requires specific adjustments for optimal performance. Proper alignment and tension ensure smooth and safe rides on various terrains.
Disc Brakes
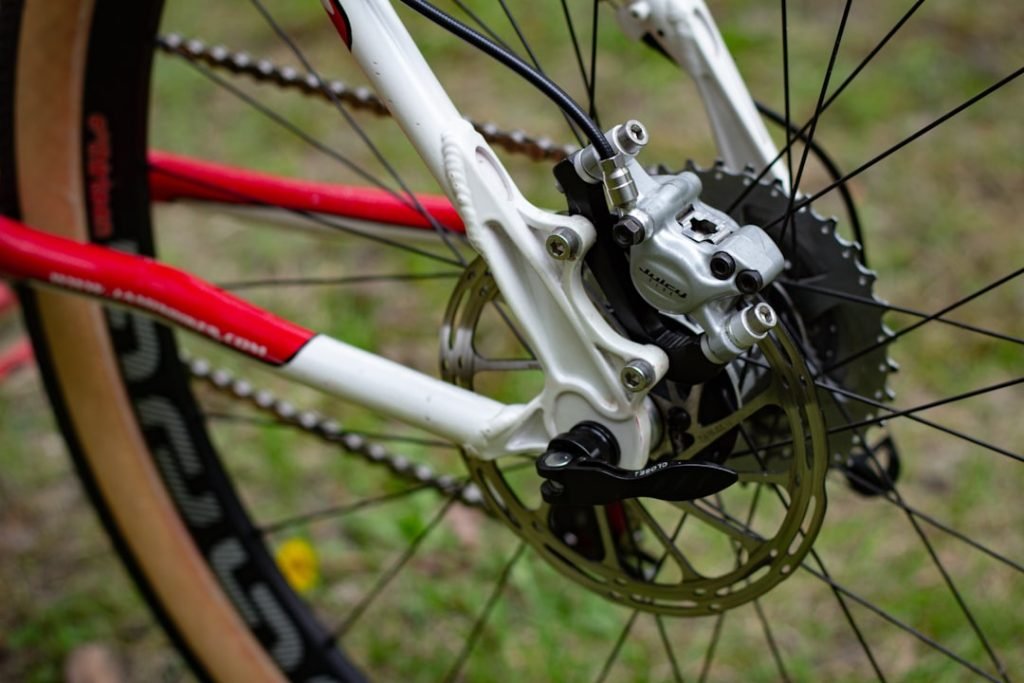
Disc brakesare strong and work well in all weather. They have a round metal disc. This disc is near the wheel hub. A clamp called a caliper squeezes the disc to stop the bike. Disc brakes can be hydraulicor mechanical. Hydraulic ones use fluid to move the caliper. Mechanical ones use a cable.
V-brakes
V-brakesare also called linear-pull brakes. They are easy to adjust and maintain. V-brakes have two arms. These arms hold the brake pads. When you pull the lever, the arms move inward. This action squeezes the rim to stop the bike. V-brakes are light and cost-effective.
Cantilever Brakes
Cantilever brakeshave two arms too. They are popular on older bikes. The arms are pulled by a single cable. This cable runs over a small bridge. Cantilever brakes are good for muddy conditions. They offer good tire clearance. But, they might need more frequent adjustments.
Identifying Brake Issues
Squeaking brakes can be annoying. They often mean dirt on the pads. Clean the brake pads with a soft cloth. Sometimes, the pads are worn out. If so, replace them with new ones. Check if the brake cables are too loose. Tighten them for better performance. A squeak might also mean wet brakes. Dry them with a towel or let them air dry.
Uneven braking can be dangerous. It can make you lose control. Check if the brake pads touch the rim evenly. If not, adjust the brake arms. Make sure the wheel is straight. A bent wheel can cause uneven braking. Tighten any loose bolts or screws. This helps in keeping the brakes steady.
Brake fade happens after long rides. Brakes feel weak and slow. First, check the brake pads for wear. Worn pads need replacing. Inspect the brake fluid if your bike has hydraulic brakes. Low fluid can cause fade. Adjust the brake lever for better grip. Always ensure brakes cool down after long rides.
Adjusting Disc Brakes
First, check if the caliper is centered over the rotor. Loosen the caliper mounting bolts slightly. Spin the wheel and gently squeeze the brake lever. This centers the caliper. Tighten the bolts while holding the lever. Ensure the rotor doesn’t rub.
Inspect the brake pads for even wear. If one pad is closer, adjust it. Turn the pad adjustment dial on the caliper. This moves the pad closer or further from the rotor. Ensure both pads have equal spacing from the rotor. This helps in smooth braking.
Check the brake lever position. It should be easy to reach. Adjust the lever reach screw. This moves the lever closer or further from the handlebar. Test the lever pull. It should feel firm but not too tight. A comfortable lever ensures safe braking.
Adjusting V-brakes
First, loosen the cable anchor bolt. Pull the cable tighter. Tighten the bolt. Check the brake lever. The lever should move halfway. Adjust the cable if needed. This makes the brakes responsive.
Check the brake pads. They should touch the rim evenly. Loosen the pad bolt. Move the pad to the right spot. Tighten the bolt again. Pads must not touch the tire. This ensures safe braking.
Adjust the spring tensionusing the screws. Find the screws on the side of the brake arms. Turn the screws to balance the brakes. If one side moves too much, tighten the screw. If a side does not move, loosen the screw. Both sides should move equally.

Credit: www.bikeradar.com
Adjusting Cantilever Brakes
The straddle cable must be the right length. Too long or too short can cause problems. Adjust it to make a neat triangle shape. This helps the brakes work best. Make sure the cable is not loose. A firm cable gives better control.
The brake pads should touch the wheel rim evenly. Check if the pads are flat against the rim. Adjust them if needed. Pads must not touch the tire. This can damage them. Make sure the pads are clean. Dirt can make them less effective.
Check the brake lever pull. It should be smooth and easy. Too tight can make it hard to brake. Too loose means brakes won’t work well. Adjust the cable at the lever end. This will help control the bike better. Always test brakes after adjusting.
Maintenance Tips
Adjusting mountain bike brakes ensures safe rides. Begin by checking brake pads for wear and alignment. Then, fine-tune the brake cable tension for smooth operation.
Regular Inspection
Check your bike brakes often. Look for wear and tearon the brake pads. Ensure cables are not loose or frayed. Tighten any loose bolts. This keeps your bike safe and ready to ride.
Cleaning And Lubrication
Keep brakes clean from dirt and dust. Use a soft cloth to wipe them. Apply lubricantto moving parts. Avoid getting oil on brake pads. This helps brakes work smoothly and last longer.
Replacing Brake Pads
Brake pads wear out over time. Replace them when they are thin. Remove the old pads carefully. Place new pads in the same spot. Make sure they fit snugly. This keeps your bike stopping safely.
Safety Precautions
Testing brakesis very important. Make sure brakes work properly before riding. Check the brake pads. They should not be worn out. Look at the brake cables. They must be tight, not loose. Press the brake lever. It should feel firm, not soft. Ensure brakes stop the bike quickly. Try them on different surfaces.
Wearing safety gearkeeps you safe. Always wear a helmet. Protect your head from falls. Use knee and elbow pads. They guard against scratches and bumps. Wear gloves to grip handles better. Shoes should have good grip. Avoid loose clothing. It can catch in the bike chain.
Professional assistancecan be helpful. If unsure, ask a bike expert. They can adjust brakes correctly. They have tools and skills. Visit a bike shop for help. Professionals can spot hidden problems. Keep your bike in top shape.
Frequently Asked Questions
How Do I Adjust My Brakes On My Mountain Bike?
First, locate the brake caliper and loosen the bolts. Align the brake pads with the rim. Tighten the bolts, ensuring even pad contact. Adjust the brake cable tension using the barrel adjuster. Spin the wheel to check for rubbing. Test the brakes for responsiveness and make final tweaks if necessary.
How To Adjust Bike Brakes To Stop Rubbing?
Loosen the brake caliper bolts slightly. Align the caliper with the rotor or rim. Tighten the bolts. Adjust the brake pads by turning the barrel adjuster to increase or decrease tension. Spin the wheel to check for rubbing. Make final adjustments if needed.
How To Adjust V Brakes On A Mountain Bike?
First, loosen the brake cable bolt. Align brake pads with the rim, then tighten the bolt. Spin the wheel to check alignment. Adjust the barrel adjuster for fine-tuning. Ensure even pad contact and test brakes for effectiveness.
How To Adjust Bike Brakes To Stop Squeaking?
Clean the brake pads and rims to remove dirt. Adjust the brake pads to align correctly with the rim. Tighten loose components and ensure proper tension in the brake cables. Test the brakes and make final adjustments if necessary. Regular maintenance can prevent squeaking and improve braking efficiency.
Conclusion
Mountain biking offers fun and excitement. Adjusting your bike brakes is crucial. Properly tuned brakes ensure safety and enhance your ride. Start with simple steps. Check the brake pads often. Align them correctly. Tighten the cables as needed. Test the brakes after adjustments.
Practice these skills regularly. They become easier with time. A well-maintained bike boosts confidence on trails. Enjoy every ride with secure brakes. Take the time to keep them in top shape. Your biking experience will be better. Happy biking and stay safe!



