
Have you ever wondered if you can build your own velomobile? Imagine creating a sleek, pedal-powered vehicle that turns heads and gets you where you want to go efficiently.
It might sound complicated, but with the right guidance, you could bring this exciting project to life. You’ll discover what it takes to build a velomobile yourself, the challenges you might face, and the rewards waiting on the other side.
Keep reading—your dream ride could be closer than you think.

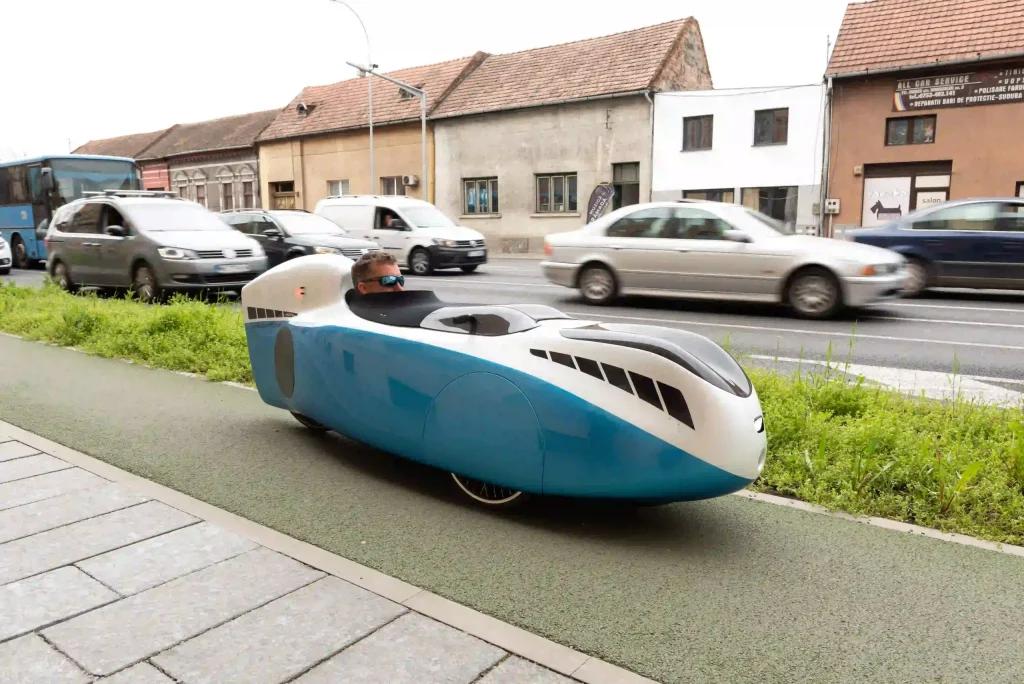
Credit: newatlas.com
Choosing The Right Design
Building your own velomobile starts with picking the right design. The design affects how your velomobile looks and rides.
Good design matches your needs, skills, and budget. Think about what you want before you start building.
Types Of Velomobiles
Velomobiles come in many shapes and styles. Each type has its own benefits and uses.
- Streamlined recumbent trikes for speed and low wind resistance
- Enclosed bikes with full fairings for weather protection
- Lightweight models for easy handling and climbing
- Two or three-wheeled designs for stability and balance
Choose a type that fits your riding style and where you will ride.
Factors To Consider
Think about size, weight, and materials before you pick a design. These affect building and riding.
- Space for riding comfort and storage
- Weight for easier pedaling and transport
- Material strength and cost
- Ease of building with your skills and tools
- Aerodynamics for faster rides
Also consider safety features and how easy it is to repair your velomobile.
Finding Plans And Blueprints
Good plans help you build the velomobile correctly. Look for clear blueprints and instructions.
- Online forums and builder communities
- Open-source designs with free plans
- Books and magazines on velomobile building
- Paid detailed blueprints for advanced designs
Choose plans that match your skills and tools. Read reviews and ask others who have built velomobiles.
Essential Materials And Tools
Building your own velomobile is a rewarding project. You need the right materials and tools to start.
This guide covers the main frame materials, body materials, and the tools required for the job.
Frame Materials
The frame is the skeleton of your velomobile. It must be strong and light to support the weight.
- Steel tubing: strong, easy to weld, and affordable.
- Aluminum: lightweight and corrosion-resistant but harder to weld.
- Carbon fiber: very light and strong but expensive and complex to work with.
- Titanium: strong and light but costly and needs special tools.
Body Materials
The body protects the rider and improves aerodynamics. Choose materials that balance weight and durability.
| Material | Advantages | Disadvantages |
| Fiberglass | Lightweight, easy to mold | Can crack under stress |
| Carbon fiber | Very strong and light | Expensive, needs skill to work |
| Plastic sheets | Cheap and easy to cut | Less durable, can dent |
| Aluminum panels | Strong and weather-resistant | Heavier, harder to shape |
Tools You’ll Need
Having the right tools makes building easier and safer. Some tools are essential for working on frames and bodies.
- Welding machine for joining metal frame parts.
- Angle grinder for cutting and smoothing metal and plastic.
- Drill with various bits for holes and attachments.
- Measuring tape and square for precise measurements.
- Clamps to hold parts while working.
- Safety gear like gloves, goggles, and masks.
Building The Frame
Building the frame is a key part of making your own velomobile. The frame holds all parts together and supports your weight. It needs to be strong and light at the same time.
Choosing the right method to build the frame can affect how safe and durable your velomobile will be. Let’s look at some important points about frame construction.
Frame Construction Techniques
There are many ways to build a velomobile frame. You can use metal tubes, wood, or even carbon fiber. Metal tubes are popular because they are strong and easy to shape.
- Steel tubing is strong and affordable.
- Aluminum tubing is light but less strong than steel.
- Wood can be shaped easily but needs good protection from weather.
- Carbon fiber is very light and strong but expensive.
Welding Vs. Bolting
Two main ways to join frame parts are welding and bolting. Welding melts metal pieces together to form one solid piece. Bolting uses screws or bolts to connect parts.
| Method | Pros | Cons |
| Welding | Strong, smooth joints, no extra weight from bolts | Needs skill and special tools, hard to modify later |
| Bolting | Easy to assemble and repair, parts can be changed | Bolts can loosen, adds some weight |
Ensuring Structural Integrity
Your frame must handle stress and weight without bending or breaking. Check all joints and parts carefully for weak spots. Use strong materials and good design for safety.
- Use triangulation to make parts support each other.
- Inspect welds or bolts regularly for cracks or loosening.
- Add reinforcements at high-stress points.
- Test the frame by applying pressure before riding.

Credit: www.reddit.com
Crafting The Body
Building your own velomobile means shaping its body carefully. The body protects you and helps the vehicle move smoothly.
This part needs attention to details in molding, attaching, and finishing. Each step ensures the velomobile looks good and works well.
Molding And Shaping
Start by choosing the right materials for the body. Common choices include fiberglass, carbon fiber, or plastic sheets.
Use molds to get the body’s shape. You can build molds from wood or foam, then lay the material over them. Sand and cut the edges to fit your design.
- Prepare a smooth mold surface
- Apply resin or plastic layers carefully
- Let each layer dry fully before adding the next
- Trim rough edges after curing
Attaching The Body To Frame
Secure the shaped body to the velomobile’s frame. This step keeps the body stable and safe during rides.
Use bolts, screws, or strong adhesives to connect the body to the frame. Make sure the attachment points line up well to avoid stress.
- Check frame and body fit before fixing
- Drill holes carefully for bolts or screws
- Use weather-resistant fasteners
- Tighten all connections firmly but avoid cracking the body
Painting And Finishing
Painting the body protects it from weather and gives the velomobile a nice look. Use paint made for plastics or fiberglass.
Start with a primer to help paint stick better. After painting, add a clear coat to protect the surface and add shine.
- Sand the body lightly before priming
- Apply multiple thin paint layers
- Let each layer dry completely
- Finish with a clear protective coat
Installing The Drivetrain
Installing the drivetrain is a key part of building your own velomobile. This process includes choosing the right gears and chains, mounting pedals and crankset, and adjusting all parts for smooth movement.
Each step requires care to ensure your velomobile runs efficiently and lasts long. Let’s explore these steps in detail.
Selecting Gears And Chains
Selecting the right gears and chains affects how well your velomobile performs. Choose gears that match your riding style and terrain.
- Pick a gear range that covers flat and hilly routes.
- Use a chain that fits your gear teeth size.
- Consider durability and weight for better speed and control.
- Check compatibility between the chain and gears.
Mounting The Pedals And Crankset
Mounting pedals and crankset correctly ensures power transfers well from your legs to the drivetrain. Follow proper tightening and alignment steps.
| Component | Action | Tip |
| Crankset | Attach to bottom bracket | Use correct torque |
| Pedals | Screw into crank arms | Right pedal right side, left pedal left side |
| Bolts | Tighten securely | Apply grease to prevent rust |
Adjusting For Smooth Operation
Adjust the drivetrain parts so they work smoothly and quietly. Proper adjustment prevents wear and keeps riding easy.
- Check chain tension; it should not be too tight or loose.
- Align the derailleur to guide the chain correctly on gears.
- Lubricate the chain and moving parts regularly.
- Test the pedals and crankset for smooth rotation without noise.
Adding Wheels And Steering
Building your own velomobile needs careful choice of wheels and steering parts. These parts affect how the vehicle moves and handles.
Good wheels and steering make riding safer and more fun. Learn about wheel sizes, steering types, and alignment.
Choosing Wheel Size And Type
Pick wheels based on speed, stability, and road type. Bigger wheels roll easier on rough roads. Smaller wheels help with tight turns.
- Large wheels: better for speed and rough surfaces
- Medium wheels: balance of speed and handling
- Small wheels: easier to steer and maneuver
- Types include spoked, solid, and carbon fiber wheels
Steering Mechanism Options
Choose a steering system that fits your build and comfort. Common types include direct, linkage, and rack-and-pinion steering.
| Steering Type | Pros | Cons |
| Direct Steering | Simple and light | Less precise at high speed |
| Linkage Steering | Good control and feedback | More parts to maintain |
| Rack-and-Pinion | Very precise | Complex and heavier |
Aligning Wheels And Steering
Proper alignment stops uneven tire wear and improves safety. Check toe, camber, and caster angles carefully.
Basic wheel alignment steps:
- Set wheels straight ahead.
- Adjust toe-in or toe-out to manufacturer specs.
- Ensure camber angle is correct for tire contact.
- Check caster for steering stability.
- Tighten all bolts securely.
Safety And Comfort Features
Building your own velomobile lets you choose safety and comfort features. These features help you ride safely and feel good on long trips.
Good design focuses on visibility, secure seating, and weather protection. These parts keep you safe and comfortable while riding.
Lighting And Reflectors
Proper lighting makes you visible to other road users. Use bright front and rear lights for day and night riding.
Reflectors add extra safety by reflecting car lights. Place them on the sides and back of your velomobile.
- Use LED front lights with high brightness
- Install red rear lights with steady and blinking modes
- Add side reflectors on wheels and frame
- Consider reflective tape for extra visibility
Seat And Harness Options
A good seat supports your back and reduces fatigue. Choose a seat that fits your body shape well.
Harnesses keep you safe in case of sudden stops. Select adjustable harnesses for a secure fit.
- Use padded seats for comfort on long rides
- Pick breathable materials to stay cool
- Choose a five-point harness for extra safety
- Adjust harness straps to fit snugly
Weather Protection
Weather protection keeps you dry and warm. A good canopy or fairing blocks wind and rain effectively.
Use materials that resist water and allow air flow. This helps prevent fogging inside the velomobile.
- Install a removable canopy for sunny or rainy days
- Use waterproof fabric for rain protection
- Add ventilation openings to reduce fog
- Consider insulated panels for cold weather
Testing And Troubleshooting
Building your own velomobile is exciting, but testing and troubleshooting are key. You need to check every part carefully. This ensures your velomobile is safe and works well.
Testing helps find problems early. Fixing issues quickly keeps your rides smooth and fun. Below are steps to guide you through testing and troubleshooting your velomobile.
Initial Test Rides
Start with short rides in a safe area. Check how the velomobile handles turns and brakes. Listen for strange sounds during rides. Watch for loose parts or odd vibrations.
- Test brakes on gentle slopes
- Check steering response at slow speeds
- Look for frame flex or cracks
- Note any unusual noises or rattles
- Ensure lights and signals work if installed
Common Issues And Fixes
Some common problems may appear during your test rides. Fixing these quickly helps avoid bigger troubles later. Use this table to identify issues and possible fixes.
| Issue | Cause | Fix |
| Brake squeaking | Dirty pads or misalignment | Clean pads and adjust brakes |
| Steering pull | Uneven tire pressure | Inflate tires evenly |
| Loose frame parts | Vibration or poor assembly | Tighten bolts and joints |
| Chain slipping | Worn gears or poor tension | Replace gears or adjust chain |
| Unusual noises | Loose components or debris | Inspect and secure parts |
Maintenance Tips
Regular maintenance keeps your velomobile in top shape. Follow these easy tips to avoid common problems and extend the life of your build.
- Check tire pressure before every ride
- Lubricate chain and moving parts weekly
- Inspect brakes and adjust as needed
- Clean the frame and components regularly
- Tighten bolts and screws monthly
- Store in a dry place to avoid rust
Cost And Time Estimates
Building your own velomobile can be a fun and rewarding project. It takes careful planning to understand the costs and time involved.
Knowing what to expect helps you finish the project without surprises. This guide covers budgeting, time, and ways to save money.
Budgeting Your Project
Start by listing all parts and materials you need. This includes the frame, wheels, body panels, and tools.
Costs vary depending on materials and where you buy them. Expect to spend between $2,000 and $5,000 for a full build.
- Frame materials: $500 – $1,500
- Body panels: $400 – $1,200
- Wheels and tires: $300 – $700
- Drive system parts: $400 – $800
- Tools and supplies: $200 – $500
Expected Build Time
Building a velomobile takes time, especially if you work alone. Most hobbyists spend 300 to 600 hours on their project.
The time depends on your skill level and how complex the design is. Simple designs take less time than custom shapes.
- Planning and design: 40 – 80 hours
- Frame construction: 80 – 150 hours
- Body panel shaping: 100 – 200 hours
- Assembly and finishing: 80 – 170 hours
Saving Money Without Sacrificing Quality
You can cut costs by using recycled or secondhand parts. Search for quality used wheels or tools online or at local shops.
Buy materials in bulk or from wholesalers. This often lowers the price per item without lowering quality.
- Use scrap metal or wood for the frame if possible
- Choose standard parts instead of custom ones
- Borrow or rent expensive tools
- Learn skills like fiberglass work to do it yourself
- Join velomobile forums for tips and parts swaps
Community And Resources
Building your own velomobile can be a fun and rewarding project. Many people share their experiences and tips online and offline. Being part of a community helps you learn faster and avoid mistakes.
You will find many resources that guide you through the process. These include forums, workshops, and books or videos made by experienced builders.
Online Forums And Groups
Online forums and groups are great places to ask questions and share ideas. Many velomobile builders join these spaces to help each other. You can find advice on tools, designs, and materials.
These communities often have experienced members who offer support. They can guide you through problems and suggest improvements. You can also share your progress and get feedback.
- Discuss design options and building tips
- Share photos and videos of your project
- Find parts and tools from other members
- Join local or international groups for support
Workshops And Classes
Workshops and classes offer hands-on experience. They teach you how to use tools and work with materials. You learn from instructors who have built velomobiles before.
These events also let you meet other builders in person. You can ask questions and see real examples. Some workshops last a few days and cover all building steps.
- Learn basic and advanced building skills
- Practice using tools safely
- Work on group projects for experience
- Get guidance from skilled instructors
Recommended Reading And Videos
Books and videos help you understand the building process. They explain technical details in simple ways. Watching videos can show you step-by-step how to build parts.
Reading materials often cover design ideas and safety tips. They help you plan your project better. You can find many free and paid resources online or in libraries.
- Books on velomobile design and construction
- Video tutorials on tool use and assembly
- Instruction manuals from velomobile builders
- Documentaries about velomobile projects
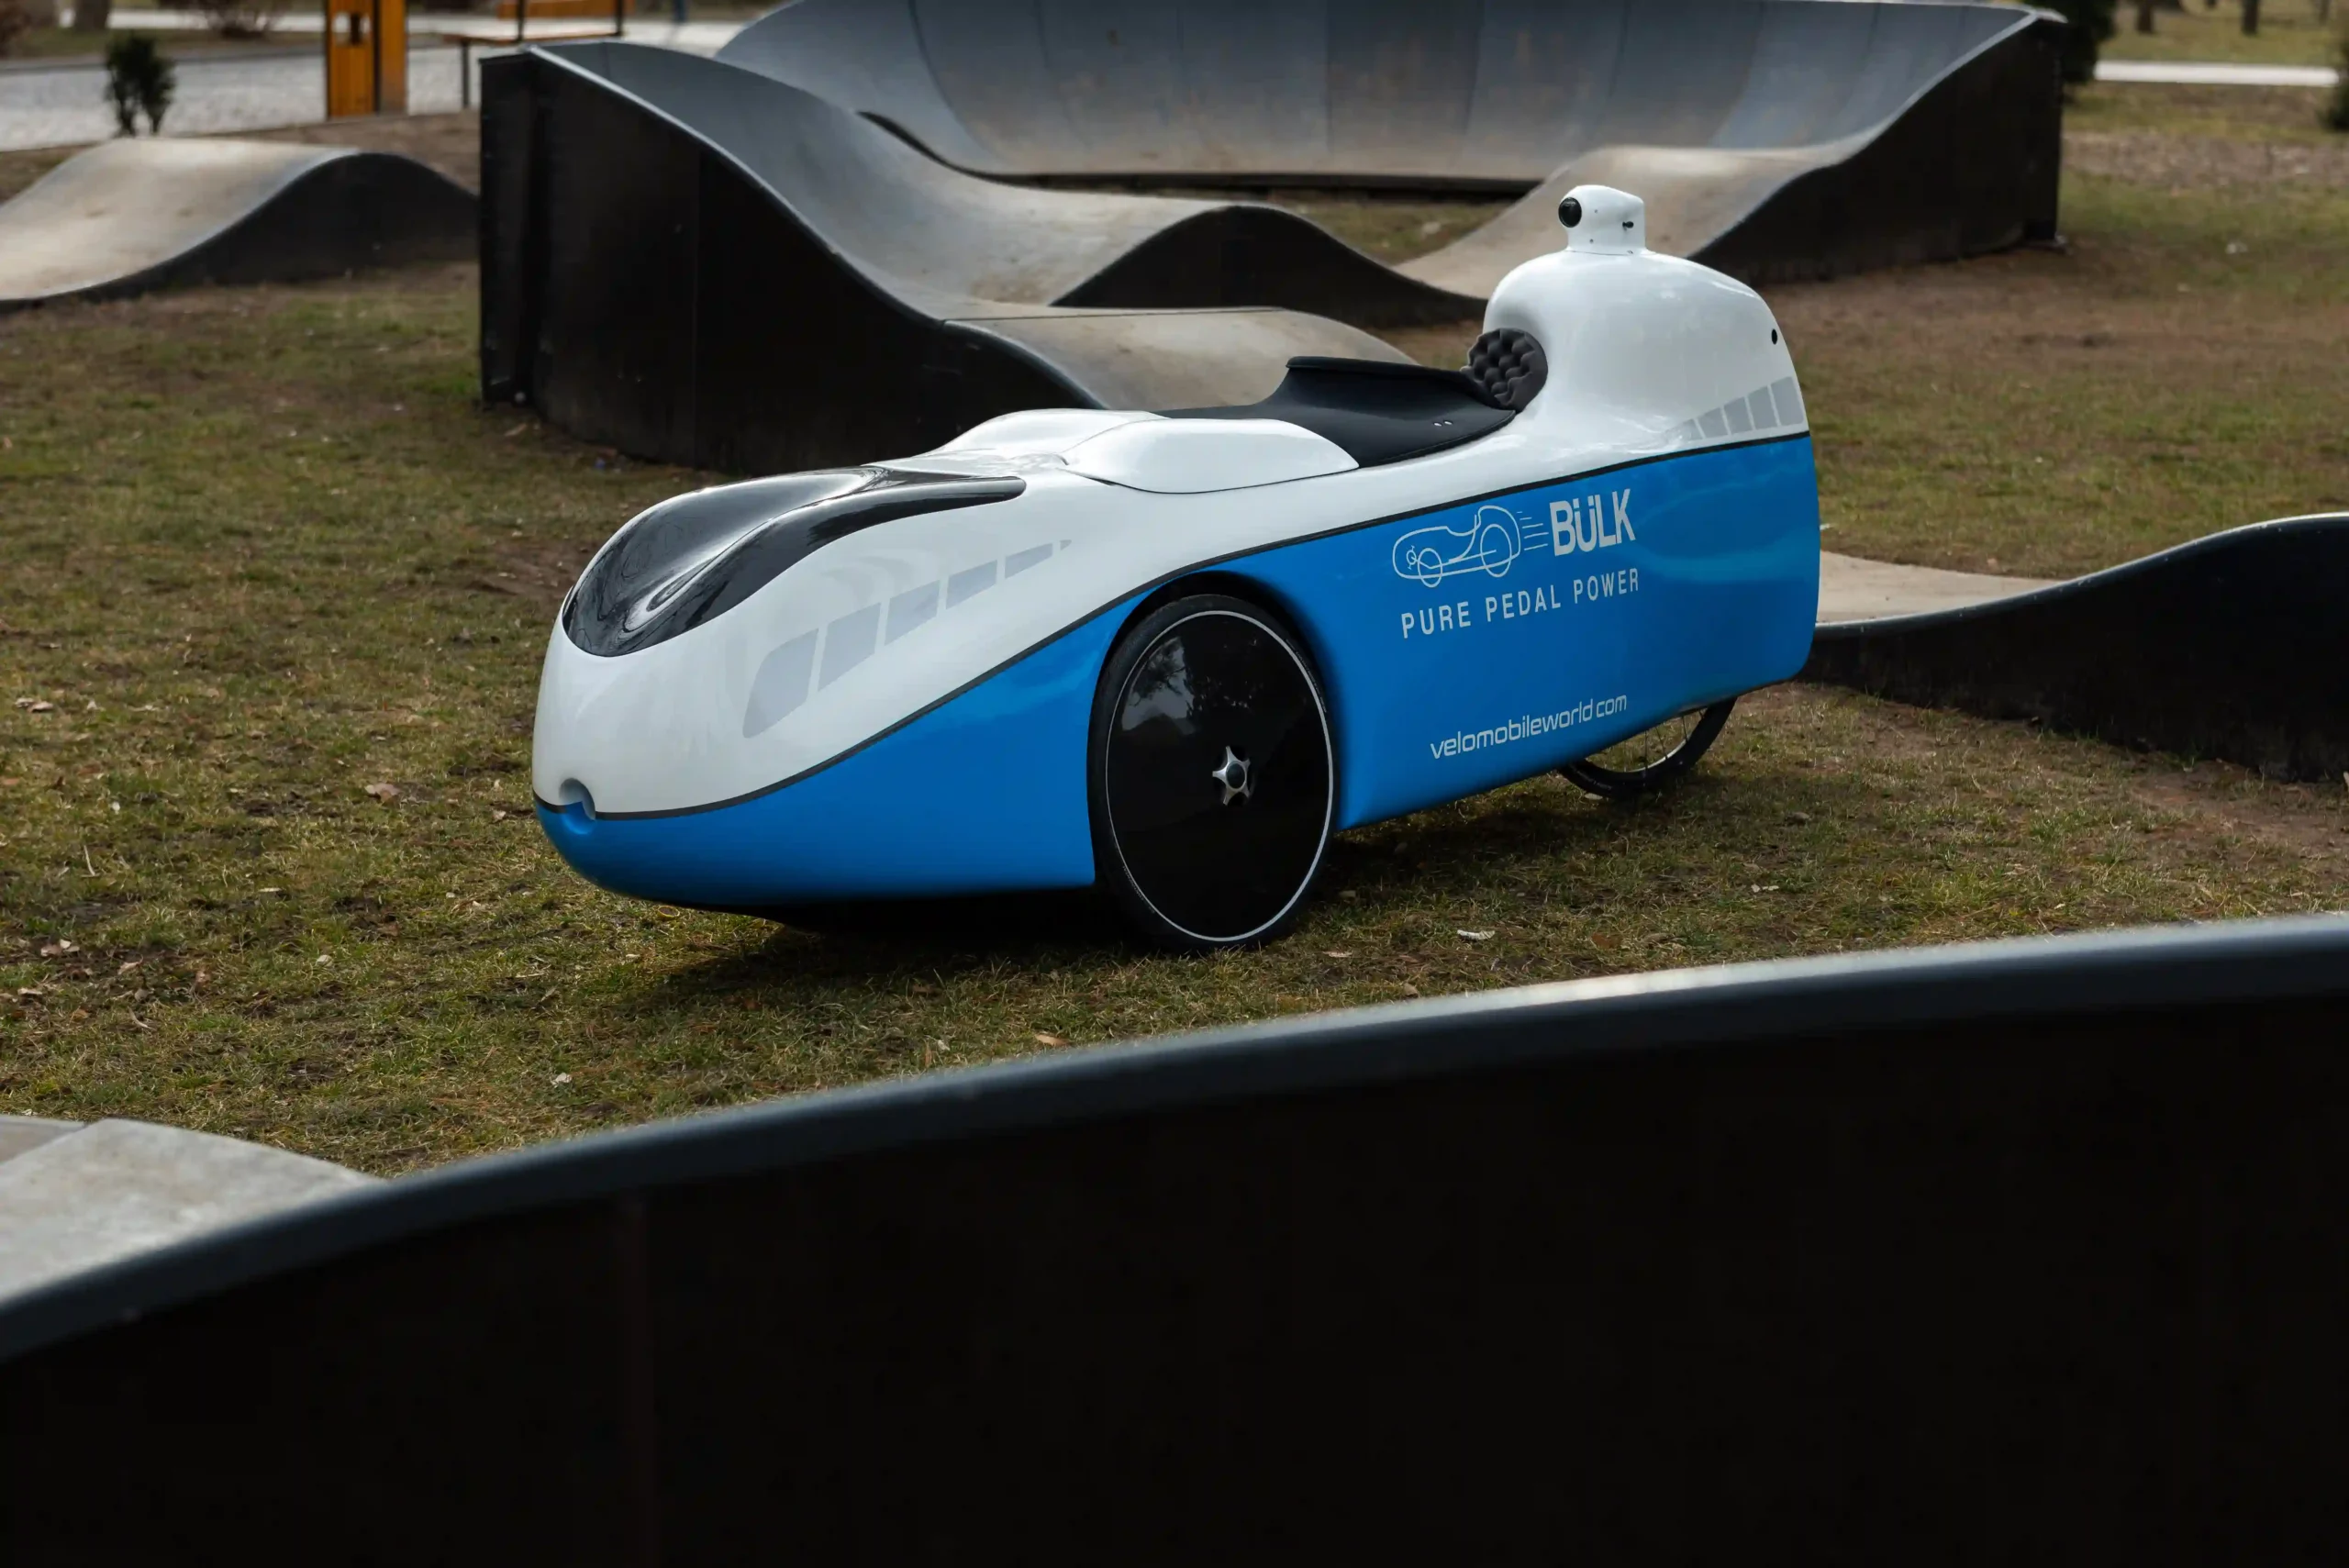
Credit: www.velomobileworld.com
Frequently Asked Questions
What Materials Are Best For Building A Velomobile?
Lightweight materials like fiberglass, carbon fiber, and aluminum are best. They ensure strength, durability, and aerodynamic efficiency. Using these materials makes the velomobile easier to pedal and maneuver.
How Much Does It Cost To Build A Velomobile?
Building a velomobile can cost between $1,000 to $5,000. Costs vary depending on materials, components, and tools. DIY kits may reduce expenses but require time and skills.
How Long Does It Take To Build A Velomobile?
Building a velomobile typically takes several weeks to months. Time depends on experience, design complexity, and available tools. Patience and careful planning improve the final result.
Do I Need Special Skills To Build A Velomobile?
Basic skills in mechanics, welding, and crafting are helpful. Learning from tutorials and community support can guide beginners. No advanced skills are mandatory but improve quality and safety.
Conclusion
Building your own velomobile takes time, patience, and some skill. It can save money and give you a unique ride. You learn a lot about how things work. Challenges will come, but solving them feels great. Start small, plan well, and enjoy the process.
Your velomobile can be a fun project and a useful vehicle. Give it a try, and see what you can create.


