
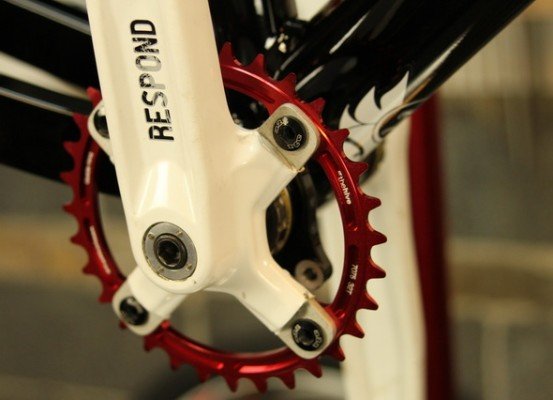
Ready to take your dirt jumping skills to the next level? It all starts with having the right setup—especially your bike crank.
Installing a dirt jump bike crank might seem tricky, but with the right steps, you can do it yourself and get back to the trails faster. In this guide, you’ll discover simple, clear instructions that make the process easy, even if you’re new to bike maintenance.
Stick with me, and by the end, you’ll have the confidence to install your crank like a pro. Let’s get your bike ready to fly!
Choosing The Right Crankset
Installing the right crankset on your dirt jump bike is important. It affects your bike’s performance and durability. Picking the correct crankset helps you ride better and avoid damage.
This guide explains how to choose the best crankset for dirt jumping. We look at different types, materials, and bike compatibility.
Types Of Cranks For Dirt Jumping
There are several crank types used in dirt jumping. Each type has its own strengths and weaknesses. Knowing these helps you pick the right one for your style.
- Two-piece cranks:These have separate arms and spindle. They are strong and easy to replace.
- Three-piece cranks:These include two arms and a spindle with a separate bottom bracket. They are common and affordable.
- One-piece cranks:The arms and spindle are one solid piece. They are very strong but heavier.
Material Considerations
Material affects crank weight, strength, and price. Choose material based on your riding needs and budget.
| Material | Weight | Strength | Cost |
| Aluminum | Light | Strong | Moderate |
| Steel | Heavy | Very strong | Low |
| Carbon fiber | Very light | Strong but can crack | High |
Compatibility With Your Bike
Not all cranksets fit every bike. Check your bike’s bottom bracket type and spindle length before buying a crankset.
- Identify your bottom bracket standard (e.g., BSA, Press Fit).
- Match spindle length to your bike frame and pedal clearance.
- Confirm crank arm length fits your riding style (usually 165-175 mm).
- Ensure chainring size suits dirt jumping needs (smaller chainrings help control).
Tools Needed For Installation
Installing a dirt jump bike crank needs the right tools. Using proper tools makes the job easier and safer.
This guide shows essential tools, optional tools for ease, and safety gear recommendations for crank installation.
Essential Tools List
These tools are necessary to install your dirt jump bike crank correctly. Without them, the installation may fail or damage parts.
- Crank puller tool – to remove old crank arms
- Bottom bracket tool – to install or remove bottom bracket
- Allen wrenches (usually 5mm and 8mm) – for bolts on crank and pedals
- Torque wrench – to tighten bolts to correct torque
- Grease – to lubricate threads and prevent seizing
- Rubber mallet – to gently tap crank arms if needed
Optional Tools For Ease
These tools are not required but can make the installation faster or simpler. They help avoid extra effort.
- Pedal wrench – designed to fit pedal flats for easier pedal installation
- Chain whip – helps hold cassette if you remove the bottom bracket
- Rag or paper towels – to clean parts before assembly
- Rubber gloves – to keep hands clean and improve grip
- Adjustable wrench – for bolts that may not fit standard sizes
Safety Gear Recommendations
Wear safety gear to protect yourself while working on your bike. This lowers injury risk and keeps you safe.
- Protective gloves – to avoid cuts and grease on hands
- Safety glasses – to protect eyes from flying debris or grease
- Closed-toe shoes – to protect feet from dropped tools or parts
- Work apron or old clothes – to keep your clothes clean
Preparing The Bike
Installing a dirt jump bike crank starts with good preparation. Taking time now avoids problems later. You want the bike ready for the new crankset.
This guide covers removing the old crank, cleaning the bottom bracket, and checking parts for wear. Each step helps your bike work better.
Removing The Old Crankset
Remove the crankset carefully to avoid damage. Use the right tools like a crank puller and wrench. Loosen bolts on both sides before pulling out the crank arms.
- Shift the chain to the smallest chainring to reduce tension.
- Use an Allen wrench to loosen the crank bolts.
- Attach a crank puller tool to the crank arm.
- Turn the tool to pull the crank off the spindle.
- Remove both crank arms and the chainring if needed.
Cleaning The Bottom Bracket Area
Cleaning the bottom bracket area removes dirt and grease. This keeps bearings running smooth and extends part life. Use a cloth and degreaser to clean all surfaces.
| Tool | Purpose |
|---|---|
| Cloth | Wipe dirt and grime |
| Degreaser | Remove old grease |
| Brush | Clean hard-to-reach spots |
Inspecting Components For Wear
Check parts for damage before installing new crank arms. Look for cracks, rust, or worn teeth on the chainring. Spin the bottom bracket to feel for roughness or play.
- Examine crank arms for cracks or dents.
- Check chainring teeth for wear or bending.
- Spin bottom bracket bearings to detect rough spots.
- Look for corrosion or dirt inside the bottom bracket shell.
Credit: theradavist.com
Installing The New Crankset
Installing a new crankset on your dirt jump bike makes your rides smoother. This guide helps you fit the crankset properly.
Follow these tips to ensure your crankset works well and lasts long on rough trails.
Bottom Bracket Installation Tips
Make sure the bottom bracket shell is clean before installing. Dirt or old grease can cause problems.
Apply grease on the threads of the bottom bracket. This helps to prevent rust and makes future removal easier.
- Check the bottom bracket shell for damage or wear.
- Use the correct tool to avoid stripping the threads.
- Tighten the bottom bracket to the manufacturer’s recommended torque.
Aligning The Crank Arms
Position the crank arms so they are exactly opposite each other. This ensures smooth pedaling and balance.
Aligning the arms at 180 degrees apart helps avoid pedal strikes and uneven wear on parts.
- Install one crank arm first, then position the other directly opposite.
- Check that both arms sit flush against the bottom bracket.
- Spin the cranks to confirm smooth rotation without wobble.
Securing Bolts To Proper Torque
Use a torque wrench to tighten bolts to the recommended settings. Too loose bolts can cause damage.
Over-tightening can strip threads or damage crank arms, so follow torque specs carefully.
- Find the torque value in the crankset manual or manufacturer’s website.
- Tighten bolts gradually, alternating between them for even pressure.
- Check torque after your first few rides to ensure bolts stay tight.
Adjusting And Testing
After installing your dirt jump bike crank, adjusting and testing are key. These steps ensure smooth riding and longer part life.
Focus on rotation, chainline, and performance during test rides. Each area needs careful attention for the best results.
Checking For Smooth Rotation
Spin the crank by hand to check for smooth movement. Look for any grinding, clicking, or stiffness that could mean a problem.
- Ensure bearings are well lubricated and seated properly
- Check that crank arms are tight without over-tightening
- Look for wobbling or uneven motion
- Adjust bottom bracket if rotation feels rough
Fine-tuning Chainline
The chainline affects gear shifting and chain wear. Adjust it carefully to keep the chain straight and aligned.
| Chainline Issue | Cause | Fix |
| Chain rubbing | Misaligned crank | Move crankset or spacers |
| Chain slipping | Worn chainring or poor alignment | Replace parts, adjust position |
| Noise during pedaling | Incorrect chainline | Reposition crank or bottom bracket |
Test Riding For Performance
Take a short ride to feel the crank’s performance. Check for smooth pedaling and proper power transfer.
- Ride on flat ground first to feel resistance
- Try small jumps or bumps to test crank stability
- Listen for unusual noises during pedaling
- Check crank bolts again after the ride
- Make final adjustments if needed

Credit: bikeboard.cc
Maintenance Tips
Keeping your dirt jump bike crank in good condition is key for safe rides. Regular care helps parts last longer and work well.
Follow simple maintenance steps to avoid problems and keep your bike running smoothly.
Regular Inspection
Check your bike crank often for damage or loose parts. Look for cracks, worn teeth, or bent arms.
- Inspect crank arms for cracks or bends
- Check the chainring teeth for wear or missing teeth
- Ensure all bolts are tight but not over-tightened
- Spin the crank to listen for unusual noises
- Look for play or wobble in the crankset
Lubrication Advice
Proper lubrication reduces friction and prevents rust. Use bike-specific grease and oils on moving parts.
| Part | Lubricant Type | Frequency |
| Bottom bracket bearings | Grease | Every 3 months |
| Pedal threads | Grease | Every 2 months |
| Chainring bolts | Light oil | Monthly |
| Crank spindle | Grease | Every 6 months |
Troubleshooting Common Issues
Fix common problems quickly to avoid damage. Use the list below to identify and solve issues.
- If your crank feels loose, check and tighten bolts carefully.
- If you hear clicking sounds, clean and lubricate the bottom bracket.
- If the crank wobbles, inspect the bearings and replace if worn.
- If pedaling feels rough, check chainring teeth for wear or damage.
- If bolts are stuck, apply penetrating oil and use correct tools.
Credit: theradavist.com
Frequently Asked Questions
How Do I Install A Crank On A Dirt Jump Bike?
First, clean the crank area and bottom bracket. Align the crank with the spindle, then slide it on. Tighten the crank bolt to the recommended torque. Finally, install the pedal and check for smooth rotation.
What Tools Are Needed For Crank Installation?
You need a crank puller, Allen wrenches, torque wrench, and grease. These tools ensure proper fitting and secure installation of the crankset on your bike.
How Tight Should Crank Bolts Be?
Crank bolts should be tightened to the manufacturer’s recommended torque, usually 35-50 Nm. Over-tightening can damage components; under-tightening risks crank loosening during rides.
Can I Install A Crank Without A Bike Stand?
Yes, but a bike stand makes installation easier and safer. Without it, stabilize the bike on a flat surface and proceed carefully to avoid damage.
Conclusion
Installing your dirt jump bike crank can be simple and quick. Follow the right steps carefully. Check each part fits well before tightening bolts. Use proper tools for best results and safety. Test your bike after installation to ensure smooth riding.
Practice regularly to improve your skills. Keep your bike parts clean and maintained. Enjoy the thrill of dirt jumping with confidence and control.



