
If you love long rides and need extra storage, installing pannier racks on your touring bike is a game-changer. But how do you do it right?
You might feel unsure about which racks fit, how to attach them securely, or what tools you need. This guide will walk you through every simple step, so you can add sturdy pannier racks with confidence. By the end, you’ll have your bike ready to carry all your gear without any hassle.
Keep reading, and let’s make your next tour easier and more enjoyable!
Choosing The Right Pannier Rack
Pannier racks come in different types. Some attach to the rear wheel, others to the front. Choose based on your bike style and needs.
| Type | Description | Best For |
|---|---|---|
| Rear Rack | Mounts over the back wheel, holds most gear. | Touring and commuting |
| Front Rack | Fits over front wheel, balances weight. | Long trips and light gear |
| Lowrider Rack | Mounts low on the fork for stability. | Heavy loads on front wheel |
Material affects rack strengthand weight. Steel is strong but heavy. Aluminum is light but less tough. Some racks use stainless steel for rust resistance.
- Steel:Durable, holds heavy weight.
- Aluminum:Lightweight, good for speed.
- Stainless Steel:Rust-proof and sturdy.
Check the rack’s weight capacity. It should hold your gear safely without bending. Also, size matters. The rack must fit your bike and panniers well.
Gathering Necessary Tools
Gather all essential toolsbefore starting the installation. A set of Allen wrenchesis key for most bolts. A Phillips screwdriverhelps with small screws. Use a wrenchor adjustable spanner to tighten nuts securely.
Optional accessories can make the job easier. A torque wrenchensures bolts are not too tight. Thread locker helps keep bolts from loosening on rough roads. A bike standholds the bike steady during work.
| Essential Tools | Optional Accessories |
|---|---|
|
|
Preparing Your Touring Bike
Clean the mounting areas well. Use a cloth and some water or rubbing alcohol. Dirt or grease can stop racks from fitting tightly. Dry the frame fully before starting.
Check if the frame has the right mounts. Most touring bikes have eyelets near the rear axle and seat stays. These are for pannier racks. Look for small threaded holes or bosses on the frame.
Remove any parts that block rack installation. This includes reflectors, fenders, or bags in the way. Clear the space so you can fit the rack without trouble. Keep screws and parts safe for later.

Credit: www.reddit.com
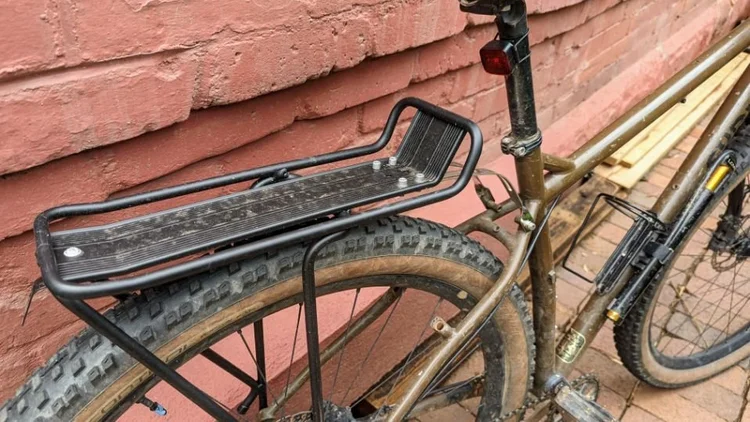
Installing The Rear Rack
Place the rack close to the rear wheel. Make sure it lines up with the bike’s frame mounts. The rack should sit evenly on both sides.
Find the holes on the frame meant for the rack bolts. These are usually near the rear dropouts and seat stays. Hold the rack in place against these holes.
- Use bolts that fit the frame mounts properly.
- Insert bolts through the rack and into the frame holes.
- Tighten bolts by hand first to keep the rack stable.
- Use a wrench to secure bolts firmly but avoid over-tightening.
Adjusting Rack Position
Check the space between the rack and bike parts. Make sure there is enough clearancefor tires and brakes. Avoid any rubbing or tight spots that could cause damage.
Adjust the rack until it sits levelon both sides. Use a small tool like a spirit level or a phone app. A level rack keeps your load balanced and safe.
- Tighten all bolts and screws securely.
- Use a wrench or Allen key to avoid slipping.
- Do not overtighten to prevent damage.
- Check fasteners after a short ride to ensure they stay firm.
Credit: www.treelinereview.com
Mounting Panniers
Pick panniers that fit your bike well. Check the size and weight. Ensure they are waterproofand strong. Look for panniers with easy-to-use clips. These help in quick attachment and removal. Make sure they have reflective stripsfor night safety. Choose colors that are visiblein low light. Test the panniers at the store if you can.
Attach panniers to the side of the rack. Use the clips provided with the panniers. Make sure they are tightly secured. Check for any wobbling or movement. You should not hear any rattling sound. Try to gently pull them to ensure they are fixed. Ensure the panniers do not touch the wheels.
Distribute the weight evenly on both sides. Keep heavy items at the bottom. This prevents the bike from tipping. Light items can go on top. Make sure the load does not block your view. Adjust as needed until the bike feels balanced. Check the load after a short ride.
Safety Checks
Ensure all bolts are tight and secure before riding. Check rack alignment to avoid wheel interference and maintain balance. Test stability by applying pressure to confirm safe installation.
Testing Rack Stability
Ensure the rack sits firm on the bike. Wiggle the rack gently. It should not move or shift. Check all bolts are tight. Loose bolts can cause wobbling.Inspecting For Interference
Look for any parts that touch the tires or brakes. These can cause trouble while riding. Adjust the rack if needed. Ensure cables and wires are free. They should not get pinched or tangled.Final Tightening
Use a wrench to tighten all bolts. This is very important for safety. Double-check each bolt again. Make sure nothing is loose. This prevents accidents during your ride. `
Credit: www.reddit.com
Maintenance Tips
Check your pannier racks often for loose boltsand cracks. Tighten bolts with the right tool to keep racks steady. Look for any bendsor damage that might affect safety.
Clean racks with a soft cloth and mild soap. Remove dirt and grime that can cause rustor wear. Dry racks completely before riding.
Apply lubricantto moving parts like hinges. This stops squeaks and keeps parts working well. Wipe off extra oil to avoid dust build-up.
Replace worn-out parts right away. Look for worn bolts, broken welds, or cracked racks. Using damaged racks can be unsafe and cause more damage.
Frequently Asked Questions
What Tools Do I Need To Install Pannier Racks?
You need a set of Allen wrenches, a screwdriver, and a wrench. Some racks require specific bolts included in the package. Having a torque wrench helps ensure proper tightness without damage.
How Do I Align Pannier Racks On A Touring Bike?
Align the rack so it sits parallel to the bike frame. Use the mounting holes on the frame’s dropouts and eyelets. Adjust until the rack is stable and doesn’t rub against tires or brakes.
Can I Install Pannier Racks Without Frame Eyelets?
Yes, use clamp-on pannier racks designed for bikes without eyelets. These racks attach securely to the seat stays and seat post. Ensure the clamps fit tightly to avoid movement while riding.
How Much Weight Can Pannier Racks Support Safely?
Most touring pannier racks support 20 to 55 pounds per side. Check the manufacturer’s specifications for exact weight limits. Distribute weight evenly to maintain bike balance and safety.
Conclusion
Installing pannier racks on your touring bike makes carrying gear easier. It adds stability and balance for long rides. Follow the steps carefully for a secure fit. Check bolts often to keep racks tight and safe. Enjoy your trips with more space for essentials.
A well-installed rack improves your bike’s function. Ready for your next adventure? Your bike is now better equipped.


