
Are you ready to give your cruiser bike a powerful new life? Converting your cruiser bike to electric is easier than you might think—and it can transform your rides into smooth, effortless journeys.
Imagine cruising longer, climbing hills without breaking a sweat, and enjoying the freedom of electric power while keeping your favorite bike. In this guide, you’ll discover simple steps and practical tips to make the switch. Keep reading, and soon you’ll know exactly how to turn your trusty cruiser into an electric ride you’ll love.
Choosing The Right Electric Kit
Choosing an electric kit that fits your cruiser bike’s size and power needs ensures smooth conversion. Focus on battery life, motor type, and compatibility for the best ride experience. Simple installation and reliable parts make the upgrade easier and safer.
Types Of Electric Kits
Electric kits come in many types. Some kits include a motor, battery, and controller. Others only have a motor and need separate batteries. Kits may differ by power and size. Choose a kit that fits your cruiser bike frame and riding style.
Battery Options
- Lead-Acid:Heavy but cheap. Shorter life.
- Lithium-Ion:Light, long life, and more expensive.
- Nickel-Metal Hydride:Middle weight and cost.
Battery size affects the bike’s range and weight. Larger batteries last longer but add weight.
Motor Choices
| Motor Type | Location | Pros | Cons |
|---|---|---|---|
| Hub Motor | Front or Rear Wheel | Simple, quiet, easy to install | Less torque on hills |
| Mid-Drive Motor | Near Pedals | Better torque, efficient | More complex, costly |
Credit: leoguarbikes.com
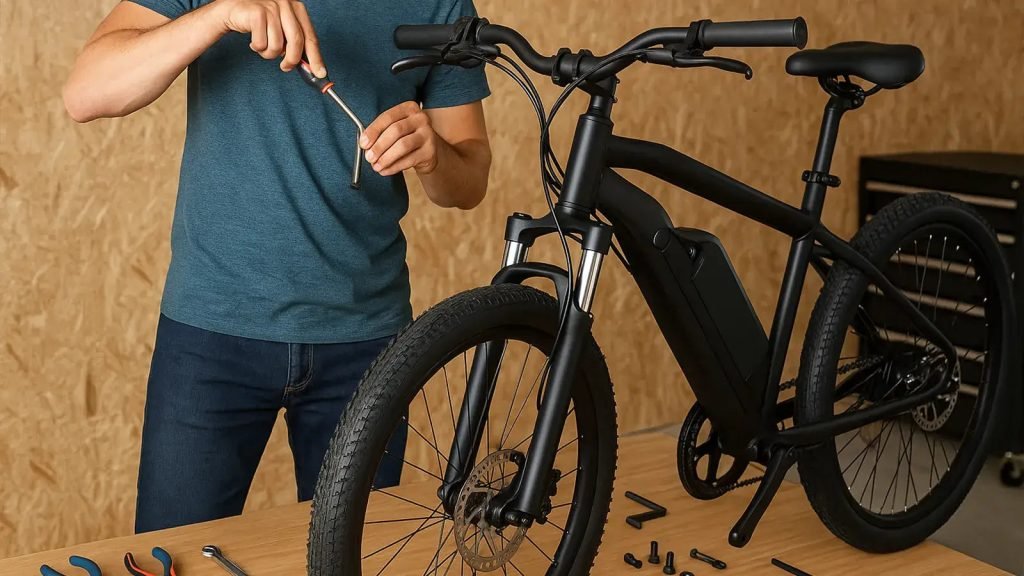
Gathering Tools And Materials
Gathering the right tools and materials is keyto a smooth electric bike conversion. Essential tools include a wrench set, screwdrivers, and a multimeterfor electrical checks. A torque wrenchhelps tighten bolts correctly.
Safety gear protects you during work. Use glovesto keep hands safe from sharp parts. Safety glassesshield eyes from debris. A helmetis a good idea if you test ride early.
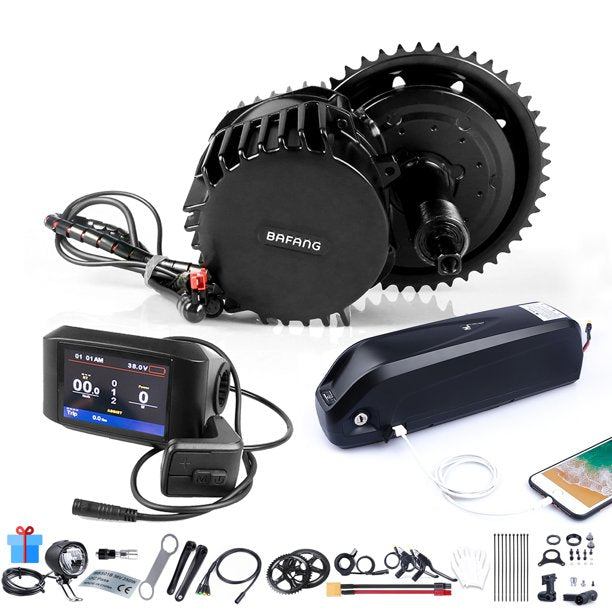
| Additional Components | Description |
|---|---|
| Electric Motor | The heart of the conversion, powers the bike. |
| Battery Pack | Supplies energy to the motor for riding. |
| Controller | Manages power flow from battery to motor. |
| Throttle | Lets you control bike speed easily. |
| Wiring & Connectors | Connect all electrical parts together safely. |
Preparing The Cruiser Bike
Check the bike’s frame for any cracks or rust. A strong frame is essentialto support the electric parts. Make sure the frame is cleanand dry before starting.
Take off parts that will no longer be needed. This may include the chain guard, kickstand, or any extra racks. Removing these parts helps make space for the electric motorand battery.
Clean the bike thoroughly to avoid dirt buildup. Use a soft cloth and mild soap. Lubricate the chain and moving parts to keep them working smoothly. This helps the bike last longer and run better.
Installing The Motor
Start by choosing a motor that fits your cruiser bike frame. Common options include hub motors or mid-drive motors. Use strong brackets to mount the motor securelyto the frame.
Make sure the motor is tight and does not move during rides. Loose motors can cause damage and unsafe riding.
- Check the motor position for easy access to wires and controls.
- Use proper tools like wrenches and screwdrivers to fasten the motor.
- Double-check bolts and screws for tightness.
Next, secure the drive system by attaching the chain or belt to the motor sprocket. Keep the chain or belt tight but not too tight. Loose chains can slip; tight ones can wear out faster.
Align the chain or belt with the bike’s rear sprocket. Proper alignment helps smooth power transferand less noise. Adjust the motor or rear wheel to get the right line.
Mounting The Battery
The battery locationaffects balance and safety. Choose a spot low and central on the bike. Common places include the frame triangleor under the seat. Avoid areas near heat or water.
Secure the battery pack firmly to prevent movement. Use strong mounting bracketsor a custom box. Check that the battery does not touch moving parts. Padding can reduce vibration damage.
Proper wiring is key for safety and performance. Use thick, insulated wiresto handle the current. Connect positive and negative terminals securely. Protect wires with tubing to avoid wear. Double-check all connections before use.
Setting Up The Controller And Wiring
Connect the controller to the battery, motor, and throttle carefully. Use the right wires for each part. Check the controller’s manual for exact wiring spots. Make sure all plugs fit tightly to avoid loose connections.
Route cables along the bike frame to keep them safe. Use zip ties or clips to hold wires in place. Avoid sharp edges or moving parts that can cut or wear out cables. Keep wires away from hot engine parts.
- Turn on the battery and controller.
- Check for any error lights or unusual sounds.
- Test the throttle to see if the motor runs smoothly.
- Make sure brakes cut power when pressed.
- Inspect all connections again for safety.
Installing The Throttle And Display
The throttleshould be placed where it is easy to reach with your right hand. Usually, it fits on the handlebar near the grip. Make sure it does not block any other controls or cables.
The displayshows speed, battery level, and mode. Mount it where you can see it clearly without looking down too much. The center of the handlebar is a good spot.
Test the throttle and display by turning the bike on. Twist the throttle gently. The display should turn on and show the correct information. Check if the motor responds smoothly to throttle changes.
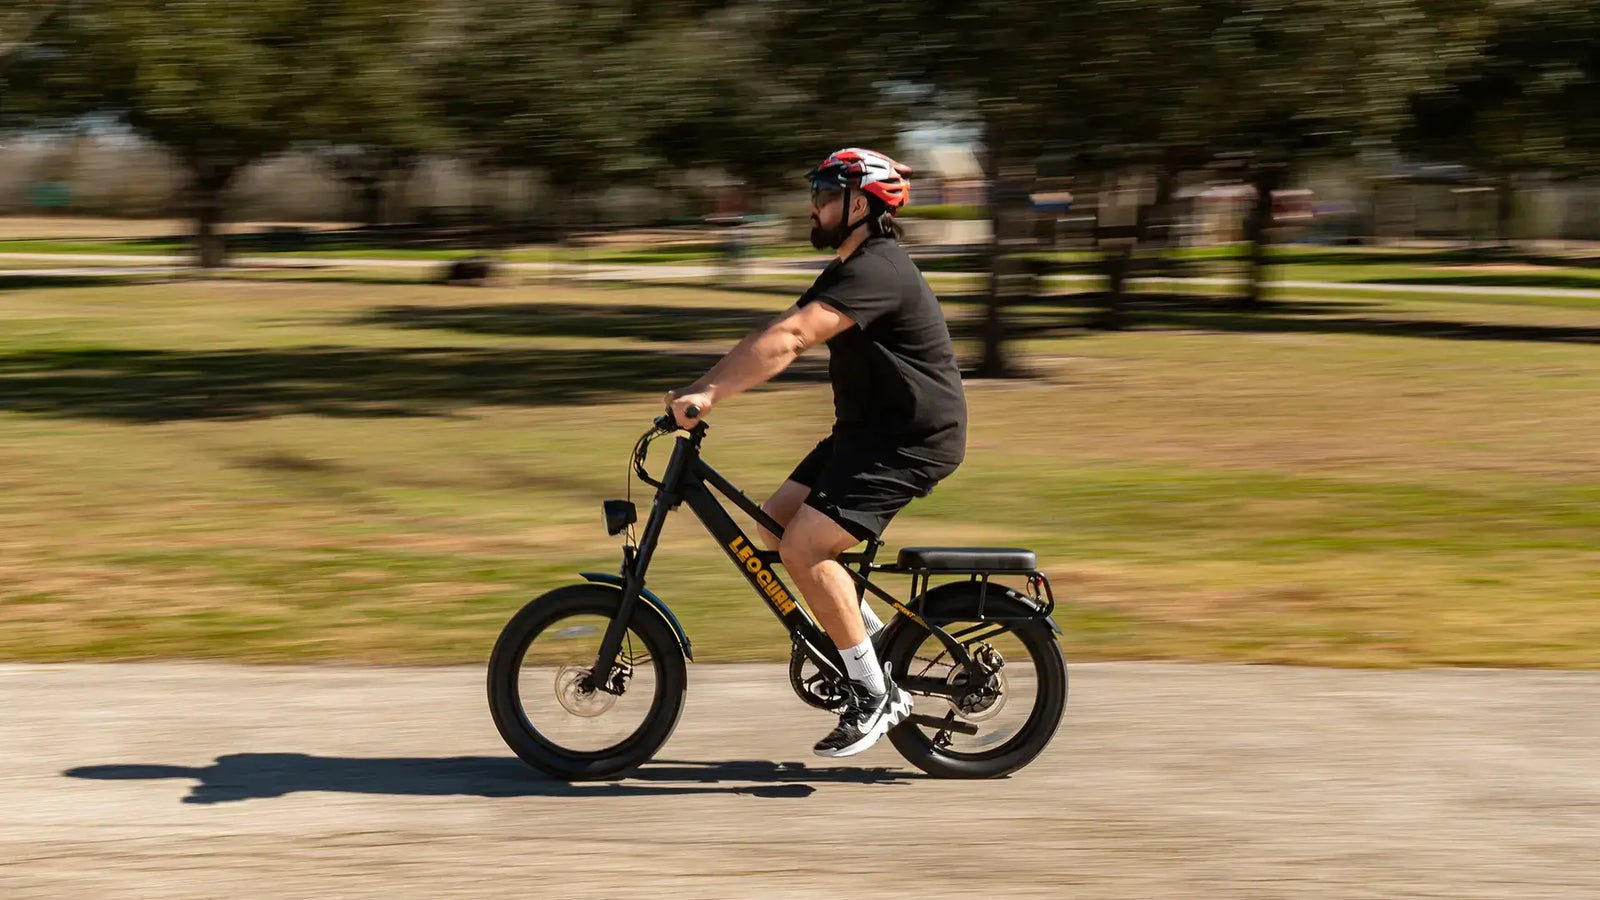
Credit: reallygoodebikes.com
Final Adjustments And Safety Checks
Brake and gear systems need careful adjustment for safety. Check brake pads for wear and replace if thin. Adjust brake cables so brakes respond quickly but don’t rub the wheel. Shift through all gears to ensure smooth changes without skipping or sticking. Tighten or loosen gear cables as needed.
Inspect tires for cracks, cuts, or low tread. Inflate tires to the recommended pressure shown on the sidewall. Check suspension parts for damage or leaks. Make sure springs and shocks work smoothly and are properly tightened.
- Check all nuts and bolts are tight, especially around the motor and battery.
- Test lights and signals if installed.
- Ensure wiring is secure and away from moving parts.
- Wear a helmet and test ride carefully in a safe area.
Maintenance Tips For Electric Cruiser Bikes
Battery Careis key for electric cruiser bikes. Keep the battery charged between rides. Avoid letting it drain completely. Store the battery in a cool, dry place. Clean battery contacts gently to prevent rust. Use the charger that came with the bike.
Motor Maintenanceensures smooth rides. Check for dirt and debris around the motor regularly. Clean the motor with a soft brush or cloth. Avoid water directly on the motor. Listen for unusual sounds that might mean trouble. Tighten loose bolts carefully but not too tight.
Regular Inspectionshelp catch problems early. Look over tires for wear and proper inflation. Test brakes and lights often. Check wires for any damage or loose connections. Keep the bike frame clean and dry. A quick inspection before every ride keeps you safe.

Credit: indieethos.com
Frequently Asked Questions
How Do I Start Converting A Cruiser Bike To Electric?
Begin by selecting a compatible electric motor and battery pack. Remove the engine and install the motor on the frame. Connect the battery, controller, and throttle carefully. Ensure all parts fit securely for optimal performance and safety.
What Parts Are Needed For Electric Cruiser Conversion?
You need an electric motor, battery, motor controller, throttle, and wiring harness. Additional parts include mounting brackets, a charger, and a display. Choose components suitable for your cruiser’s size and weight for best results.
How Long Does It Take To Convert A Cruiser Bike?
Conversion typically takes between 8 to 20 hours depending on your experience. Time varies with the complexity of the bike and quality of parts. Planning and preparation can reduce the overall conversion time significantly.
Can I Convert Any Cruiser Bike To Electric?
Most cruiser bikes can be converted, but compatibility varies. Ensure your bike frame can hold the motor and battery securely. Check weight limits and space availability before starting the conversion process.
Conclusion
Converting a cruiser bike to electric brings new life to your ride. It saves money and helps the environment. You control the speed and distance easily. The process is simple with the right tools and parts. Enjoy smoother rides and less effort on hills.
Start your project step by step and learn as you go. Electric cruising feels fun and fresh. Give your old bike a new power boost today.


